Read This First
Let's not waste your time. Here's what this is.
This is the exact process I use to make AI UGC video ads for real clients, written down so you can follow it start to finish and have something made today. Not a theory dump. Not a list of tools. A working process, with every prompt I use, that takes you from a blank screen to a finished, realistic UGC ad.
And one more thing, because it matters: this isn't AI-generated garbage. This is me, Ryan, walking you through my actual process. Every method in here is something I use on real client work. The irony isn't lost on me that I'm teaching AI while writing this myself, but that's the point. The experience is the bit that's worth paying for.
I've been making video ads for about 8 years, direct response and paid social. I moved that process over to AI as the tools got good enough, and now I make AI UGC for brands including a $900m one. The whole thing distils down to a few repeatable steps. That's what you're getting here.
By the end of this guide you'll have made a realistic talking-head UGC ad from scratch, and you'll understand the method well enough to make a hundred more. But the real win is the fundamentals. Once you understand how AI text, image and video actually work, you'll be able to replicate almost any image or video you see, make short or long form content, and stop being confused by any of it. Whether you're a freelancer adding this to your services, a brand making your own content, or a marketer who needs to test creative fast, it works the same way.
The Promise & The Warning
The promise: by the end of this, you'll understand how AI video actually works. Not "which button to press in which app," but the fundamentals underneath all of it. Once you've got that, every AI tool on the market becomes obvious, and most become unnecessary.
The warning: build it manually first. There are a hundred apps out there promising to do all of this for you at the click of a button. They're fine. But if you don't understand what's happening under the hood, you're stuck the second something breaks or looks wrong. It's like driving a car with no idea what's under the bonnet, you're fine until you break down in the middle of nowhere, and then you're really stuck. Learn the manual version once. Automate later, from a position of actually knowing what you're doing.
How to use this guide. Follow it in order the first time. Each part builds on the last: the start frame feeds the video, the video feeds the edit. And here's the bit I love: every prompt in this guide is a one-click copy. Tap the prompt box and it's on your clipboard, ready to paste. So split your screen, this guide on one side, your AI tool on the other, and you can click, paste, generate, and follow along without ever typing a prompt out. Don't just read it, make the thing as you go. The people who get good at this fast are the ones who generate something rough early, not the ones who wait for the perfect idea.
One expectation to set now. The UGC that actually works for brands is, honestly, a bit boring. It's people talking to a selfie camera, plain and believable. The wild, spectacle reels you see going viral are built for the algorithm; the UGC in this guide is built for paid ads and testing, where "looks real" beats "looks impressive" every time. My own ads get up to more than what's in here, but the fundamentals are identical, and they start with getting the boring version right. Nail that first.
Do this now — I've bought enough products to know you'll forget about this one. To make sure you don't (and you really shouldn't), bookmark this page right now, before you read on.
Right. Let's get into it.
Use This Responsibly
Quick one before we start, and I mean this.
This guide teaches you how to make AI UGC. What you do with it is on you. I'm not your lawyer, this isn't legal advice, and the rules around this stuff vary by country and change fast. So do your own due diligence.
A few honest lines to keep you out of trouble:
Disclosure is a real thing. Platforms like Meta and TikTok, and a growing list of countries and states, increasingly require you to disclose AI-generated content. If you're running ads, that responsibility sits with whoever runs them. If you're making content for a client, make it clear in writing that disclosure decisions are theirs once you hand it over.
Here's the bright line. If you'd pay a real person to talk about a brand, using AI to have someone talk about that brand isn't automatically different. But two things are a hard no: fake testimonials (someone claiming a result or experience that never happened), and using a real person's likeness or voice without their explicit written permission. Don't do either. It's not worth it, and it's the kind of thing that gets accounts banned and people sued.
So: get consent in writing when you use real people, get contracts in place with clients, and be responsible. Used properly, this is a legitimate, powerful way to make content. Keep it that way.
Right, now let's get into it properly.
The Mental Model
Before you touch a single tool, you need the one idea that makes all of this make sense. Get this and the rest of the guide is easy. Miss it and you'll be forever confused, pressing buttons in apps hoping something works.
Here it is:
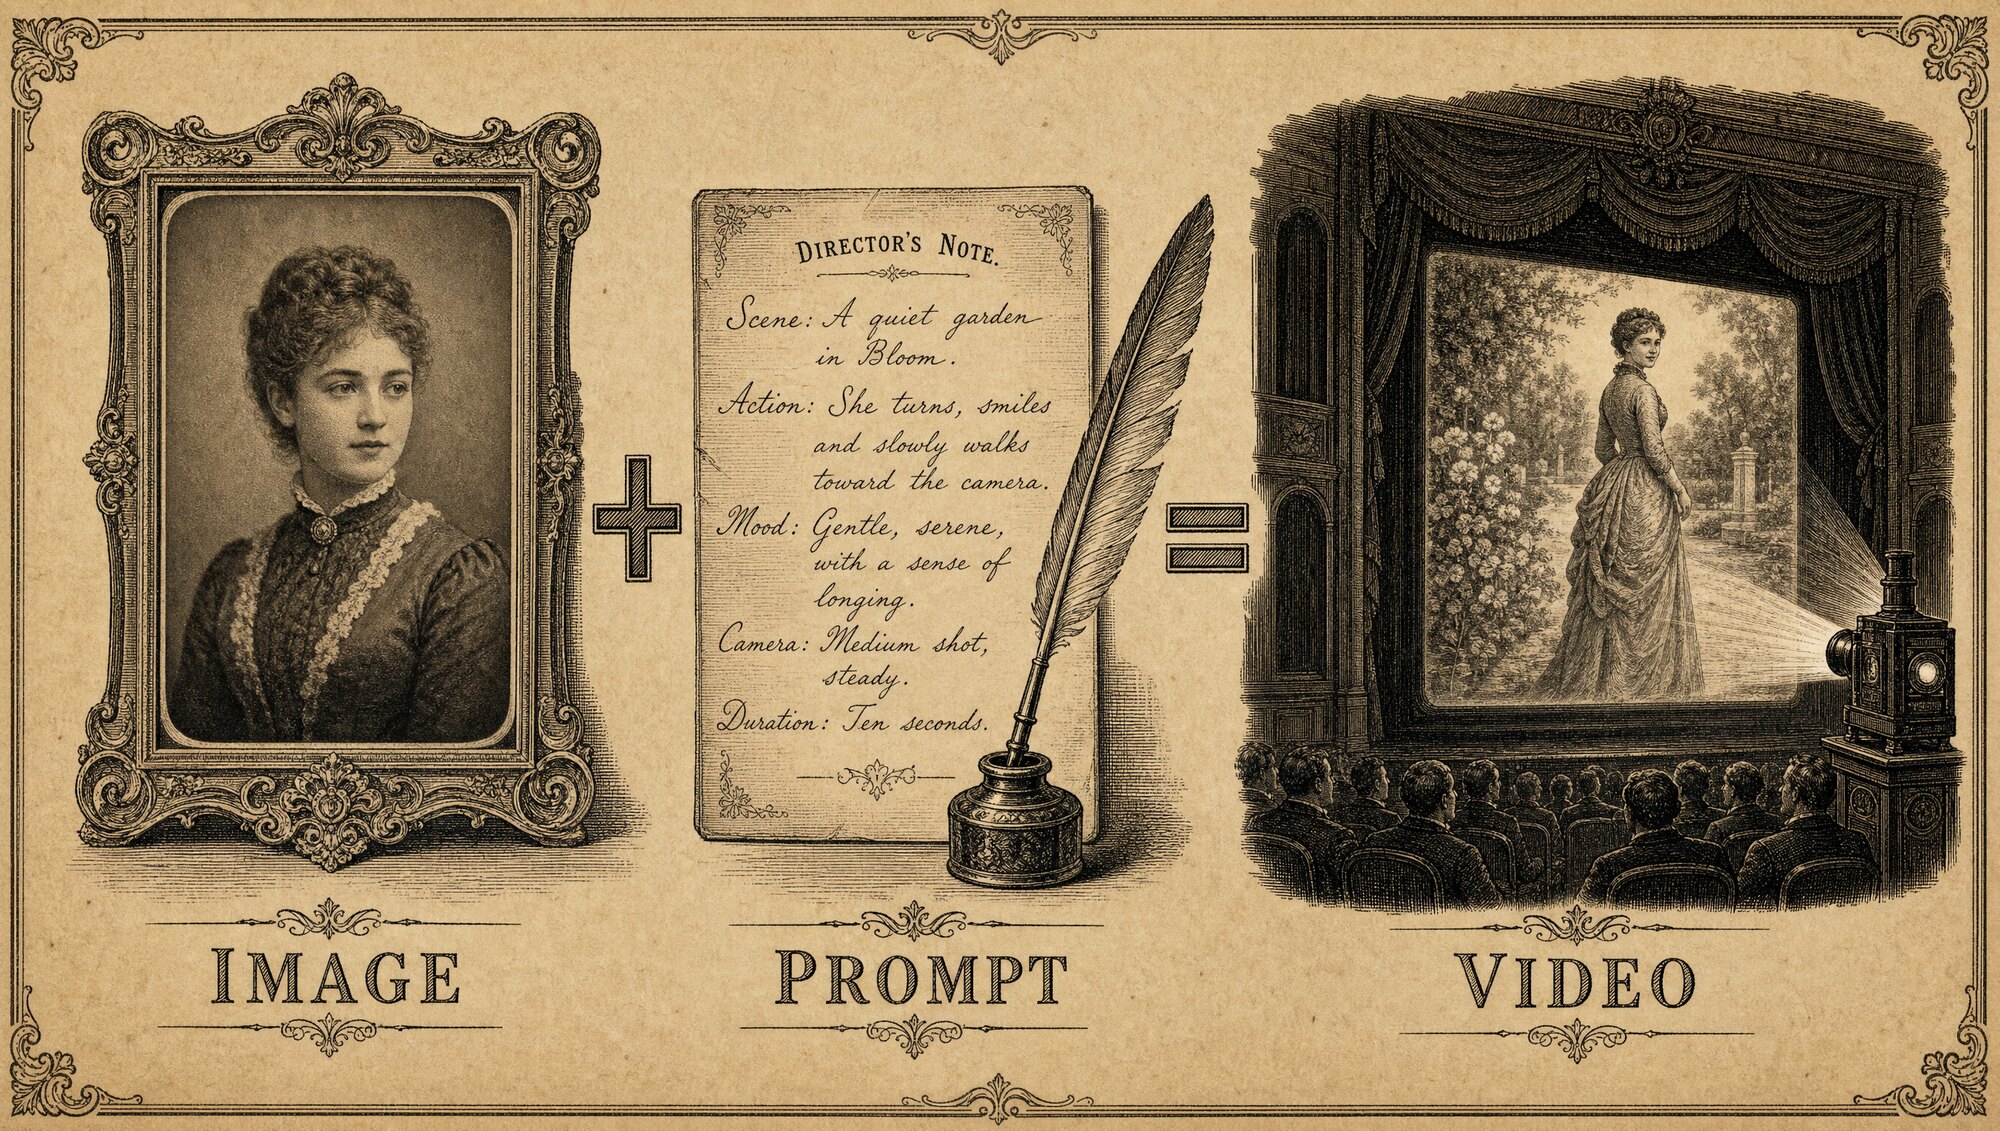
"Nearly every AI video you see is simply a good starting image and a video prompt. That's it."
The load-bearing idea of the whole guide.
That's it. That's the whole thing. A starting image (we call it the start frame), and a text instruction telling it what to do. The AI takes your image and animates it based on your words. Talking, moving, camera pushing in, whatever you asked for.
That's true whether you're looking at a 30-second AI ad or a simple talking-head clip. Underneath, it's an image and a prompt. Every time.
Why this matters so much.
When you scroll past AI content now, it can feel like magic. Like it must be some professional, complicated, animated production. It's not. Once you internalise "image plus prompt," you'll watch AI videos differently, you'll start reverse-engineering them in your head. "That's a start frame of a woman in a car, animated with a talking prompt. I could make that." That shift, from impressed to I know how that works, is the entire point of this guide.
It also kills the fear. You don't need to learn fifty tools. You need to get good at two things: making a great image, and writing a simple prompt to animate it. That's the whole skill.
The same logic runs the whole way up.
Text, image, video, it's all the same pattern: you give the AI an input and an instruction, and it gives you an output. Once you see that pattern, you can work out any AI tool, even ones that don't exist yet. Later in this guide there's a single formula (use this → have this → output this) that we'll come back to again and again. Everything is a version of that.
So here's the plan for the rest of this guide.
Since a video is just an image plus a prompt, we build in that order:
- The start frame — get the image right (the most important part, so we spend the most time here)
- The video — animate it with a simple prompt
- Consistency — keep the same person and voice across multiple clips
- The edit — stitch, caption, upscale, and finish so it looks real
- The full ad — put it all together
Nail the image, and everything downstream gets easier. Get the image wrong, and no amount of clever prompting saves it. That's why we start there.
The one-line version: a great AI video is a great image with a simple instruction. Master the image, keep the prompt simple, and you're most of the way there.
The Tools
Let's keep this simple, because the tool list is shorter than you'd think. Ignore the noise. I'm going to tell you exactly what I use, and exactly what to use instead if you're on a budget.
First, the honest truth about images.
There are two image models worth your time: ChatGPT (Image 2) and Nano Banana Pro (Google's model, accessed through Gemini by selecting "Pro" in the chat).
Both are excellent. But for AI UGC specifically, I've landed on GPT Image 2 as my go-to, and I'm actually phasing Nano Banana Pro out for this kind of work. Not because it's bad, it's genuinely great at some things. It's just that my prompts land better in GPT Image 2. The candid, realistic, shot-on-a-phone look I'm after comes out more reliably. That's it. When your prompts and your model click, you stick with what works.
→ ChatGPT · Gemini (Nano Banana Pro)
For video, the same honesty applies.
My current default: GPT Image 2 + Google Omni 1.1. This is the combination I'm reaching for in real ad production because Omni gives me the best balance of natural delivery, speed and cost for one-person UGC. The lips can still look slightly off on some lines and you need to check that every word came out, but the hit rate makes it the most efficient option I've found.
The premium fallback: GPT Image 2 + Seedance 2.0. Seedance is still the one I use when a shot is more complicated, especially multi-line dialogue, back-and-forth performances or audio/video references. It costs more, but sometimes the harder shot needs it.
Other budget options: Nano Banana Pro remains a capable image alternative, and Kling is cheap and reliable, but the voice can come out tinny. Google Omni 1.1 is now the video value pick rather than the fallback.
- Kling — cheap and reliable, but the voice is its weak point. It can come out a bit tinny; Seedance does voice noticeably better.
- Google Omni — great lip sync, but it has a habit of skipping words, so watch your dialogue comes out complete.
The honest catch is the same with every model: a cheap generation is not cheap if you run it four times. Judge the usable take, not the headline credit price. Omni 1.1 is winning that calculation for me right now, but keep Seedance available when the performance or references matter more than cost.
Now, about wrappers and workflows. → Higgsfield
Throughout this guide you'll see me use a platform called Higgsfield. Here's the honest truth about what it is, because it teaches you something important: Higgsfield is a wrapper. It bundles all these image and video models into one place so you're not jumping between tabs, downloading and re-uploading between tools. You generate an image and hit "turn to video" right there. That's the convenience it sells.
And that's worth understanding, because it applies to every AI app you'll ever see advertised.
"All those apps promising to do everything for you? They're just a prompt and a model with a nice interface and a markup on top."
Once you know that, you stop being impressed by the interface and start asking the only question that matters: what model is under it, and what am I paying for the convenience?
So here's the honest map of the landscape. Higgsfield is an aggregator, a hub that puts all the models in one place and takes a small markup for the convenience. It's the best version of that idea. Then there are the workflow tools, MakeUGC, Arcads, Calico and the rest, which are workflows wrapped in nice packaging. When one sells you a "template," that's just a sequence of image, text and video prompts chained together with a workflow and some instructions. Exactly what you're learning to build by hand right now.
Here's the trade they don't advertise: they charge a markup on the automated workflow, and in return you lose control and flexibility. Less control, less flexibility, higher cost, and often lower-quality output. That doesn't make them bad, plenty of busy business owners will find them genuinely useful. But nothing beats manual input plus a workflow you've tailored yourself. I've made hundreds of these and tested a lot of workflows, and the shortcuts get you about 80% of the way. The last 20%, the bit that actually converts, comes from understanding it yourself.
The order that works: learn it once manually, then build, test and tailor your own workflow, then pick how you profit, run it for your own business, sell the outputs as a service, or sell the workflow itself to clients.
On Pletor (the workflow tool you'll see me use). → Pletor discount link Later I use a tool called Pletor to automate parts of the process. Full honesty: it's slightly pricier than Magnific or Higgsfield's built-in canvas, but I got into AI through its workflows so it's what I'm used to, and two things genuinely stand out: their hands-on support, and the AI that helps you build the workflows. Here's the important bit, and the difference from everything above: when I share a workflow, I'm giving you the actual workflow, not an app to log into. You own it, and you can customise it. You don't need it to follow this guide, it's just what I reach for.
Do you need to pay for any of this? You can get limited free generations from ChatGPT and Gemini (Gemini gives you free Omni for both image and video), so yes, you can start for free and follow along without spending a penny. Use that to learn.
But let's be real about what we're doing here. We're replacing production studios. Actors, film crews, shoot days, equipment, the lot, with a laptop and some credits. When you look at it that way, a few dollars of generations to make an ad that would've cost thousands to shoot is nothing. It costs money to make money.
"It costs money to make money. You're replacing a film crew for the price of a coffee."
Start free to learn the fundamentals, then invest in the tools once you're creating things worth putting out, because the return is not close.
And it's only expensive measured against the fantasy promises. Against what you actually get, your own creator, in any outfit, holding any product, in any location, saying whatever you want, it's cheap.
"It's expensive against the promises being made. But for your own creator, in any outfit, holding any product, in any location, saying whatever you want? It's actually quite cheap."
The takeaway: start with GPT Image 2 + Omni 1.1 for everyday one-person UGC. Move to Seedance when the shot, dialogue or reference work is more demanding. Higgsfield and Pletor are optional convenience. That's the whole toolkit.
The Start Frame
This is the most important part of the entire guide. If you only properly learn one section, make it this one.
Remember the mental model: a video is just an image plus a prompt. The image is the start frame, the single most important frame in your whole video, because everything the AI does flows from it. The person, the setting, the lighting, the camera angle, the mood, it's all decided here. Get the start frame right and the video almost makes itself. Get it wrong and there is no prompt clever enough to save it.
"Get the start frame right and the video almost makes itself. Get it wrong and there's no prompt clever enough to save it."
Most people skip this. They type a description straight into a video model and hope. That's like pulling the handle on a slot machine with your credits, you might get something decent, but you're gambling, and you're burning money doing it. We don't gamble. We control the output by controlling the image.
There are three ways to make a great UGC start frame. We'll go through all three, in order, from most manual to most powerful:
- Manual Prompting — write it from scratch. The foundation.
- Reverse Engineering — copy a look you've seen.
- The Social Swap — my go-to for client work.
Learn them in order. Each one teaches you something the next one builds on.
"Better inputs = better outputs."
Method 1: Manual Prompting
This is the hard way, and we start here on purpose. Once you can build a start frame from nothing but words, every other method is easy.
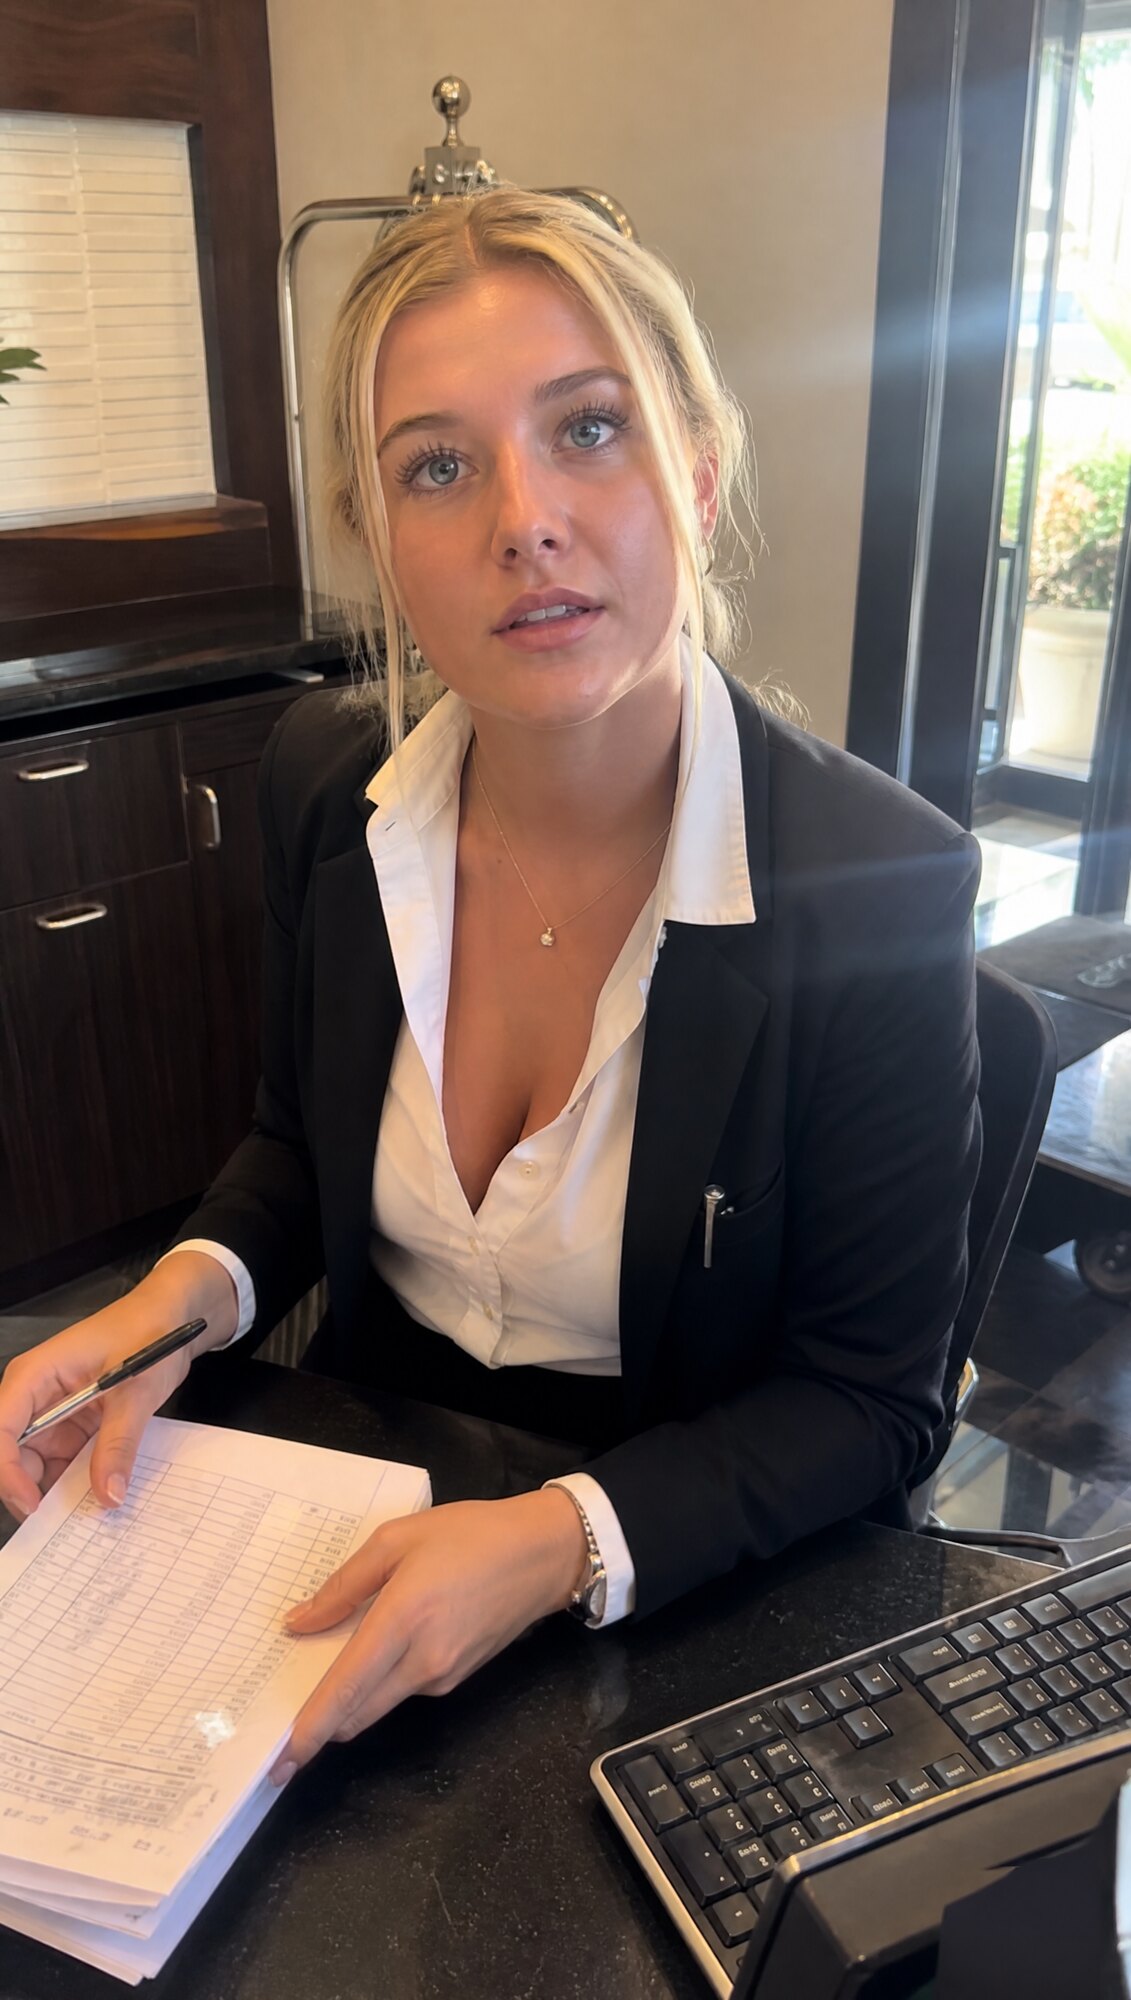
The goal of a UGC start frame is to look like a real photo taken on a real phone. Not a polished, glossy AI render, that's the giveaway that screams "fake." We want visible pores, slightly off lighting, a bit of that accidental, grabbed-in-a-hurry feel. Real beats perfect, every time.
To get there, you write two things: a simple description of the shot you want, then a block of text that forces the realistic phone-camera look. That second block is the secret, so I'm giving you both as copy-paste templates.
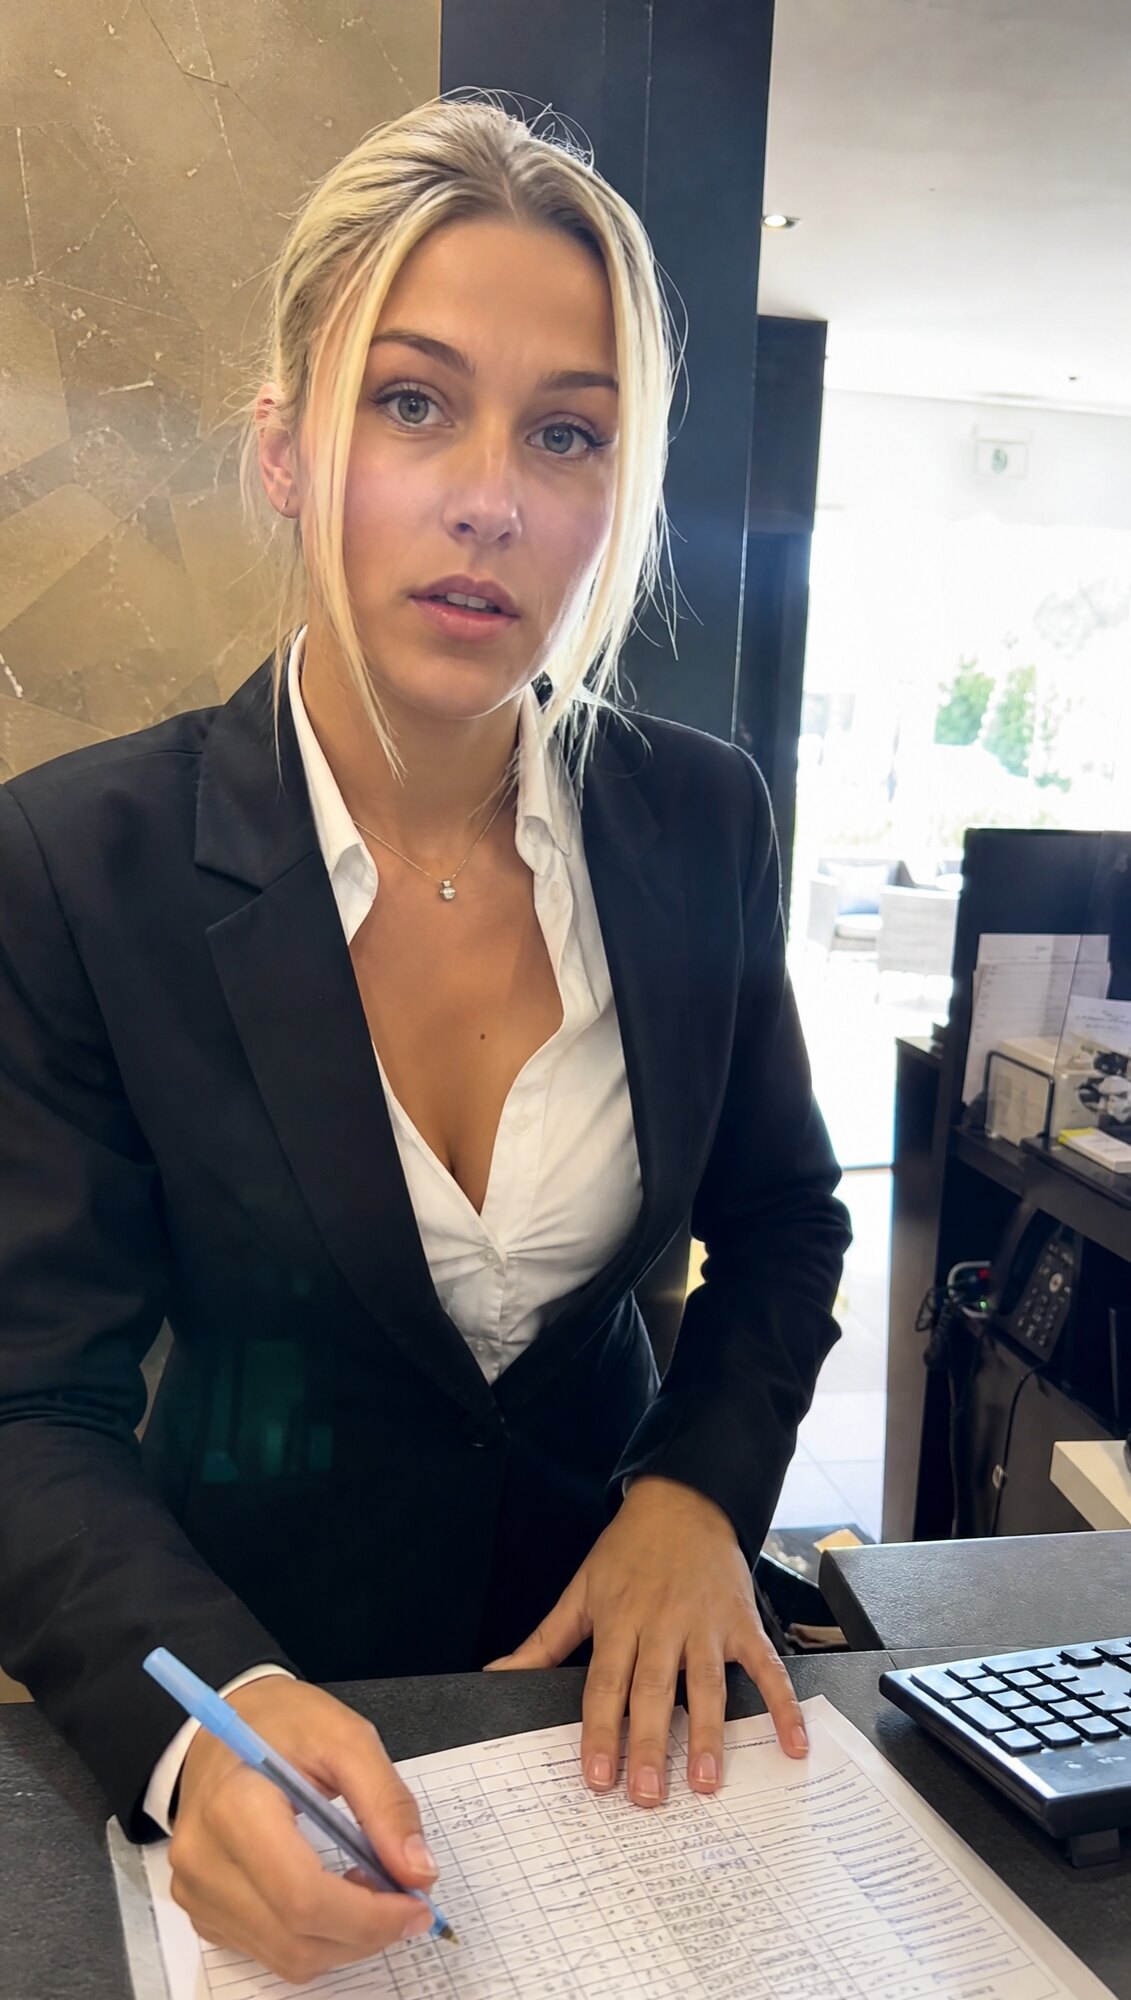
First, the nine ingredients. Everything in a good start-frame prompt is one of these nine. Learn to see them and you can write, or read, any start frame. Here they are with the receptionist frame above mapped to each:
- Character — a woman in her late twenties
- Clothing — smart hotel uniform
- Environment — behind a hotel reception desk
- Camera — shot on iPhone, front / selfie
- Angle — just below eye level, arm's length
- Composition — framing slightly off-centre
- Lighting — warm lobby light, small window highlight
- Quality — natural phone HDR, faint noise, no beauty filter
- Context — looking into the lens as if talking to camera
You don't write those out as a list, the two templates below assemble them for you. The first handles ingredients 1 to 6, the second locks in 7 to 9.
Step 1: Describe the shot. Keep it plain. Who, where, what angle, what they're doing.
POV Shot front / selfie facing camera of a (demographic / clothing description) in (environment) shot on iphone, no text or overlays. He / She is looking (direction / expression) as if (talking to camera / looking out of a window etc.)
Step 2: Force the realism. Paste this straight onto the end of your description. This is what kills the AI-render look and makes it read as a genuine phone photo.
Shot on a mediocre phone camera, not a polished AI render: visible pores and realistic skin texture, real iPhone color science, natural smartphone HDR, slight overexposure with blown highlights near the window, faint lens flare at edge of frame, minor compression artifacts, faint noise, slight autofocus imperfection, framing slightly off-center, one-handed grab-shot feel, no beauty filter, no skin smoothing. Everything should feel accidental and mundane, believable as a real phone photo, avoid anything that reads as rendered or AI-generated.
Put the two together, run it, and you've got a UGC start frame.

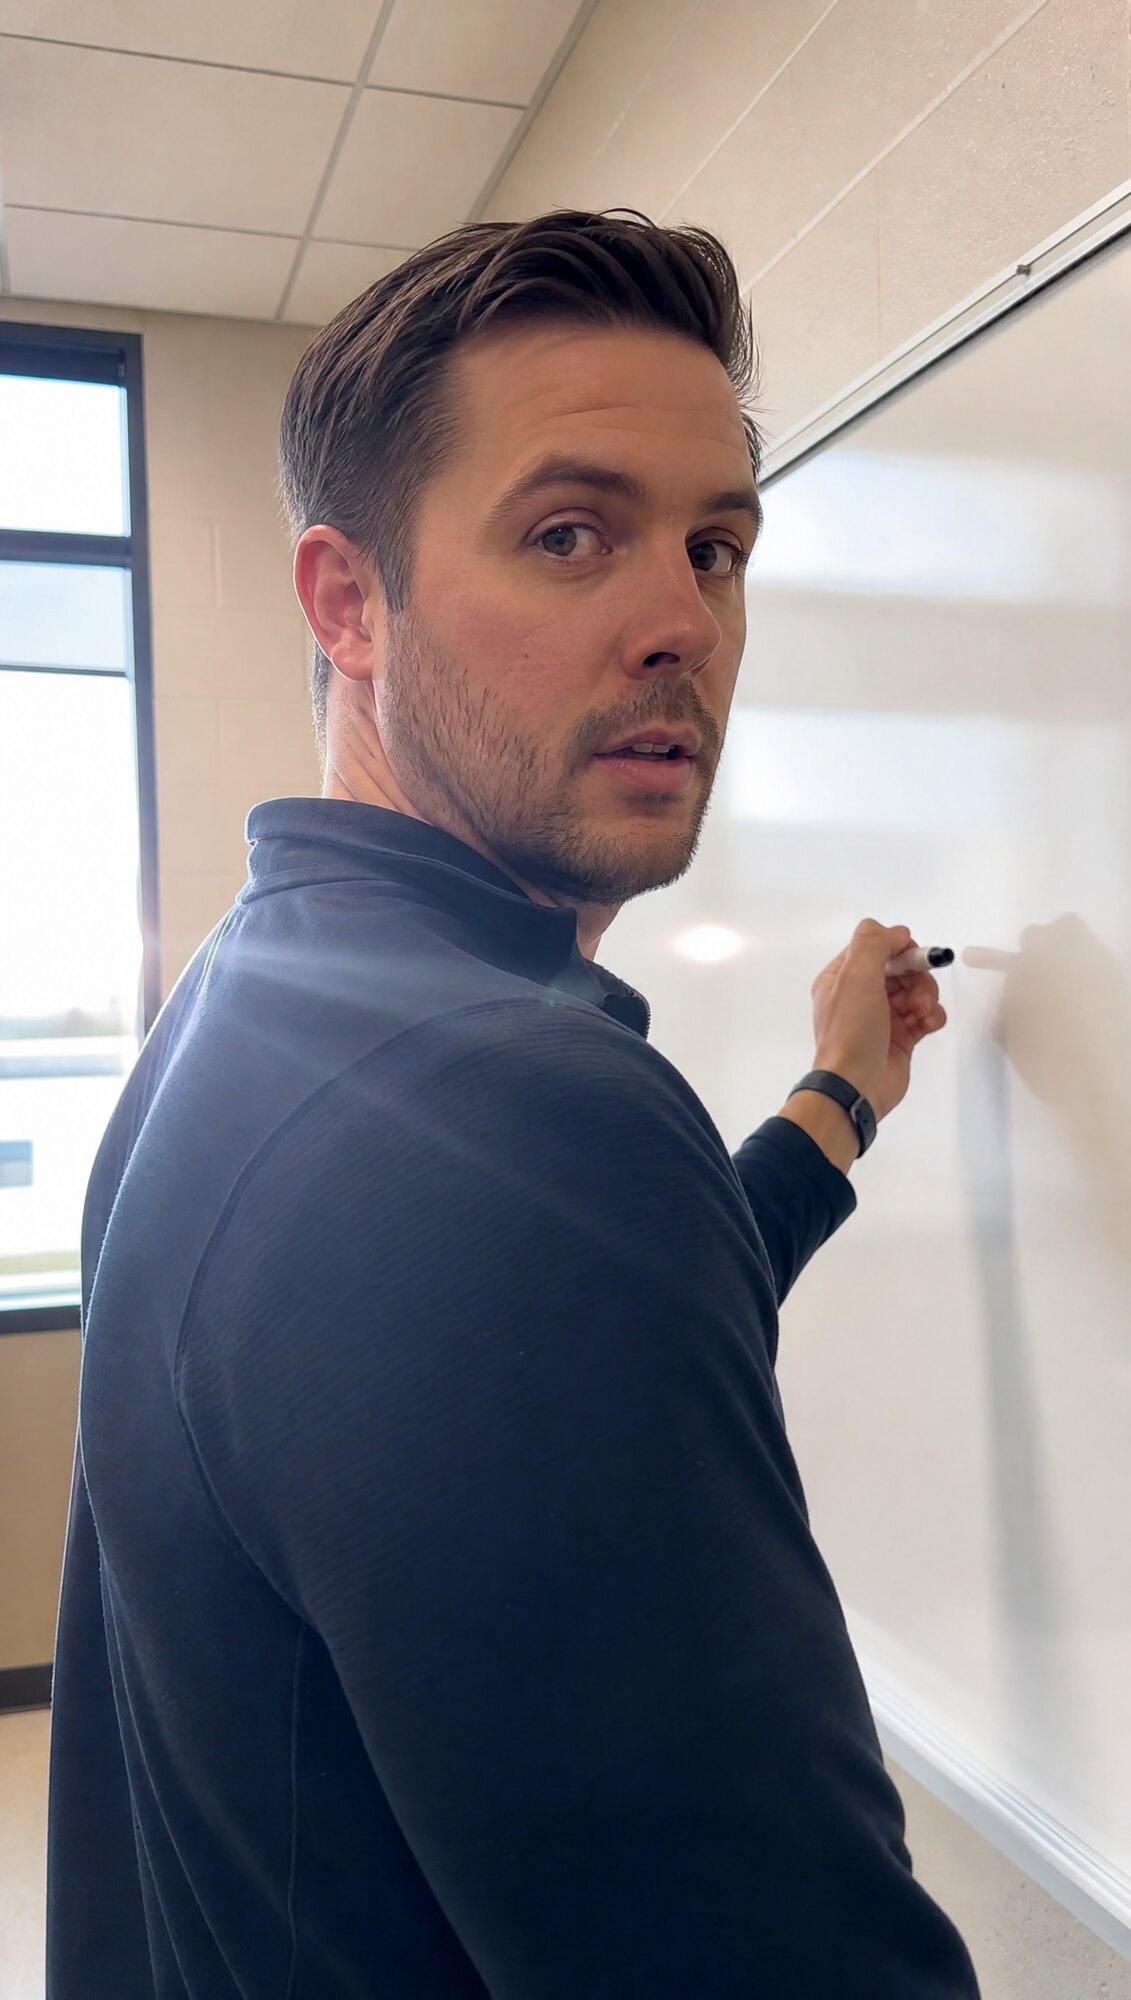
A few things I've learned the hard way:
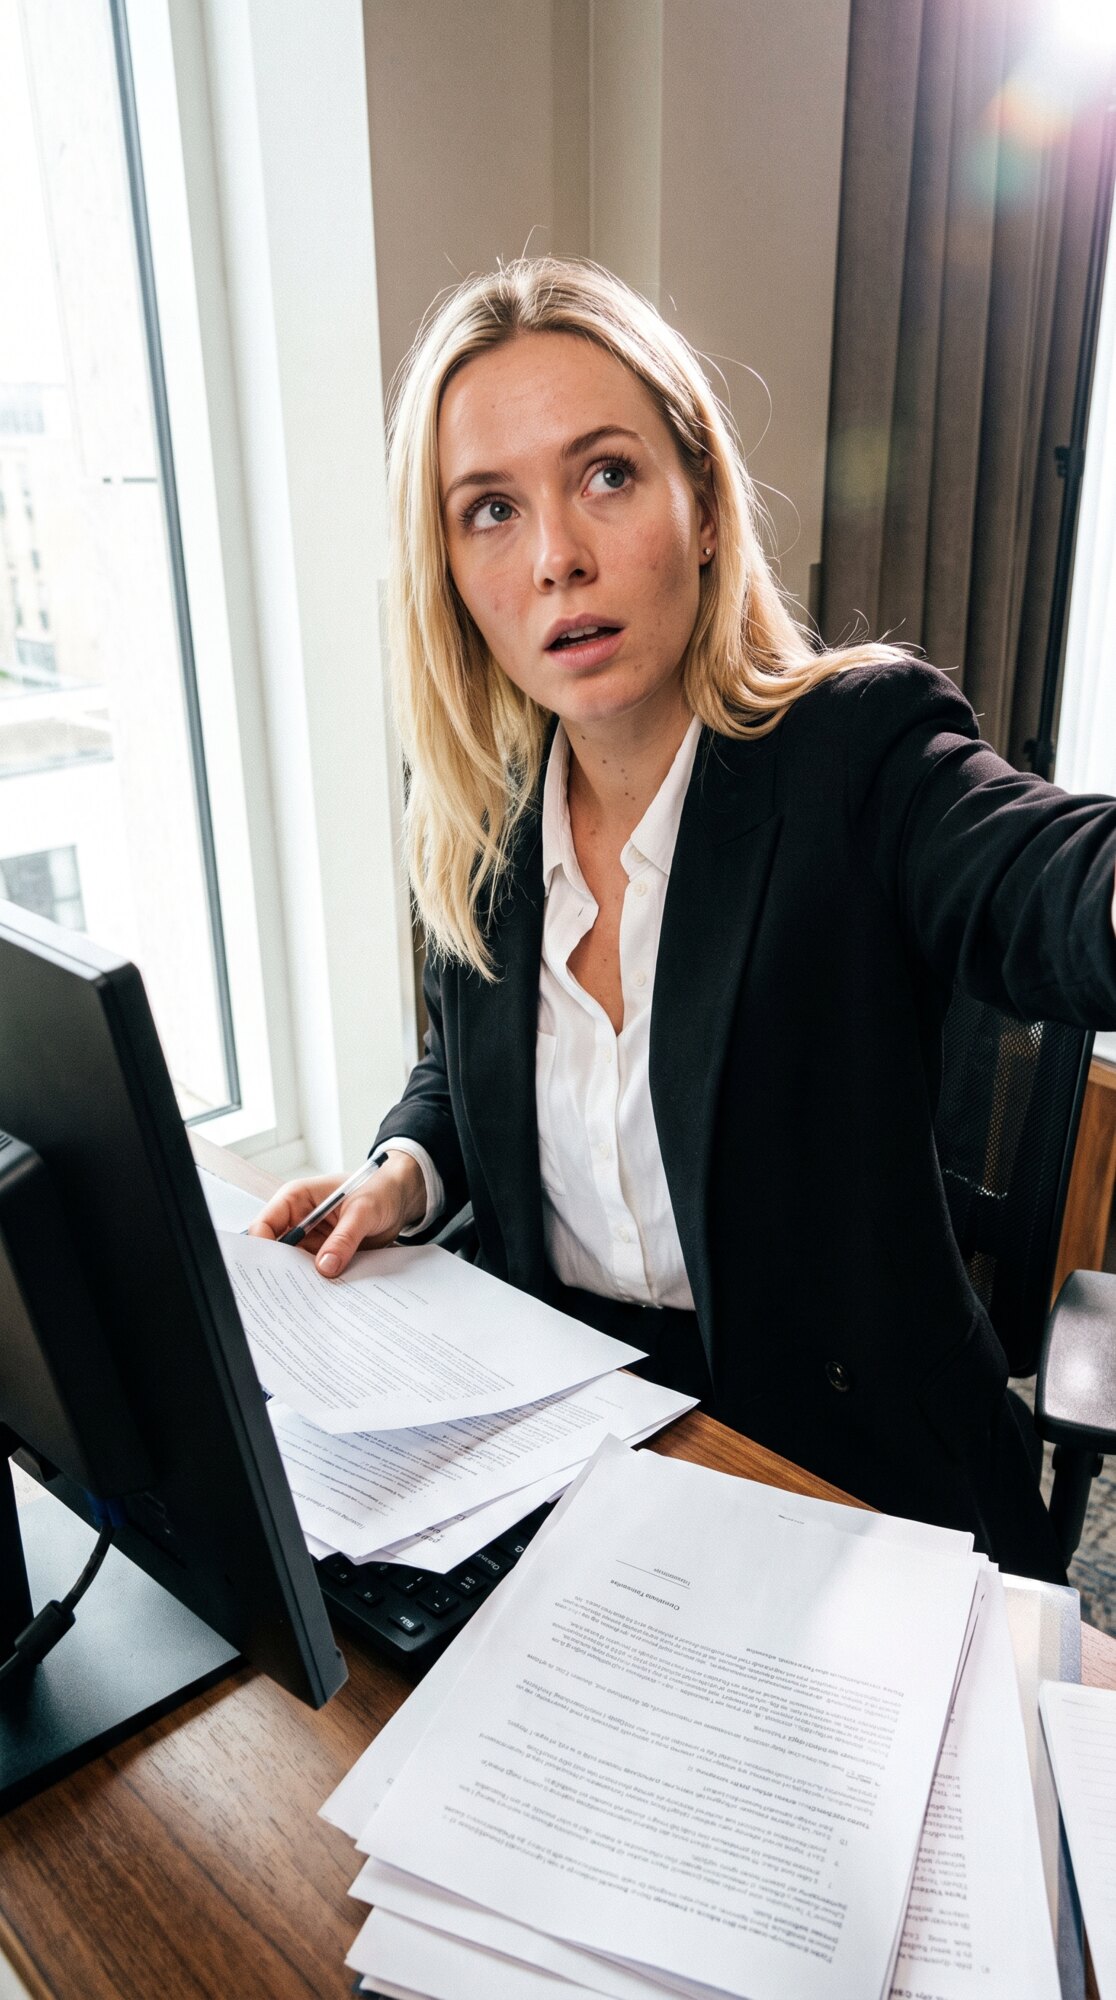
Run it across models to compare. Same prompt in GPT Image 2 and Nano Banana Pro side by side. In my testing GPT Image 2 usually wins for this candid look, but see for yourself.
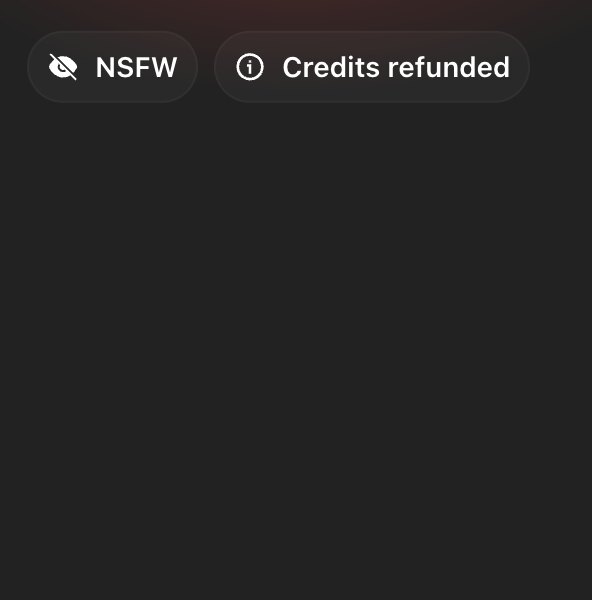
Watch your content filters. Some platforms (Higgsfield especially) are strict. Mild, totally innocent wording can get flagged and refund your credits. If a prompt gets blocked, dial the language back and try again.
Keep your prompt clean. It's easy to leave a stray detail in from a previous prompt (a location, an object) and not notice it in the result. Always read your prompt back before you generate.
Text and name badges: you can use them now. GPT Image 2 renders text well, so don't avoid it, just handle it right. Three things to know: if you don't specify the exact text you'll get something random; the video stage has no context for it, so a camera push-in can turn it to gibberish; and if you want text on screen, it's cleaner to supply it as a separate element to Seedance at the video stage. Below, a clean "SARAH, RN" badge straight out of GPT Image 2.

That's Method 1. It's the most work, and it's the one that teaches you the most. Do this a few times before you move on.
Once you've done this by hand a few times, here's the automated version I built. Drop a rough description of your shot into the box, hit test run, and it applies the full UGC aesthetic prompt and generates the start frame for you, no copy-pasting.
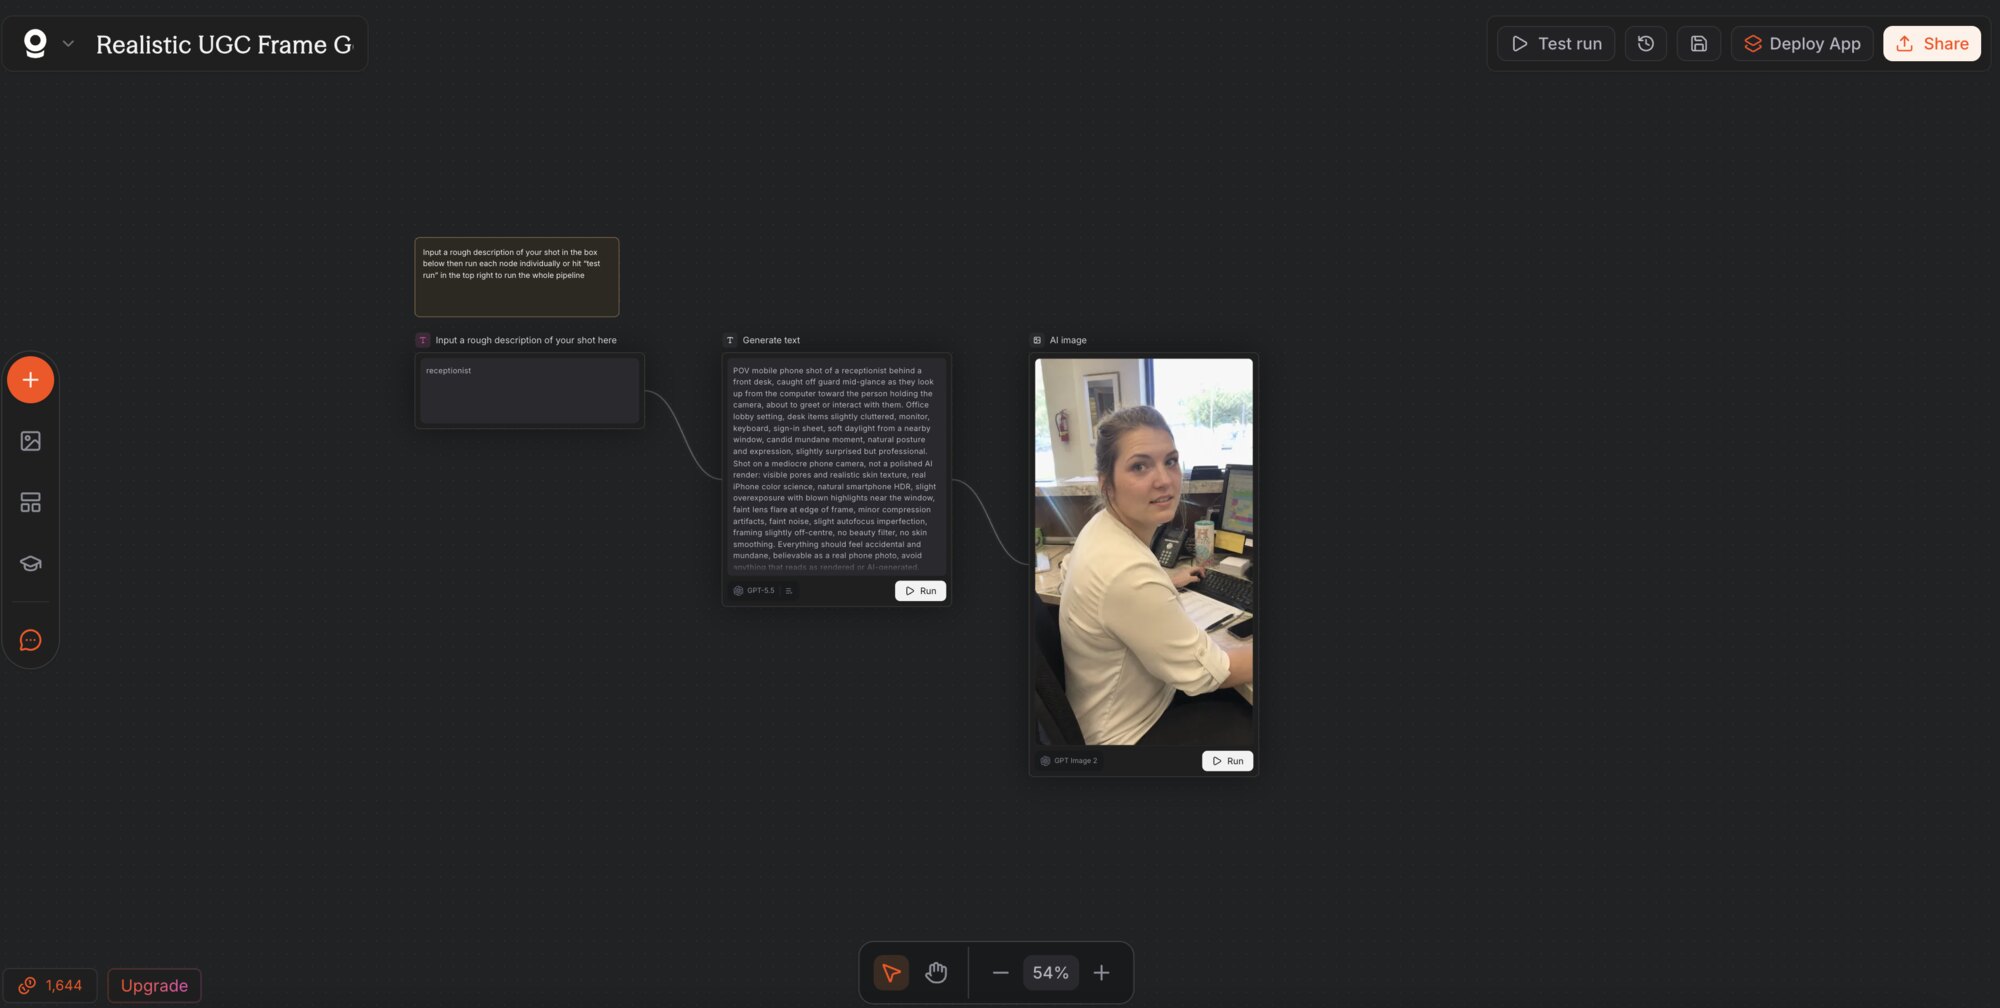
Copy my UGC Frame Generator → — 200 free credits + 20% off through this link.
Your task — generate one UGC start frame right now using both templates. Doesn't need to be perfect. It just needs to exist.
Method 2: Reverse Engineering
This one's a shortcut, and it's my favourite for speed.
Here's the situation: you're scrolling and you see an image, a photo, a shot from an ad, a frame from a video, and you think "that's the exact look I want." Instead of trying to describe it from scratch and guessing at the right words, you get the AI to write the prompt for you, by showing it the image and asking it to work backwards.
It's exactly what it sounds like: reverse engineering. You hand the AI a result and it gives you the recipe.
How it works:
- Screenshot the image you like (scrolling TikTok, Instagram, wherever).
- Drop that screenshot into ChatGPT, Gemini, or Claude.
- Ask it to reverse engineer a prompt from the image, using the template below.
- Take the prompt it gives you and paste it straight back into your image generator (GPT Image 2, Nano Banana Pro) to create a new image in that same style.
I want you to reverse engineer a prompt that will get me an image like this. Ignore the overlays or text. Just analyze the camera angle, the quality, lighting, subject and context and give me a nano banana / GPT image prompt that will get me as close to this image as possible.
That's it. You now have a detailed, professional prompt you didn't have to write, built from a real reference that already works.
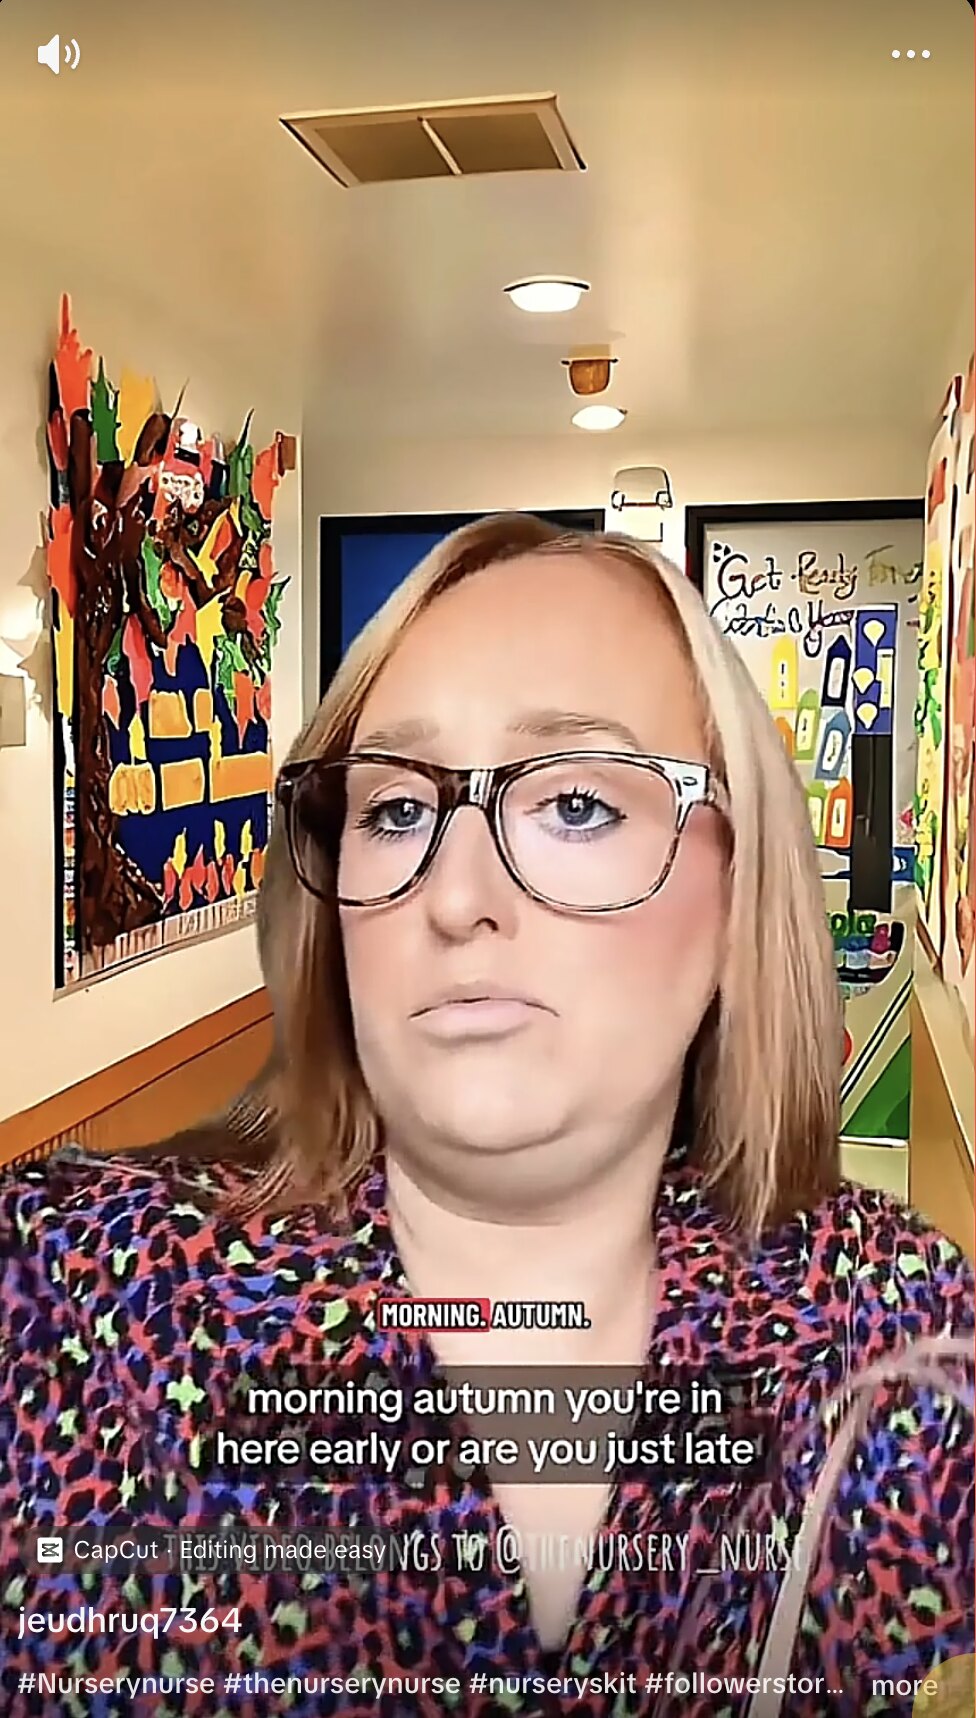
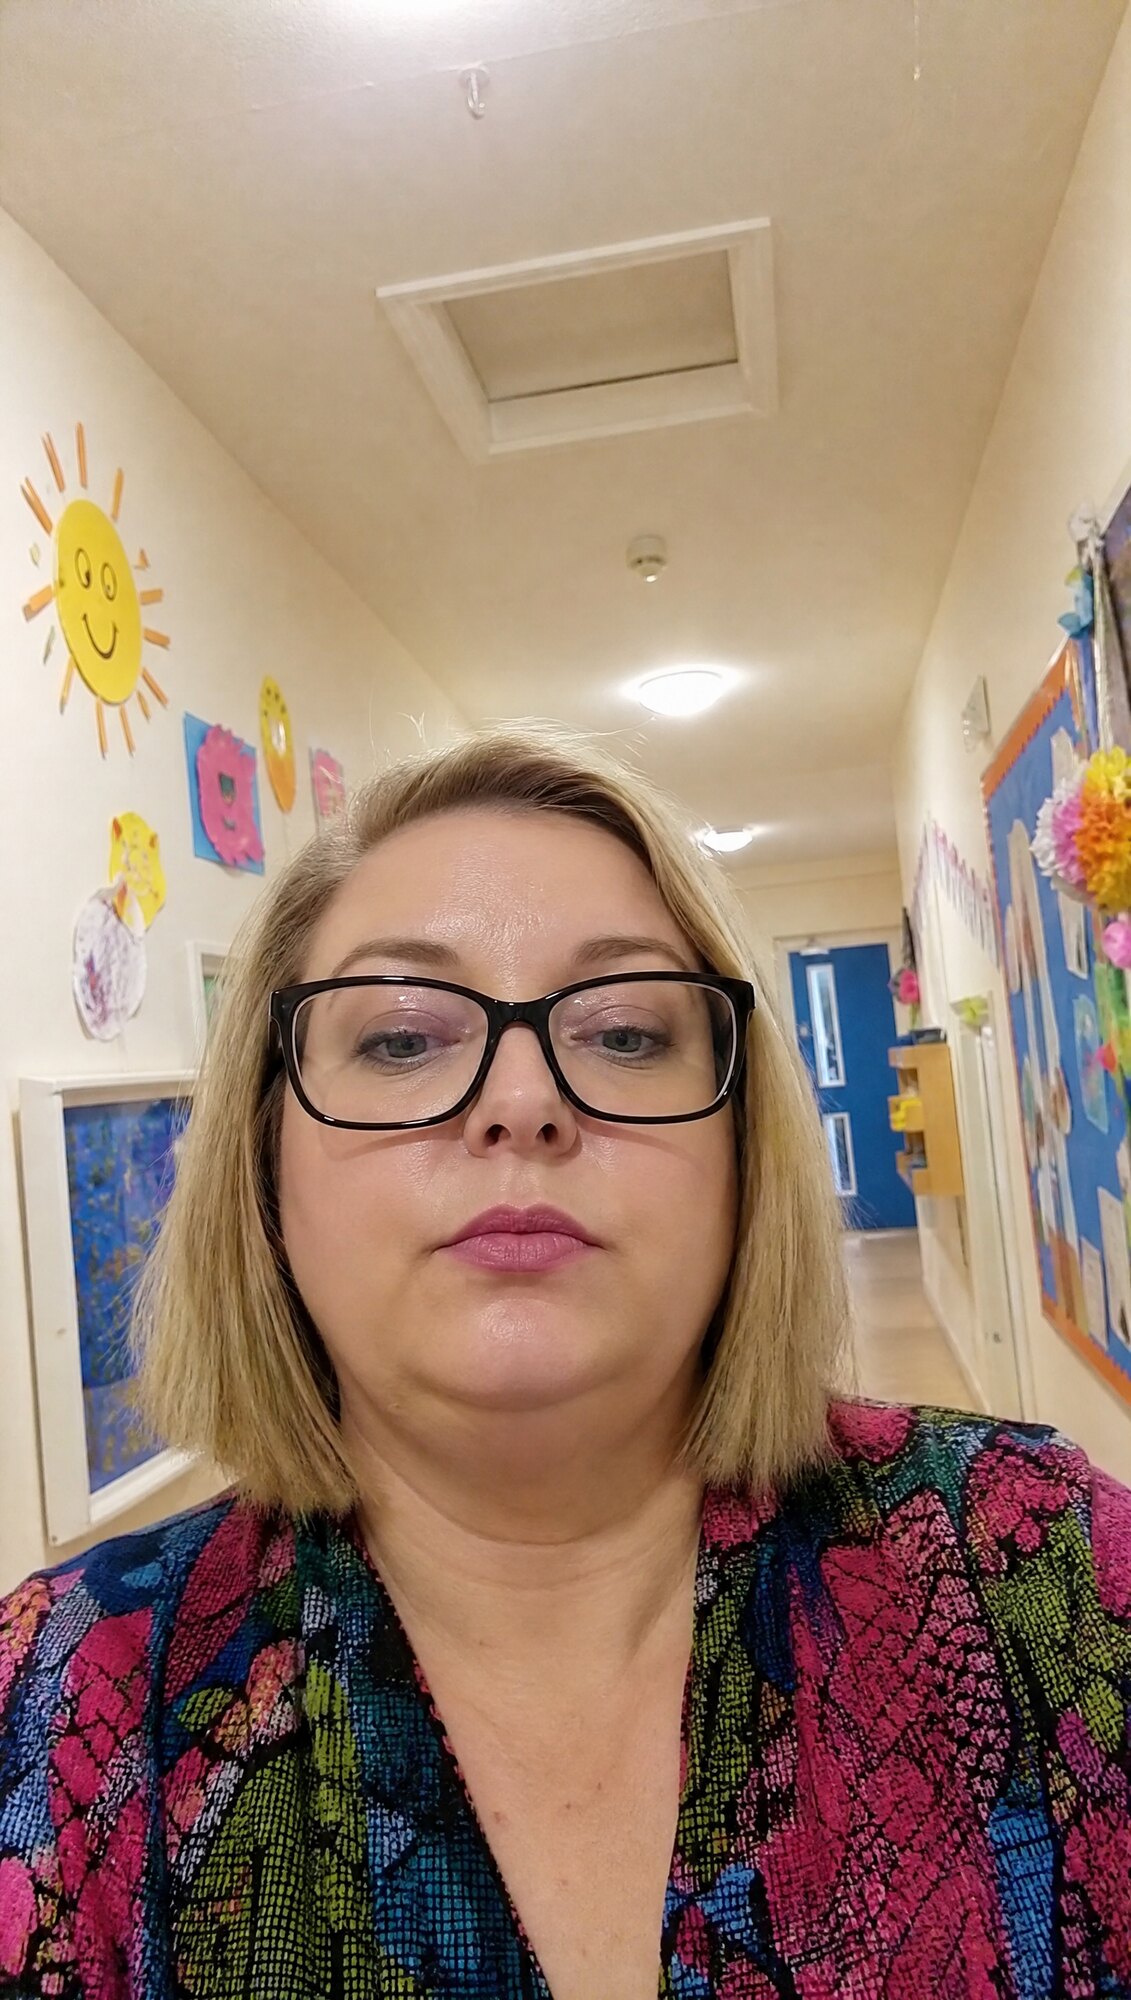
Why I rate this method so highly:
Honestly, right now this is my preferred way to get a strong starting frame. When you feed the AI a real image, it often writes a better, more detailed prompt than you would from a blank page, it notices the lighting and the camera quality and the little details you might not think to describe. I've tested it across ChatGPT, Gemini and Claude, and ChatGPT's reverse-engineered prompts consistently come out on top, sometimes producing a selfie shot that looks even more realistic than the reference I gave it.
And here's the part I really like: you don't get a copy, you get a completely different shot that carries the same feel as your inspiration. Same lighting, same energy, same style, but a new person, a new moment, your own image. It's inspiration, not duplication.
"You don't get a copy. You get a completely different shot that carries the same feel as your inspiration."
One thing I've noticed. Asking GPT to write the prompt when you're generating in GPT Image 2 (and Gemini when you're in Nano Banana) seems to give better results, like keeping the text and image generation in the same ecosystem helps. That's an observation, not a rule, but it's held up for me.
When to use it:
Use this when you've got a specific look in your head or in front of you, a vibe, an aesthetic, a style of shot, and you want to nail it fast. It's brilliant for matching a feel you've seen somewhere.
Just note: it recreates a look, not a specific scene you want to keep mostly intact. If you've found an image and you want to keep the background and just swap the person in it, that's a different job, and that's exactly what Method 3 is for.
The automated version of this one. Upload the image you want to reverse engineer, hit test run, and it writes the prompt and generates your own version, no back-and-forth between tools. Just "x" out the image to swap in a new one.
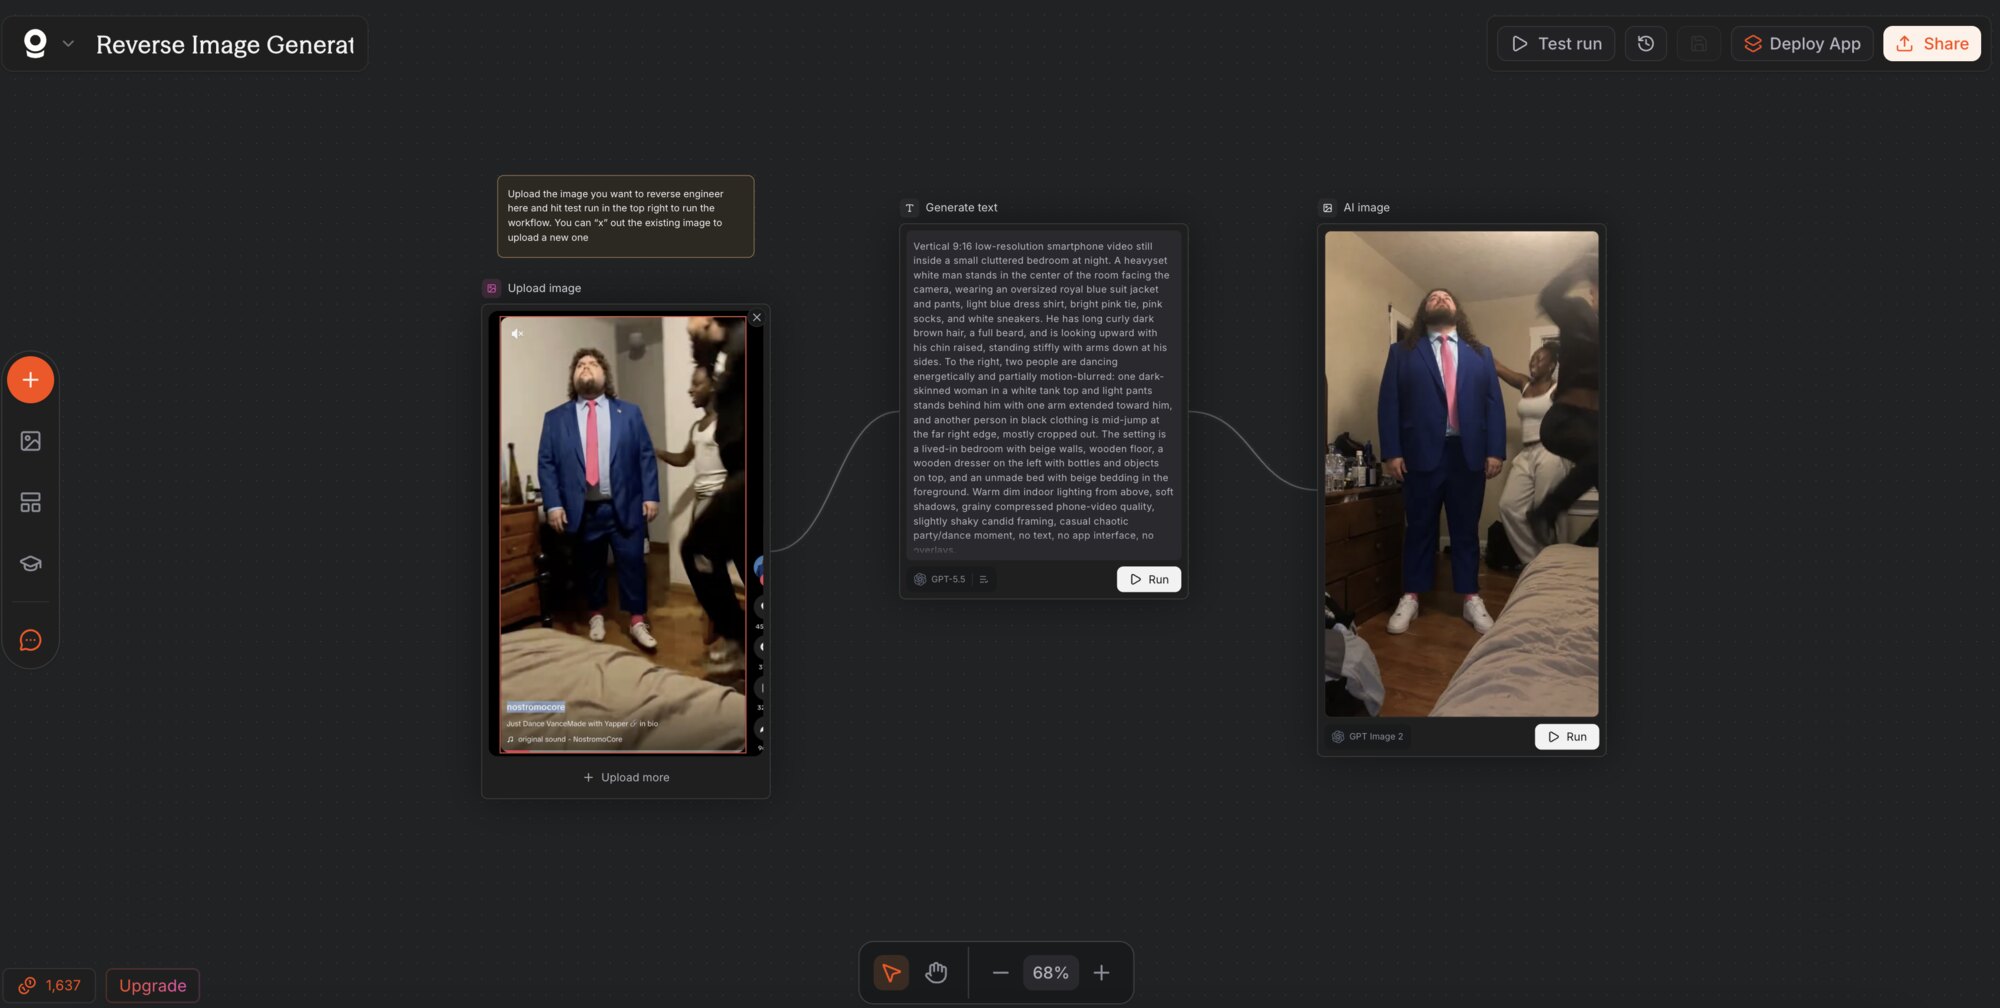
Copy my Reverse Image Swap → — 200 free credits + 20% off through this link.
Your task — find an image you like, screenshot it, and reverse engineer a prompt from it. Compare what you get to what you'd have written yourself.
Method 3: The Social Swap
This is the one I use most for client work. Learn this properly, it's the workhorse.
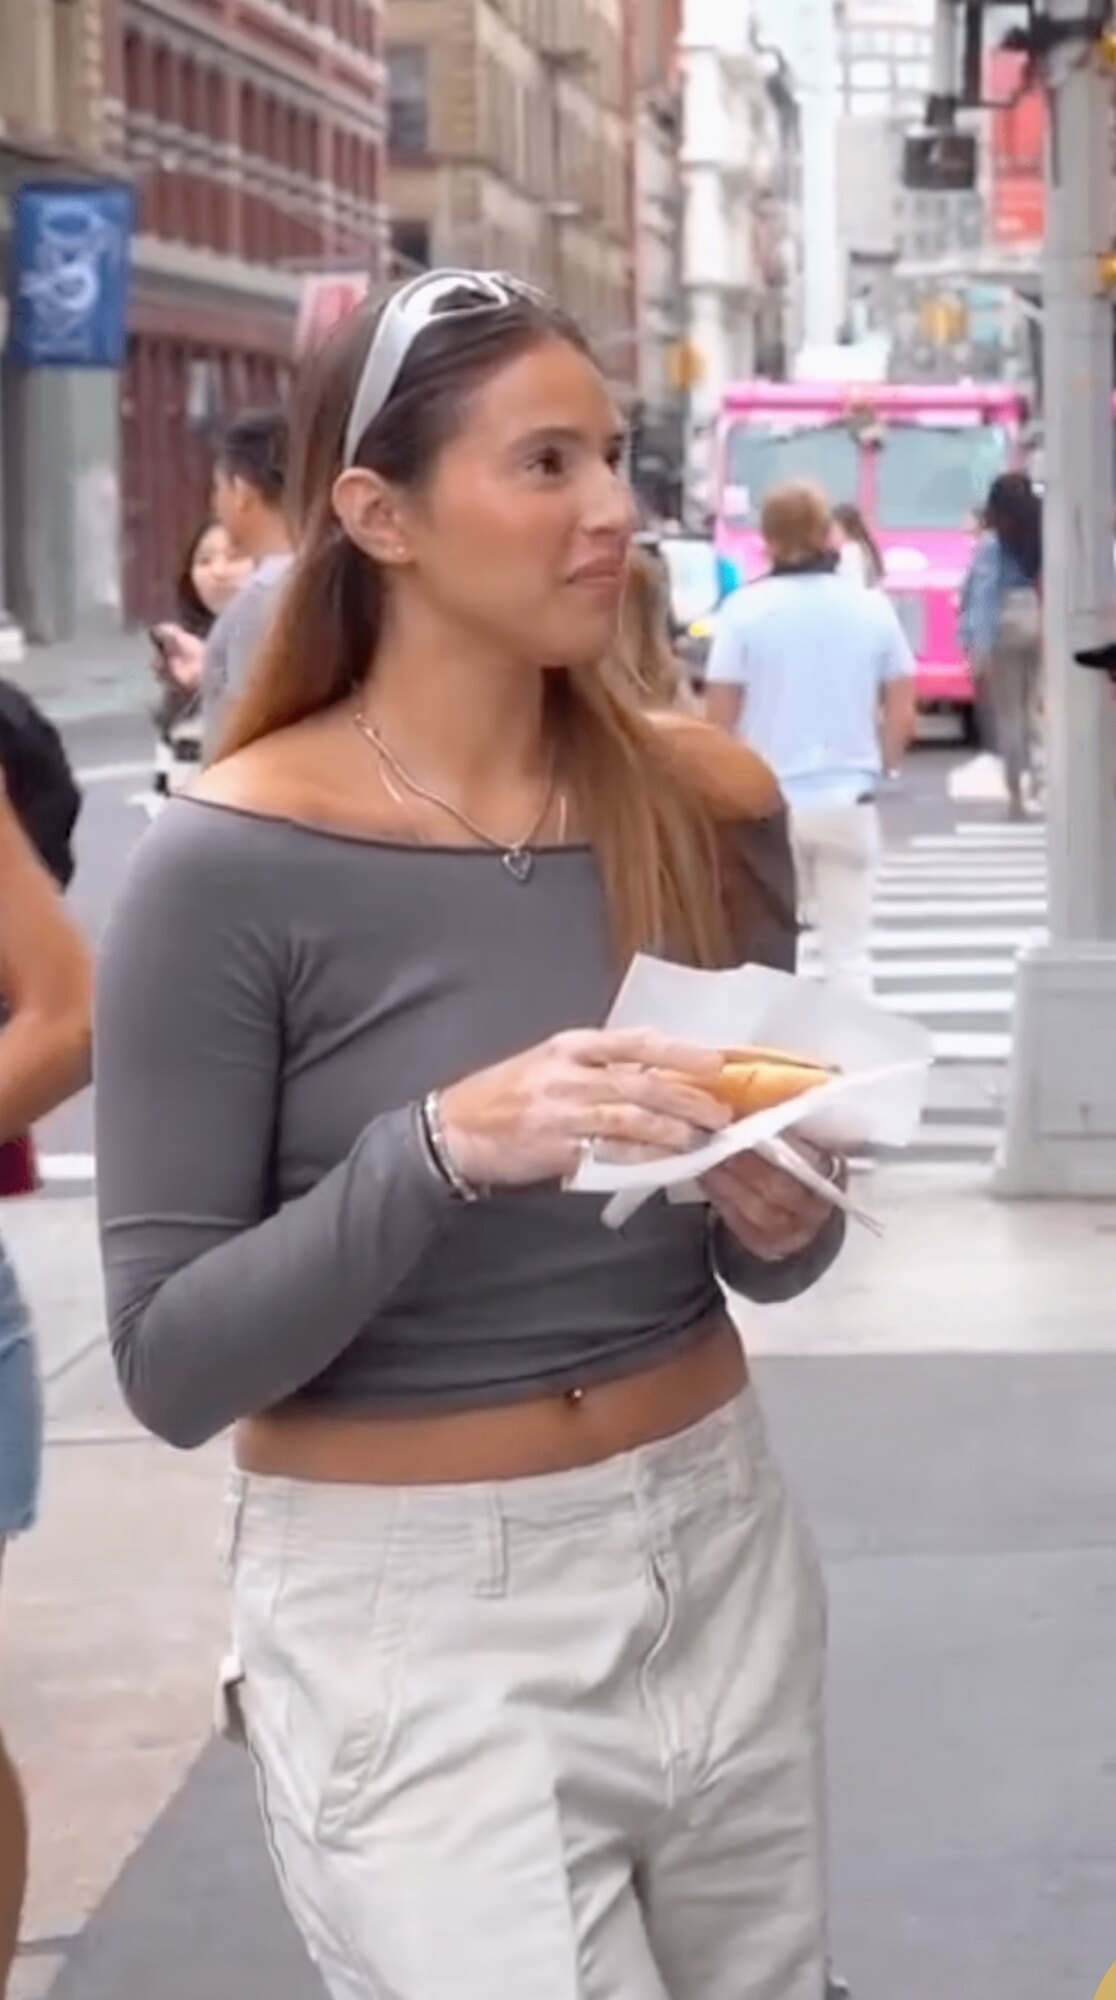
Here's the real use-case: you've got an ad that's already converting, and you want to test variations without starting over. Swap the person to test a new avatar. Swap the background to test a new setting. Do both to borrow a precise shot you've seen on socials while making it genuinely your own. The rule: change one variable at a time. Method 2 recreates a look; the Social Swap keeps a scene and swaps out what's in it.
"Method 2 recreates a look. The Social Swap keeps a scene and makes it yours."
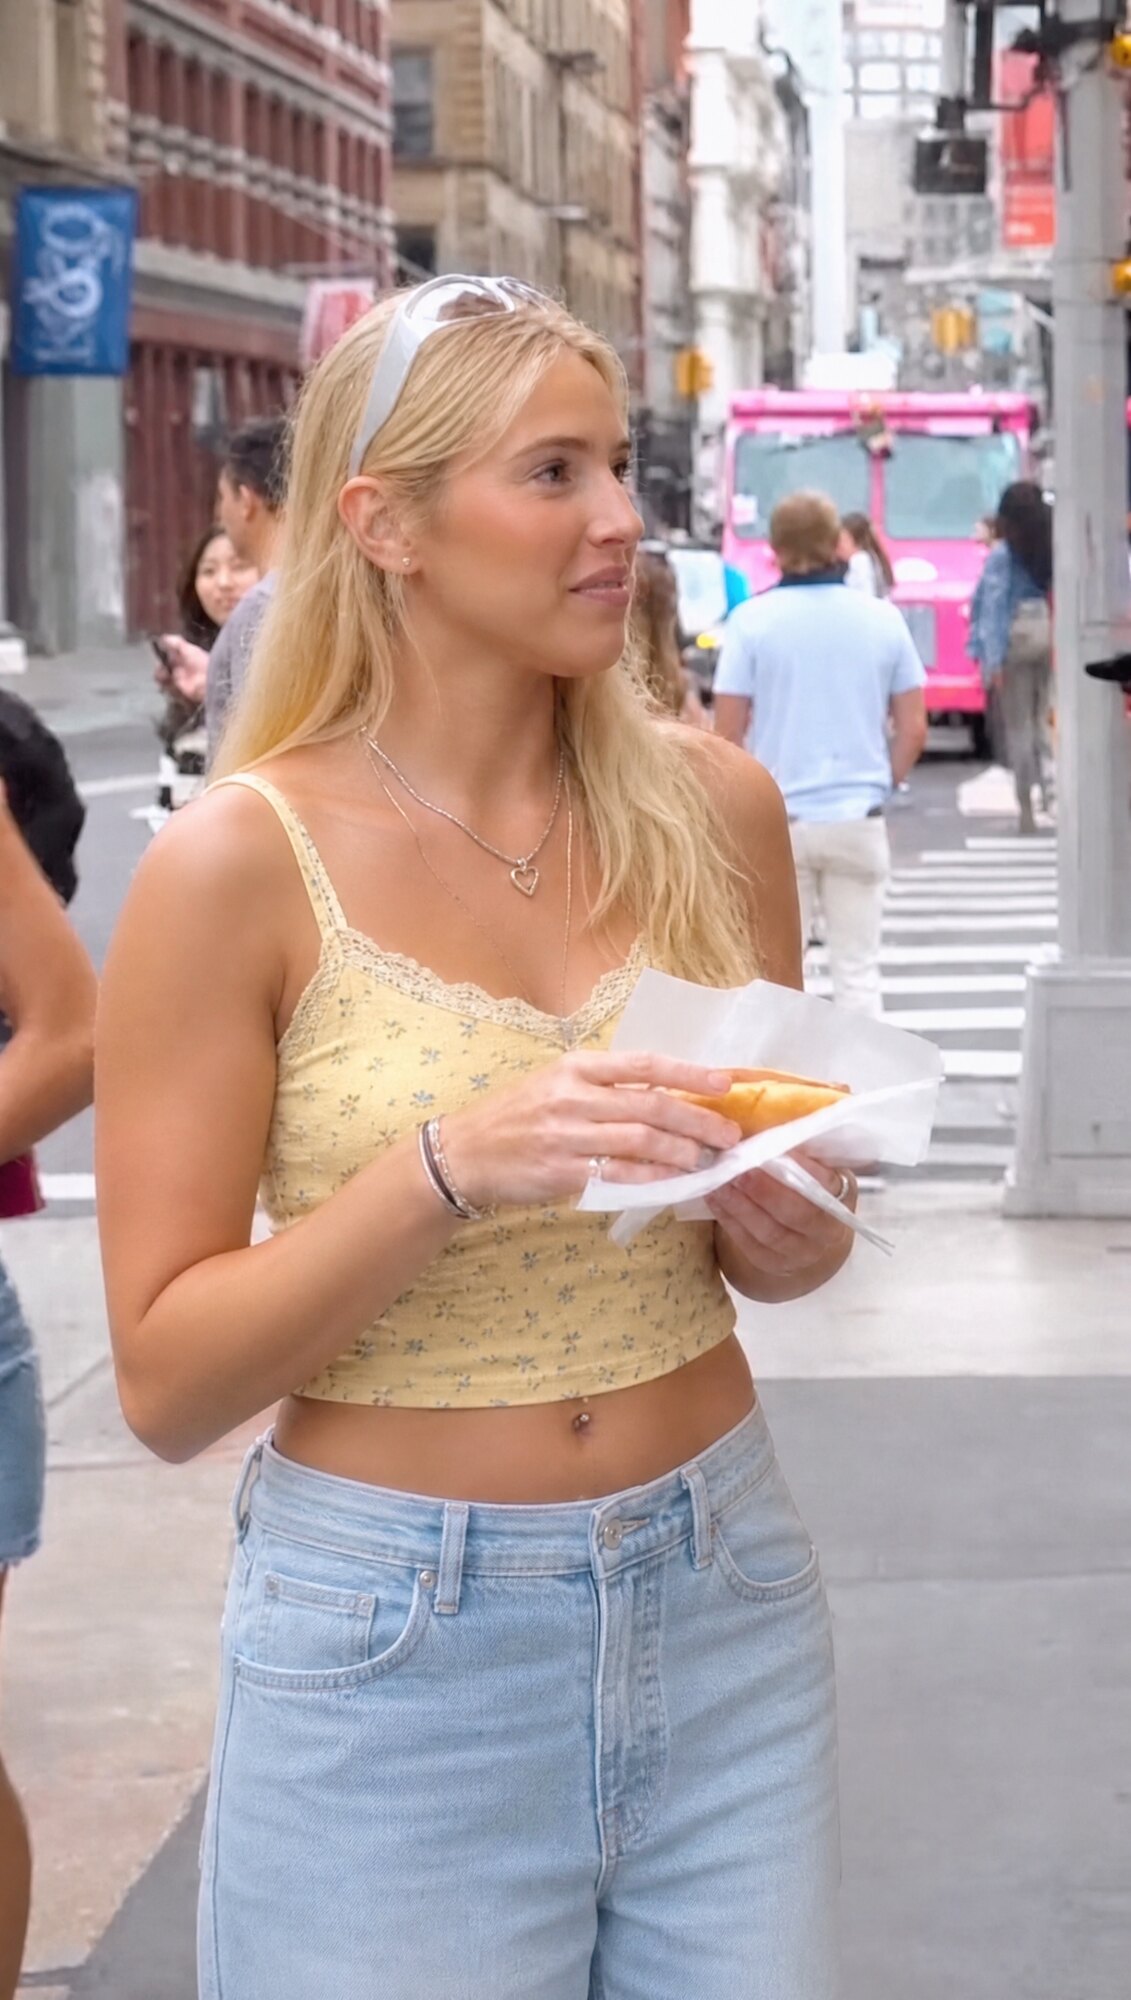
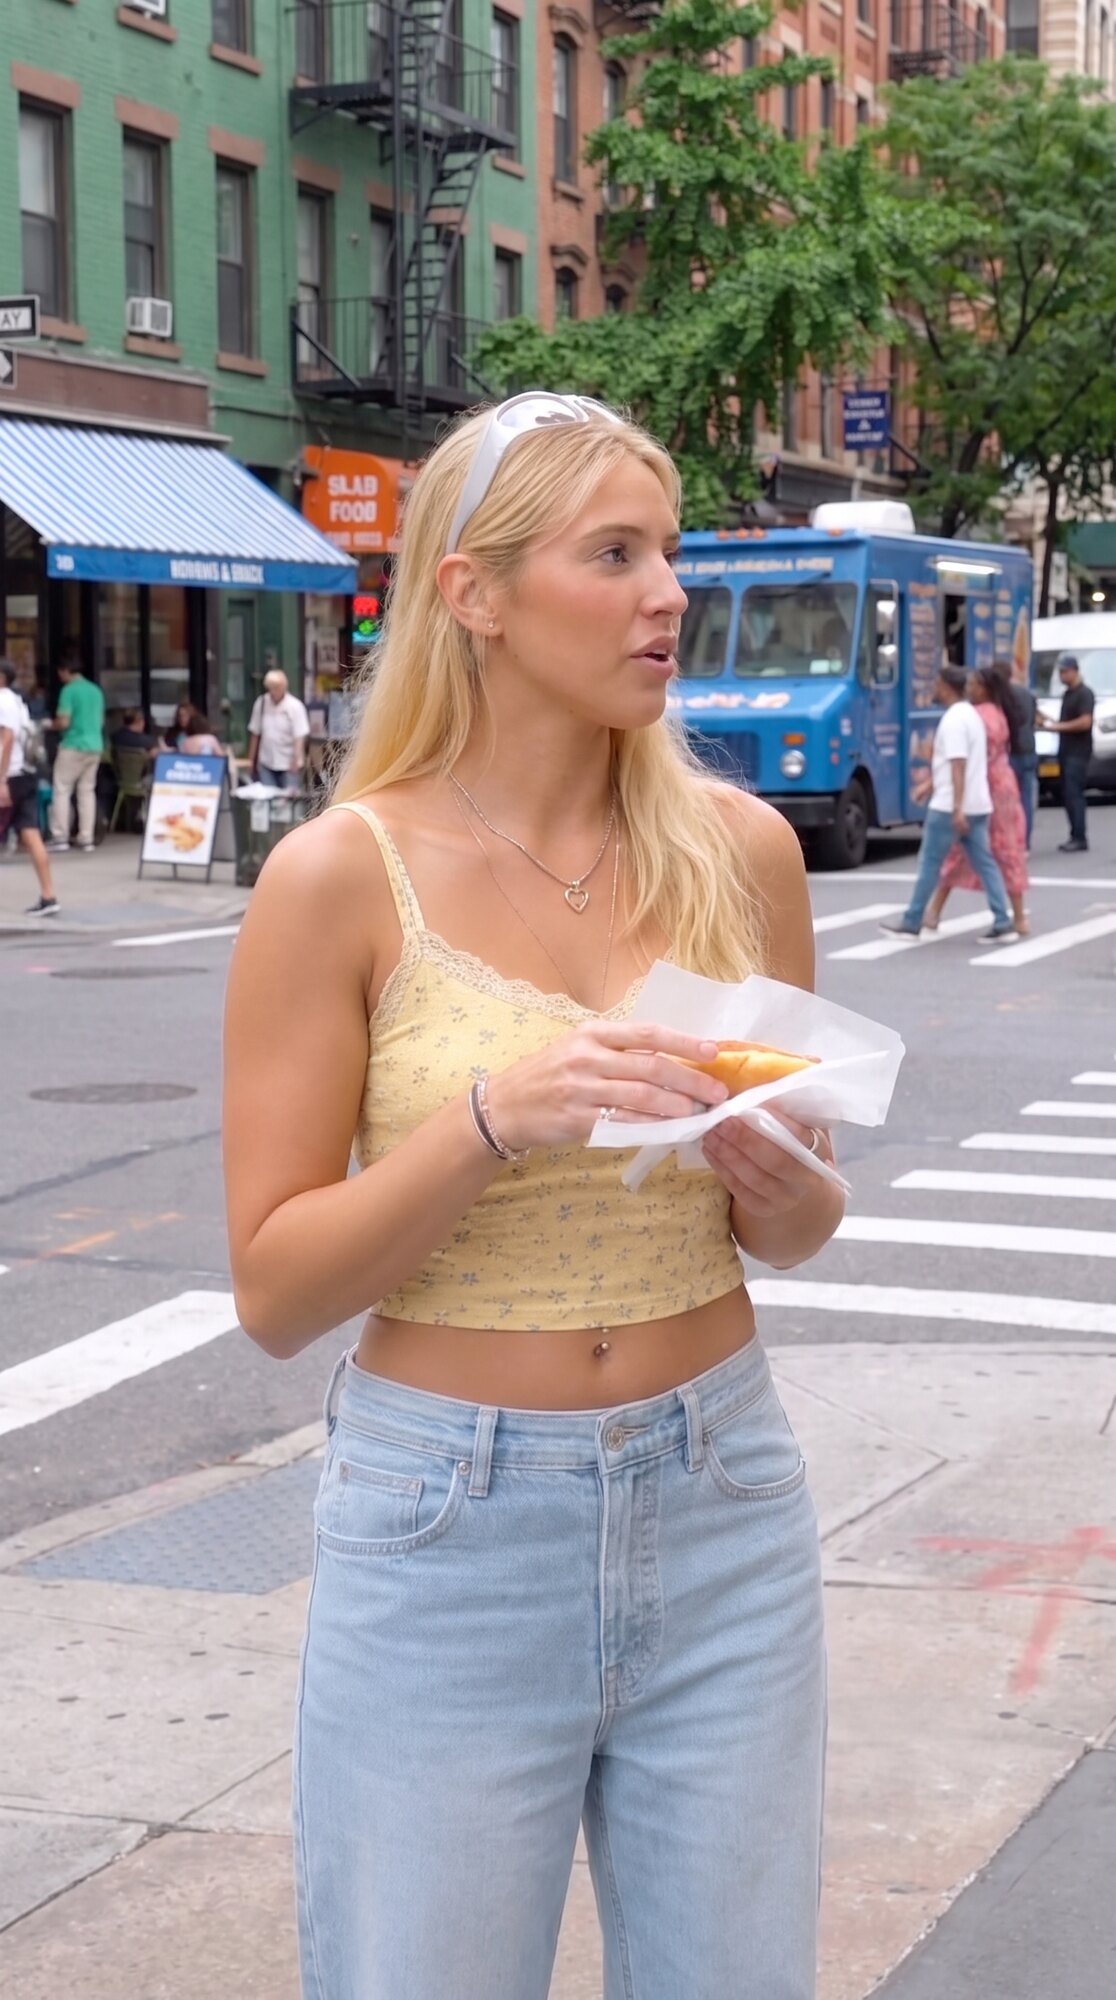
The key is doing it in two separate steps: swap the person first, then change the background. And there's a good reason it's two steps, not one.
Why two steps and not one.
If you try to swap the person and change the background at the same time, you ask the AI to change too much at once and it loses the composition, the angle, the framing, the whole thing drifts. Worse, if you only swap the person and stop there, you've basically just recreated someone else's exact scene with a new face. That's copying, and it's not what we do. We take the inspiration, the framing and the feel, and then we make the scene genuinely our own by changing the background too. Two steps keeps the quality high and keeps the work original.
Step 1: Swap the person.
Take your reference image and run this. It keeps everything about the shot identical and only changes who's in it.
Take this image and replace the person with (description). Keep the camera quality, camera angle, lighting, background, composition, the person's pose exactly the same.
Step 2: Swap the background.
Now take that new image and run this. It keeps your new person exactly as they are and changes the environment enough that it's clearly your own scene, not a copy of the original.
Take this image and keep the person, the camera angle, the lighting and camera quality exactly the same. But change the background enough so that it's not recognized - change colors, accessories, objects around the room, but keep the context of the environment exactly the same. Do not change the character at all.
Two steps, two prompts. Person in, scene made yours.
Things I've learned using this on real work:
- GPT Image 2 is the standout here. In my testing it consistently beats Nano Banana Pro for realism on these swaps. Test both, but this is where GPT Image 2 really pulls ahead.
- Watch for a synthetic "sheen." When you edit an image a second time in the same chat (like our two-step process), GPT Image 2 can add a slightly plasticky sheen. Two fixes: add "keep the image and camera quality exactly the same, no AI sheen, no smoothing" to your prompt; and if it persists, run that step in Nano Banana Pro instead, telling it to keep the composition exactly the same.
- Strip text overlays first. If your reference has captions or text on it, tell the AI to ignore them, or crop them out before you start.
And the big one: screenshot quality matters. Take your reference screenshots at full phone resolution. A low-res or pixelated reference will limit everything that follows, even though the model boosts resolution a little. This is rubbish in, rubbish out, and it matters more now than ever, because in this whole process the image is doing most of the work. A weak start frame doesn't just give you a weak image, it gives you a weak video, a weak edit, a weak ad. Everything downstream inherits it. So don't cut corners at the one stage that decides everything.
And this is why I won't just swap the person and keep the same background, that's copying. Swap both, so the result is genuinely original while keeping the quality, composition and feel. Take the inspiration, not the image.
"Garbage in, garbage out 🗑️"
Your task — find a reference with a setting you like, and run the full two-step swap. Change the person, then make the background your own.
Compositing products into your shots
If you're making ads for real products, you'll often need the product to appear in the scene, in a hand, on a desk, looking like it belongs there. Two ways to do it.
Option 1, composite with your images. Create the original start frame with GPT Image 2, then switch to Nano Banana Pro for the product edit. GPT Image 2 is brilliant at creating the starting image, but asking it to edit that same reference can regenerate more of the frame than you intended. In my test below it added a strange wavy texture across the skin and image.
Nano Banana Pro did a much better job of treating this as a local edit. The product changed, while the original camera texture, lighting and frame stayed far closer to the source.
Perform a strictly local edit only. Replace only the object inside the person’s hands with the supplied product. Preserve the original image outside that area exactly: no changes to the face, skin, hair, clothing, background, lighting, colour grade, sharpness, noise, texture or resolution. Do not beautify, restyle, relight, denoise or regenerate the full frame. Preserve the supplied product’s exact proportions, logo, label text and colours.

Do not have the person using the product, just holding it as if delivering a message to the audience on camera.
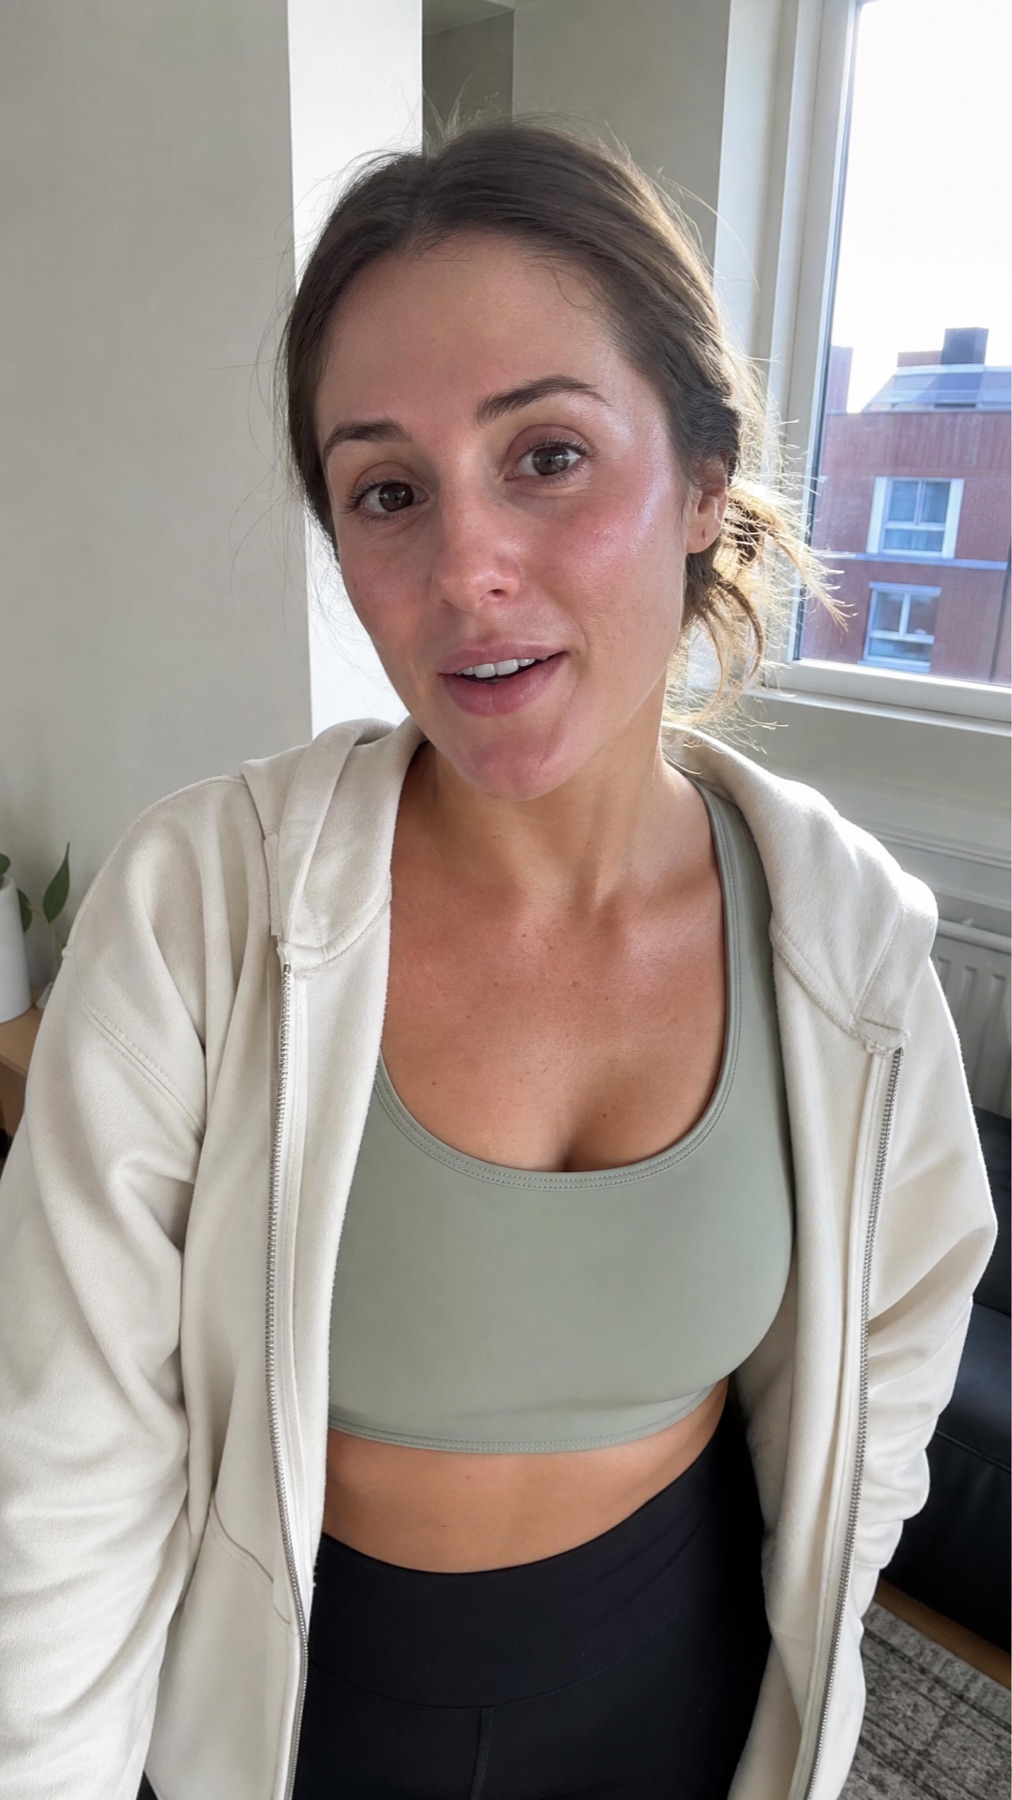
GPT Image 2 start frame
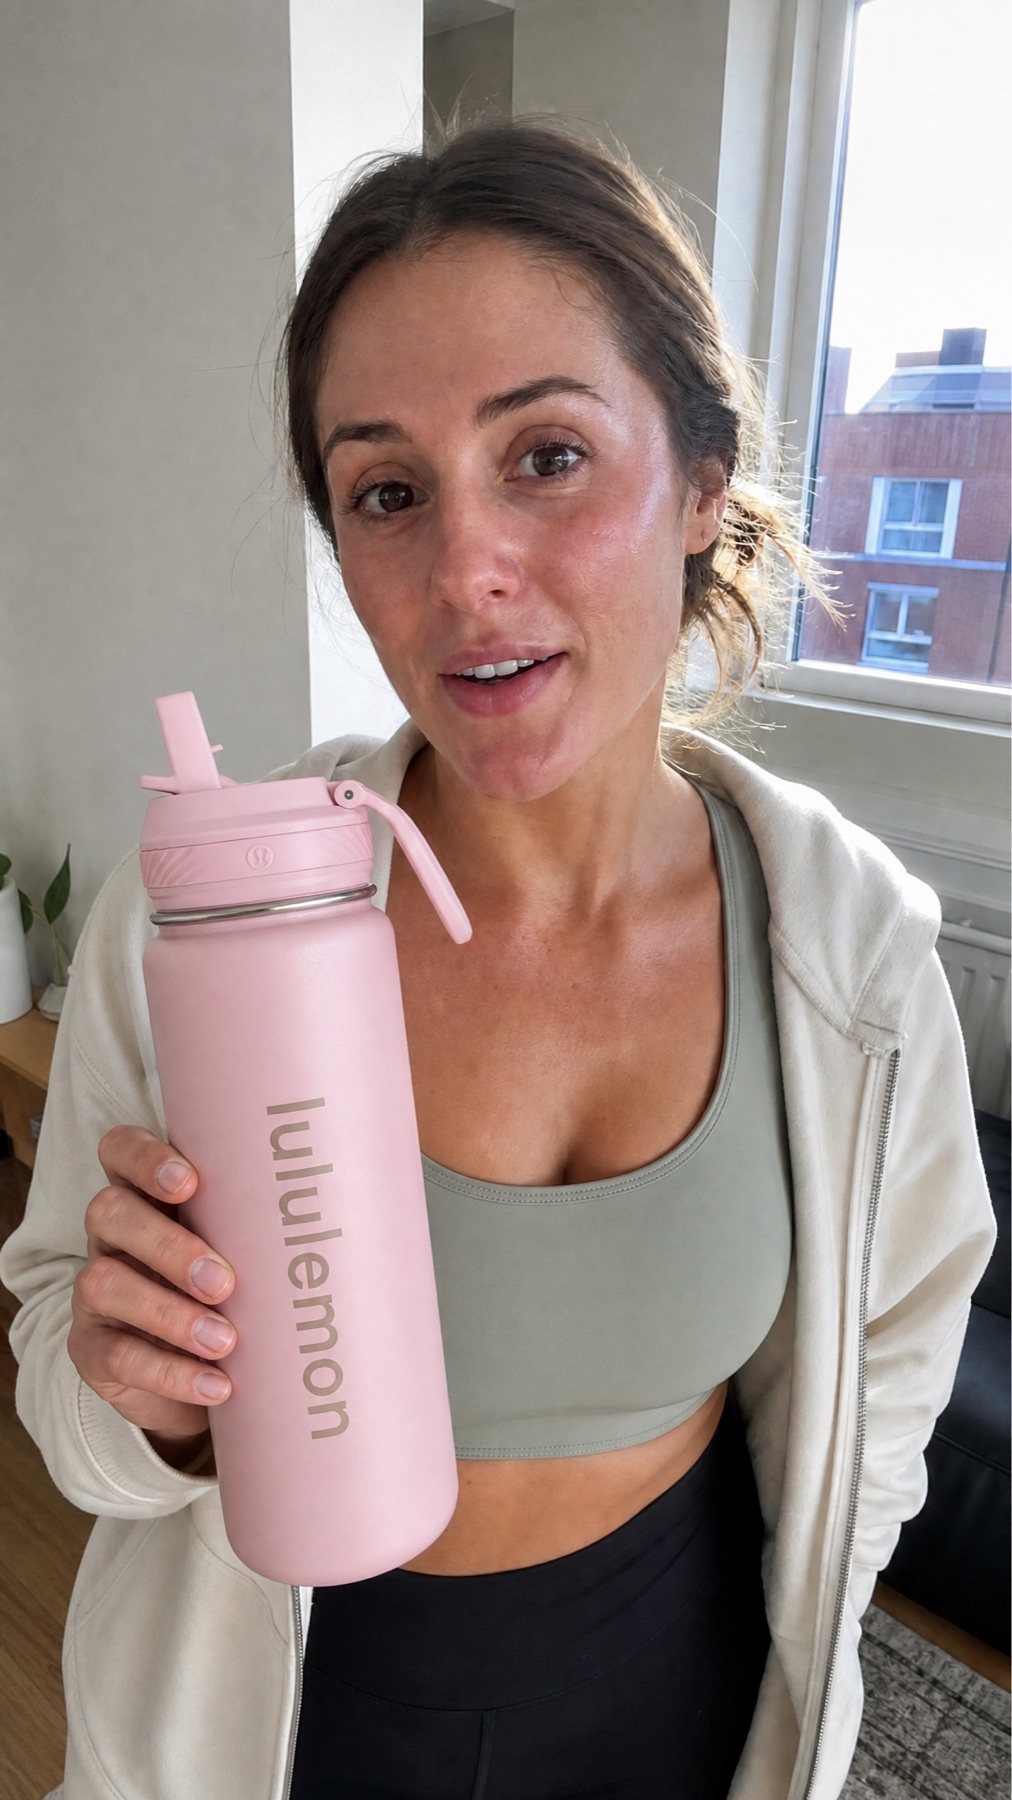
Product added, but the frame develops a wavy texture
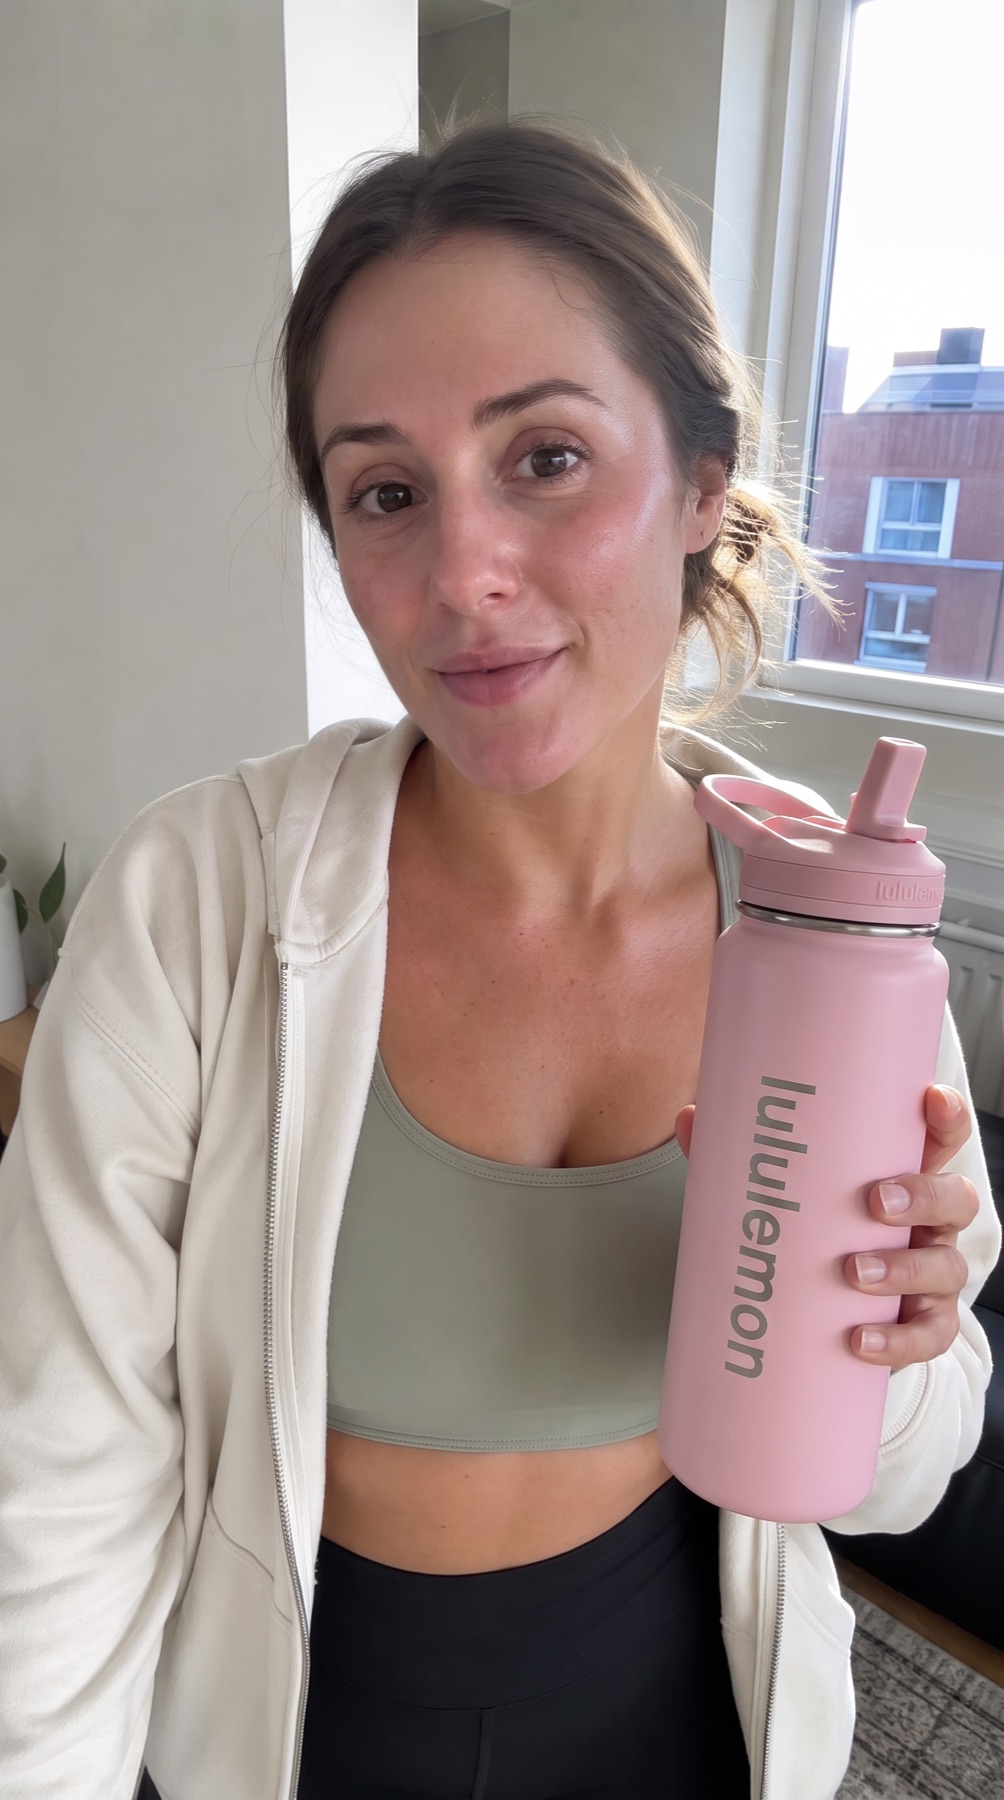
Cleaner local edit with the source texture preserved
Look closely at the face and skin rather than only the bottle. The product placement is not the only test. The rest of the frame should still look like the original.
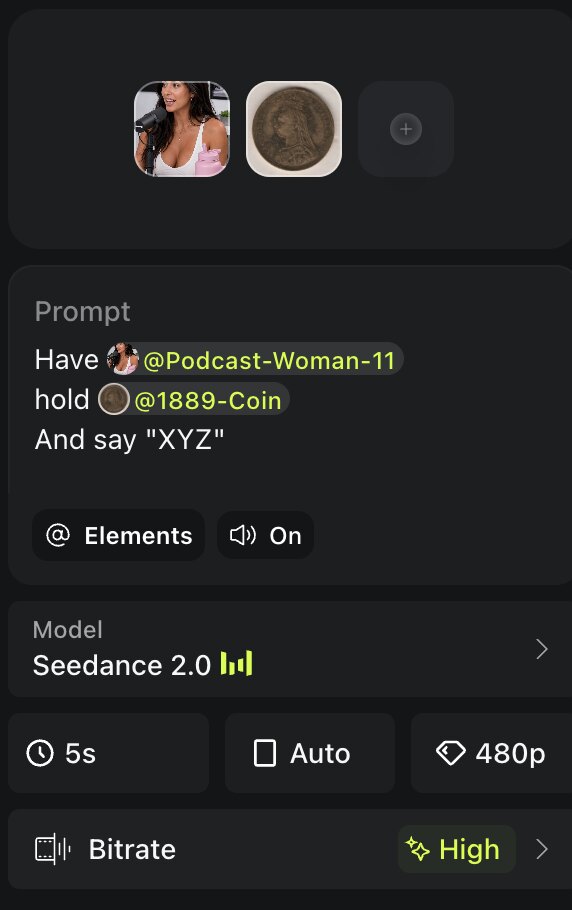
Option 2, create an "Element" in Higgsfield. In the Seedance 2.0 video model, upload multiple images of your product (studio, flatlay, context, close-up shots) and create it as a product "Element." Now whenever you reference that Element in a video, it incorporates the product accurately into the shot. The reason multiple angles matter: give the model one image and it guesses at the parts it can't see, give it several and it gets the shape, size and detail right.
Sharper tripod UGC without the waxy AI face
The original Natural UGC prompt is still excellent when the frame should feel grabbed in motion, handheld or filmed from a casual point of view. I found one place where it can work against you: a fixed phone or tripod-style shot. The motion and autofocus cues that make a selfie feel real can leave a planted shot soft, glossy or strangely waxy.
So I built two new prompt workflows and battle-tested GPT 5.5 against Astra as the prompt writer. Both can work, but one formula gave me the cleanest result again and again: Astra writes the prompt, then GPT Image 2 generates the image at 2K, Medium, 9:16. That is the route I would use first right now.
Astra prompt → GPT Image 2 → 2K → Medium → 9:16
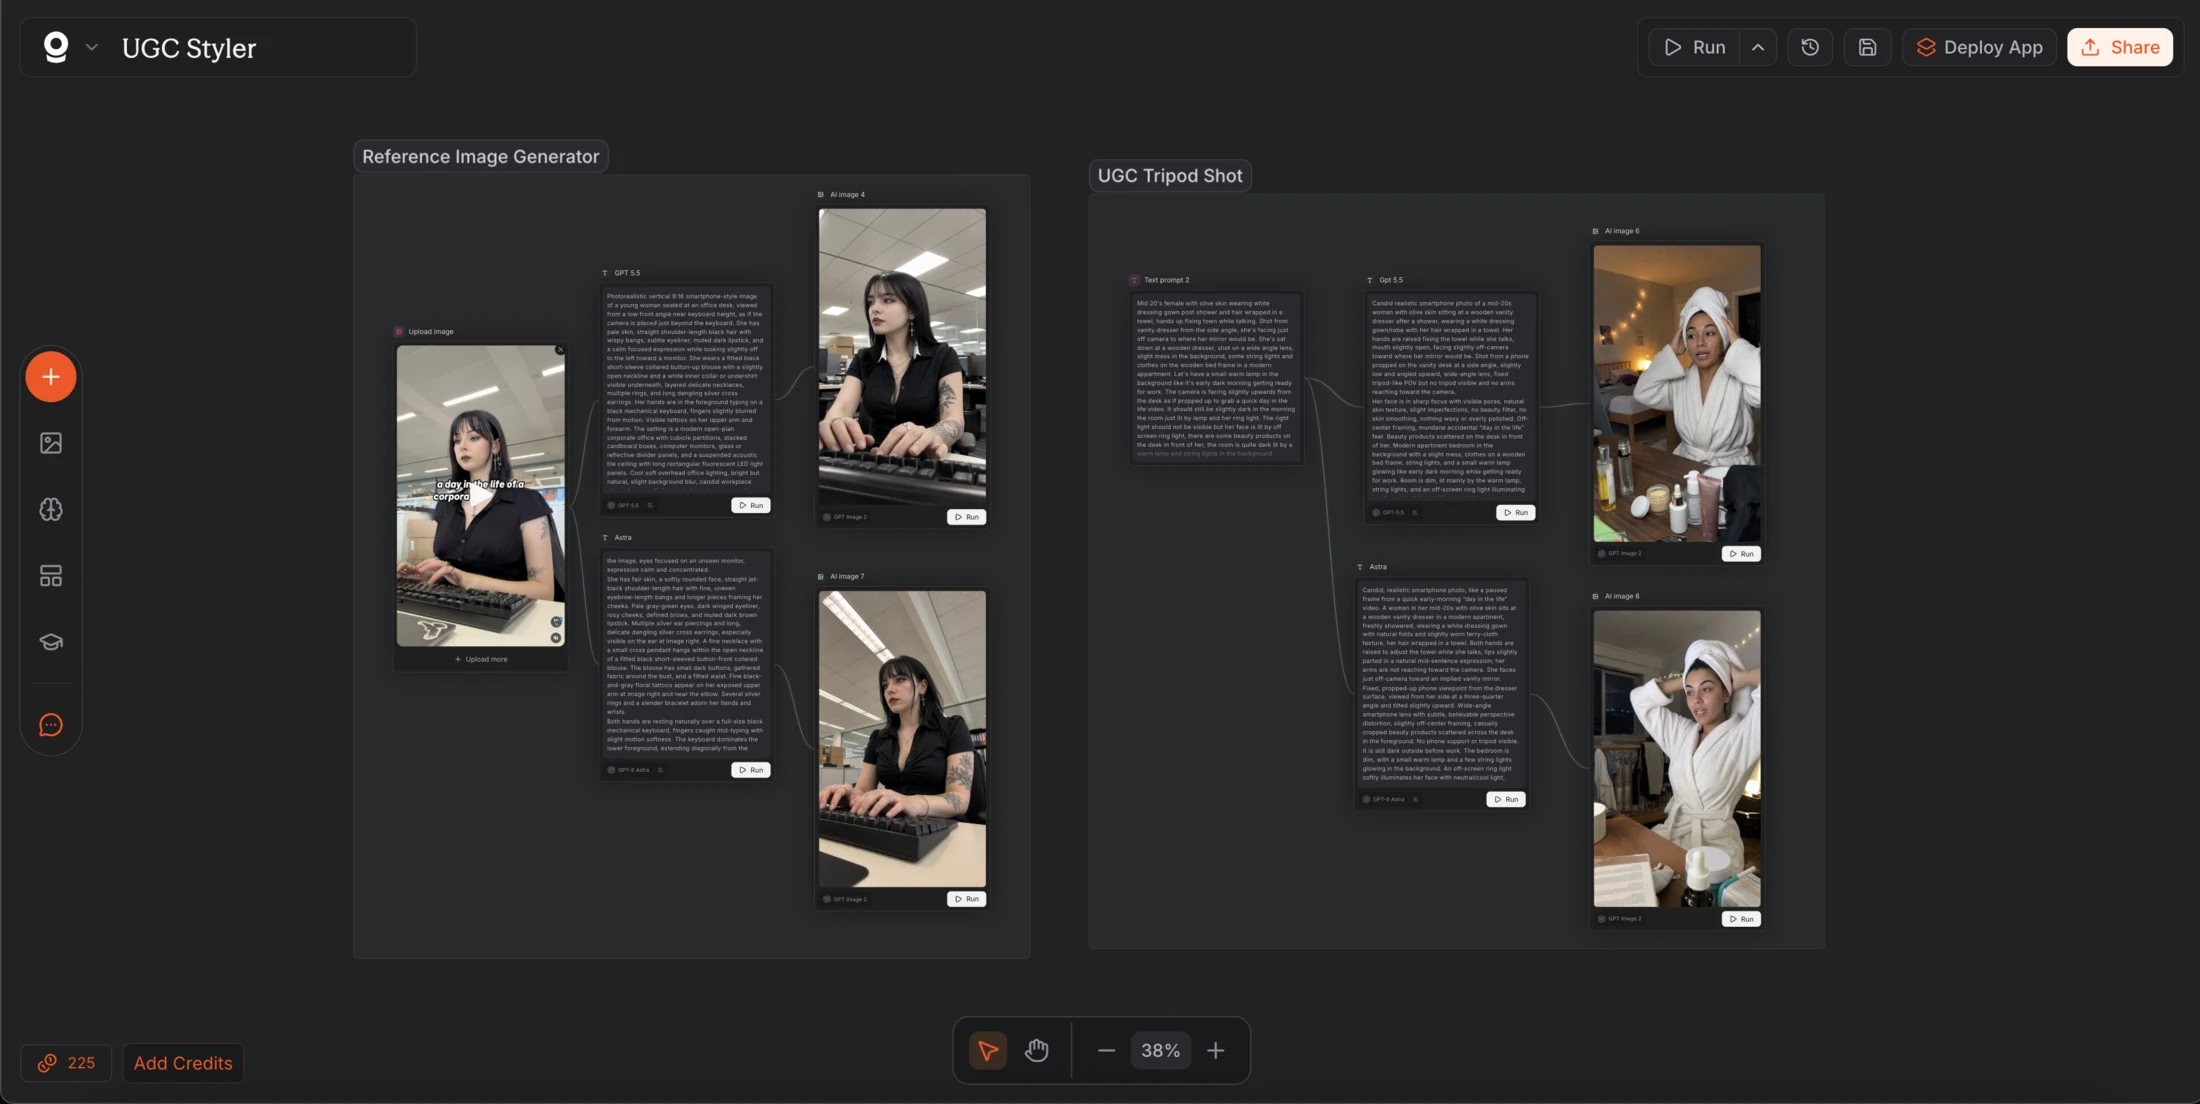
Workflow 1: recreate the exact frame from text only
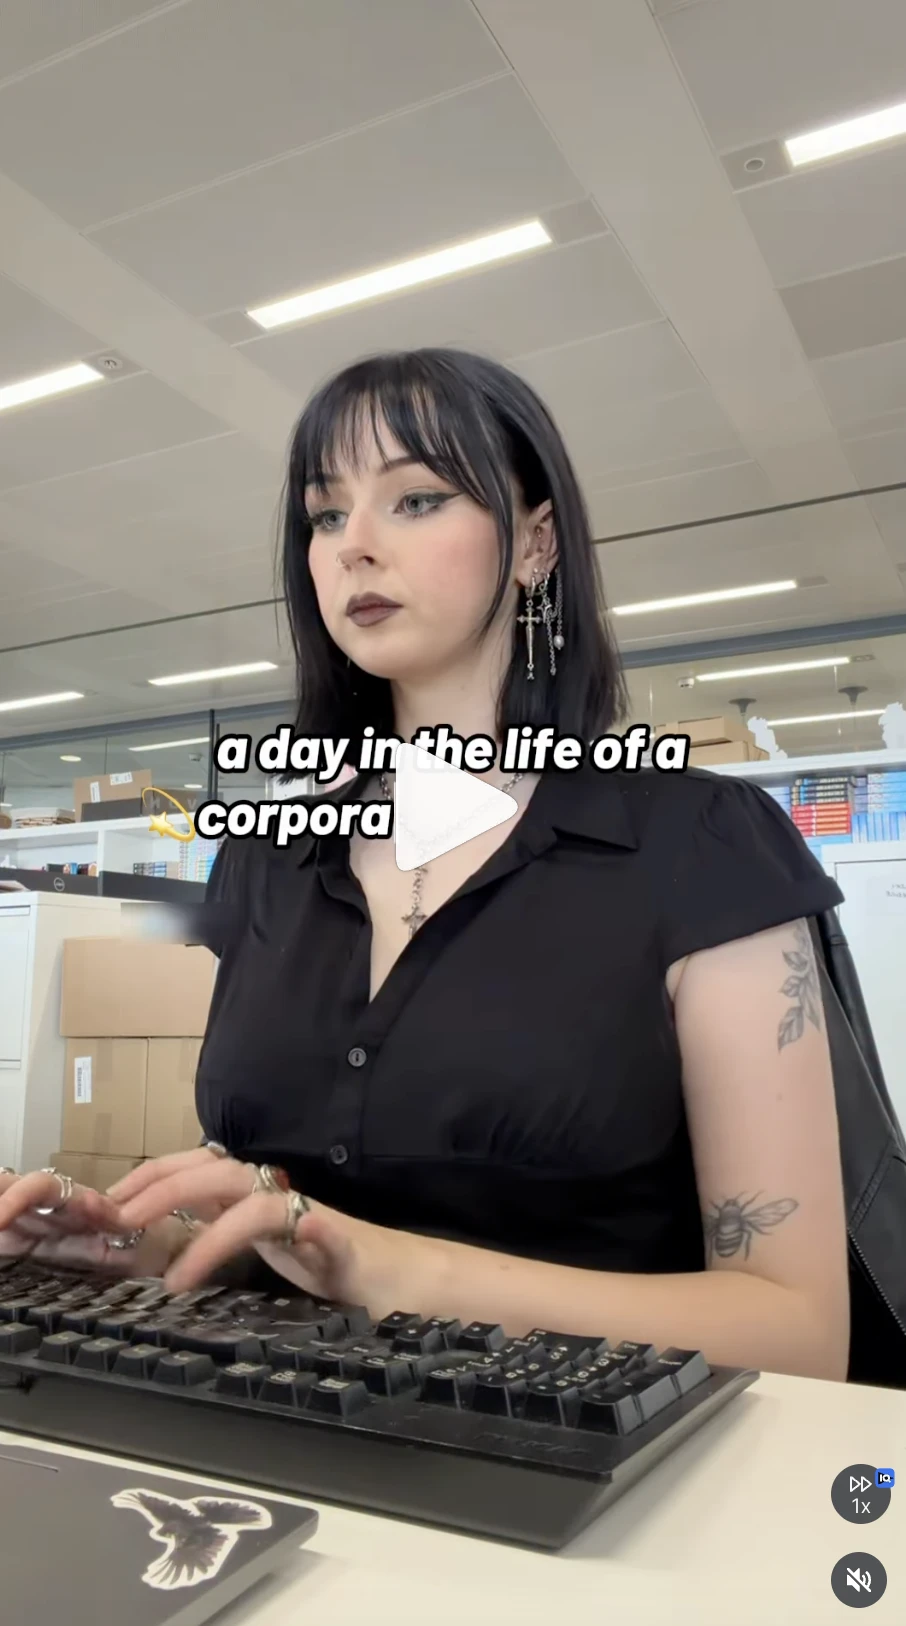
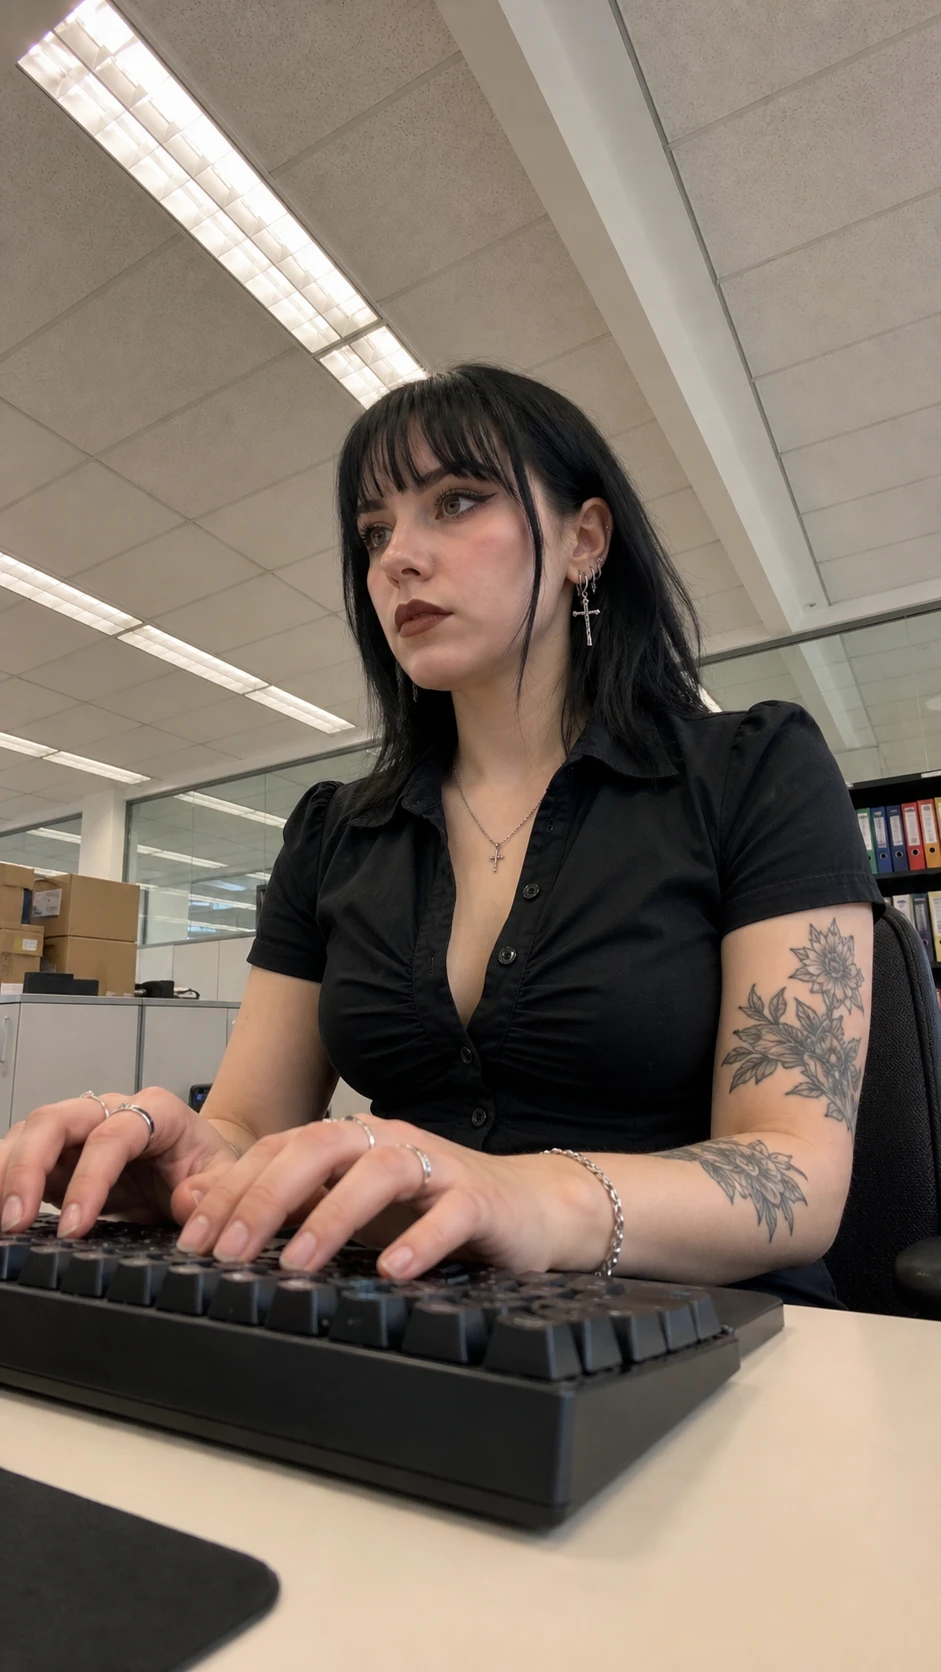
Upload the screenshot you want to recreate. Astra describes that exact image in detail: the camera, lighting, angle, subject, environment and everything else required to rebuild the frame. It leaves out captions and graphical overlays, but it can keep text that naturally exists inside the scene. GPT Image 2 then receives the finished text prompt, not the screenshot.
I want you to reverse engineer this image exactly - camera, lighting, angle, subject, environment etc. Go as detailed as you need then output a prompt but do not include text, graphics or overlays. You can include text IN the image but not captions or graphical overlays. Output a prompt to create this exact image only.
Workflow 2: make a fixed-camera shot feel real
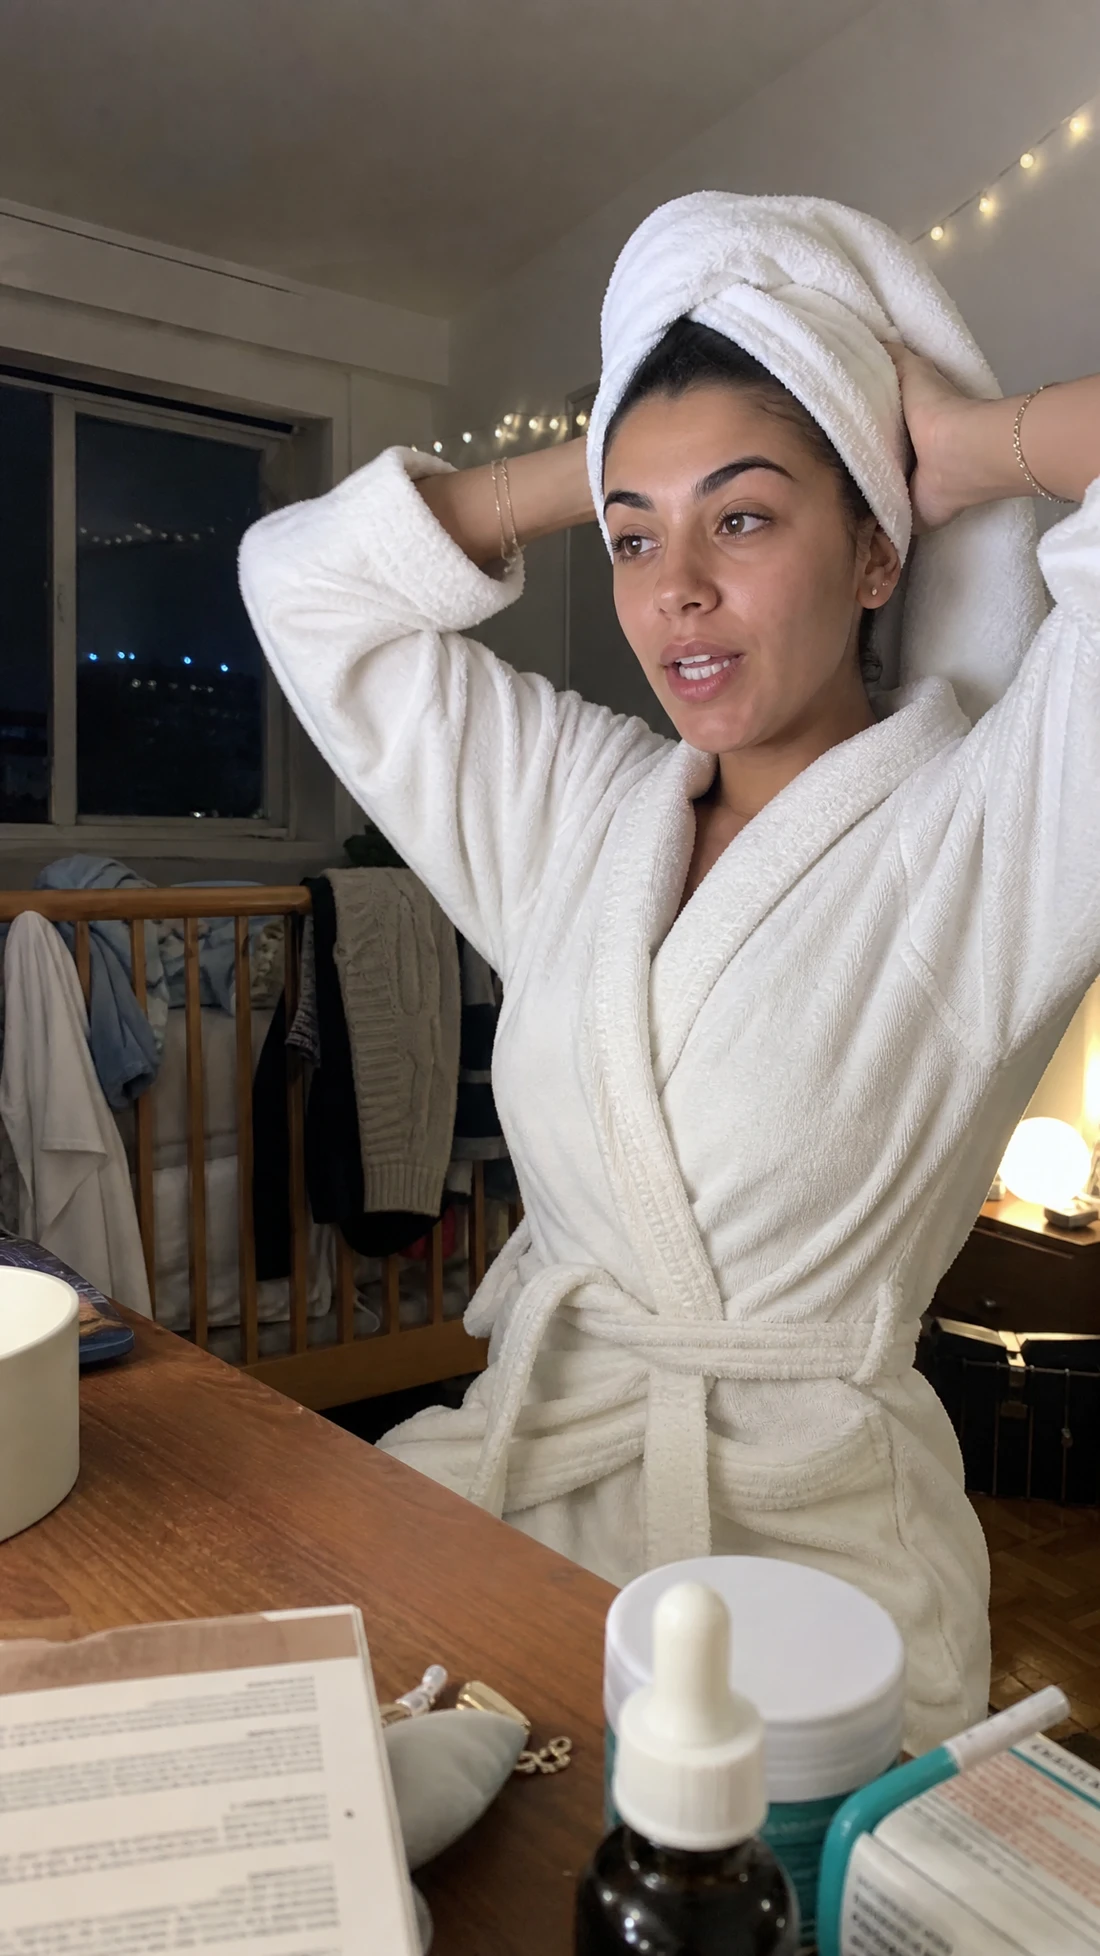
This branch starts with text only. Give it the person, room and action in ordinary language. It keeps your idea, then applies a fixed, propped-phone camera setup with sharp facial detail, believable smartphone texture and enough imperfection to avoid the polished AI look.
You will receive a rough description of a UGC shot.

Keep the requested person, action, environment, props and mood. Rewrite it as one complete 9:16 image-generation prompt for a candid but fixed-camera smartphone frame.

The phone should feel mounted, propped on a surface or held in a steady tripod-style position, but no phone support or tripod may be visible. The subject is not holding the camera and no arms should reach towards the lens. Use a believable phone-camera height, a subtle wide-angle perspective and slightly incidental, off-centre framing rather than perfect symmetry.

Keep the face, eyes and important subject detail sharply in focus. Use realistic smartphone depth rather than heavy portrait-mode blur. Include visible pores, natural skin texture, slight imperfections, real phone colour science, natural smartphone HDR, mild highlight clipping, faint sensor noise, minor compression and subtle lens distortion. Use neutral or cool natural light unless the input clearly asks for another motivated source.

The finished frame should feel ordinary, paused from real life and accidentally well captured. Avoid cinematic lighting, studio polish, glossy or hyperreal rendering, waxy skin, beauty filters, skin smoothing, perfect symmetry, a centred headshot, excessive bokeh and soft facial focus.

Output the final image prompt only. No explanation, heading or preamble.
The practical rule:
- Use the original Natural UGC block for handheld, selfie, POV and moving frames.
- Use the UGC Tripod Styler when the phone is planted and the face needs to stay sharp.
- Use the Exact Image Reverse Engineer when you want to recreate a supplied frame from text without its captions or graphical overlays.
I left GPT 5.5 and Astra wired into the workflow so you can compare them on the same input. My current winner is Astra for the prompt, followed by GPT Image 2 at 2K, Medium, 9:16 for the generation.
Open and copy the UGC Styler workflow →A new Pletor account includes 200 free credits, which should be enough to test a few examples. You'll get 20% off Pletor if you do sign up.
Video Generation
You've got your start frame. Now we bring it to life.
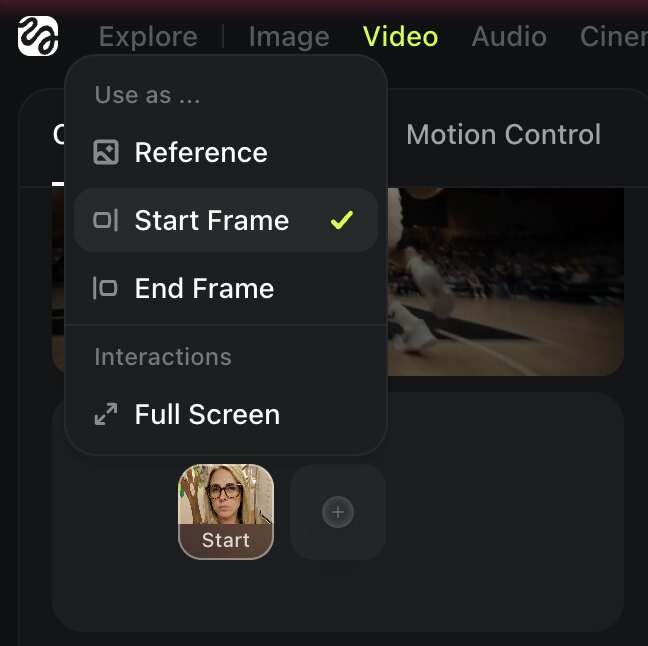
One easy thing to miss: in Higgsfield, when you add your image to Seedance, click "use as Start Frame" (not Reference). Reference borrows the look; Start Frame actually animates that exact image, which is what you want here.
Here's the good news: if the image is the hard part, the video is the fun part. And the single biggest mistake people make here is overcomplicating it. So before any templates, understand the philosophy, because it's the opposite of what most people do.
"Start simple and improve on your prompts. Let the model do the work."
Keep the prompt stupidly simple.
Don't write a paragraph. Don't get AI to write you a flowery cinematic prompt. Picture the scene in your head, describe it plainly, generate it, and then only add instructions to fix whatever the model got wrong. That's the whole method. Simple prompt, look at the result, adjust. You are directing, not writing an essay.
"You're directing, not writing an essay. Picture the shot, say it plainly, fix what's wrong."
What actually goes in a video prompt.
For a talking-head UGC shot, you only need some of these, and often just the first two or three:
- What they say (the dialogue, in quotes)
- The accent (e.g. "in a British accent")
- The expression or emotion (e.g. "smiling," "frustrated," "excited")
- A bit of direction (what they're doing, where they're looking)
- Camera instruction if you need it (e.g. "handheld camera movement," or for a static UGC shot, "no camera movement, do not push in on her face")
- Negative prompts for anything you don't want (e.g. "no background music, no sound effects")
She says "your line here" in a (accent) accent, (expression, e.g. smiling, a bit frustrated).
She is (what they're doing / where they're looking).
(Camera, e.g. no camera movement, do not push in on her face.)
(Negatives, e.g. no background music, no sound effects.)
That's it. Start with the dialogue and expression, generate, and add the rest only if the model gets something wrong.
Prompting expression. Keep it plain and human. "Smiling," "a bit frustrated," "excited," "serious", the model understands normal emotional words, so you don't need to overdo it. Start subtle; you can always push it stronger on the next generation if it's too flat. And remember expression is often more important than the exact voice, especially when you're testing at volume, so if a take nails the feeling, that's usually the one to keep.
Directing a shot: from simple to layered
The more that happens in a clip, the more you have to spell out, including the timing. Here's the same shot getting progressively more directed, so you can see how the prompt grows.
Level 1, one person, one line. The simplest case. Just the dialogue and an expression.
She says "you won't believe what happened today," smiling.
Level 2, add an off-camera voice. Now there are two speakers, so you tell the model who says what, and that the second voice is off camera.
She says "you won't believe what happened today." An off-camera male replies "go on then."
Level 3, add beats and timing. This is where most people go wrong, they expect the model to guess the rhythm. It won't. You have to write the timing: the pause, the reply, then the reaction. Spell out the order of events.
She says "you won't believe what happened today," then pauses. An off-camera male replies "go on then." She THEN leans in and says "we got the deal."
See how it grows? Each added element, a second voice, a pause, a physical action, has to be stated, and the sequence has to be explicit. The model does exactly what you choreograph, no more, no less.
"The model does exactly what you choreograph, no more, no less. If you want a pause, write the pause."
Two things that make layered shots work:
- Write the timing, not just the words. "Pauses," "then," "after he finishes", these ordering words are what keep the performance from collapsing into everyone talking at once.
- Remember the fingers trick (below). The more beats you add, the longer the clip needs.
Prompt one line at a time (mostly). Seedance handles multiple lines and back-and-forth well now, so this is no longer a hard rule. But one line per clip is still the safest for expression and lip-sync, and Omni in particular still prefers it. Keep clips a sensible length, around 6 seconds (6-8 for a longer line). When in doubt: one line, one clip.
The timing trick. Count your dialogue out on your fingers to feel how many real-world seconds it takes to say. If your line needs six seconds, don't generate a five-second clip, your words will get cut off. If anything, add a second of buffer. Two people going back and forth needs more breathing room than one person talking, so give it room.
Then adjust. If she takes too long, or there's dead air at the end, regenerate a second shorter. If it feels rushed or words get cut off, add a second.
Google Omni 1.1 is now my value pick for UGC
I've been using Omni for real ad production, and right now it is the most efficient model I've found for realistic UGC. It gives me the best balance of delivery, expression and cost. The lips can still be slightly less convincing than Seedance on some lines, so check the mouth closely and regenerate anything that feels off, but the hit rate is excellent.
The old version was also stuck at 720p. Omni 1.1 now lets you output at 1080p or 4K, although Google is clear that both are upscaled rather than native renders. It also adds cheap 360p drafts, first-and-last-frame control, scene extension and short video references. For ordinary talking-head UGC, the resolution upgrade is the bit you'll notice first.
You can use Omni 1.1 inside Higgsfield or go directly through Google Flow and Google AI Studio. My practical workflow is still simple: make the start frame, write one natural line, generate the clip, check the lips and delivery, then keep the best take.
One UK-specific limitation: Google's documentation says uploaded-video extension is not currently available in the UK, EEA or Switzerland. Extending a video generated by Omni is still supported.
A note on which model does what.
You met the models in the Tools section. Here's how they behave once you're actually generating:
- Seedance handles multi-line and back-and-forth dialogue best, and takes audio/video references (which we'll use heavily in the next section). My premium fallback for harder shots.
- Kling gives good lip sync cheaply, but the voice is the weak point, it can sound a bit tinny next to Seedance.
- Google Omni 1.1 is now my best value choice for single-person UGC. Delivery is excellent for the cost, but inspect the lips and listen for skipped words before you approve a take.
Here's exactly what I ran, so it's a fair test. Same start frame into all three, same prompt:
She says "okay so, this is a quick test to compare video models. Here's me" (smile) "here are my teeth" (smiles with teeth) "and what do you think about my voice?" Then she holds a peace sign up and smiles at the end. Natural, subtle selfie handheld camera movement.
This comparison was recorded on the original Omni model. Settings were identical: 720p, start frame, 8 seconds. And here's what each one cost to run at the time, which matters as much as the output:
- Kling — 16 credits
- Gemini Omni — 24 credits
- Seedance — 36 credits
What I found, model by model.
Kling 3.0. As you can see, it's got the worst visual fidelity and the most unnatural expression of the three. For talking-head UGC I'd rule Kling out as a serious competitor.
Gemini Omni. Honestly, near perfect. The little lip smack before she talks and the cadence feel real. The main things to inspect are the lips and the words, especially on longer or back-and-forth clips. For a single-person talking head it was already the best price-to-value in this test, and Omni 1.1 is now the version I'd reach for first.
Seedance 2.0. Great expression, but the camera movement comes out slightly choppy. Upscale to 30fps (Part 4) and it smooths right out, so upscale it, though honestly the choppy handheld can even work in your favour for a candid feel. It also holds on to a little of GPT Image 2's "AI sheen."
TLDR.
- Kling 3.0 — not worth it.
- Gemini Omni 1.1 — my best value choice for one-person UGC.
- Seedance — the premium option for when Gemini doesn't cut it, or the shot's more complicated.
One continuity tip for later. If you're planning to cut two clips together, force the camera to stay still on both (e.g. "no camera movement, do not move the camera in"). That way the last frame of clip one and the first frame of clip two line up, and you get a clean cut instead of a jarring jump.
Your task — take your start frame and animate it with one simple line of dialogue. Keep the prompt short. See what you get, then adjust.
Google Flow for longer videos
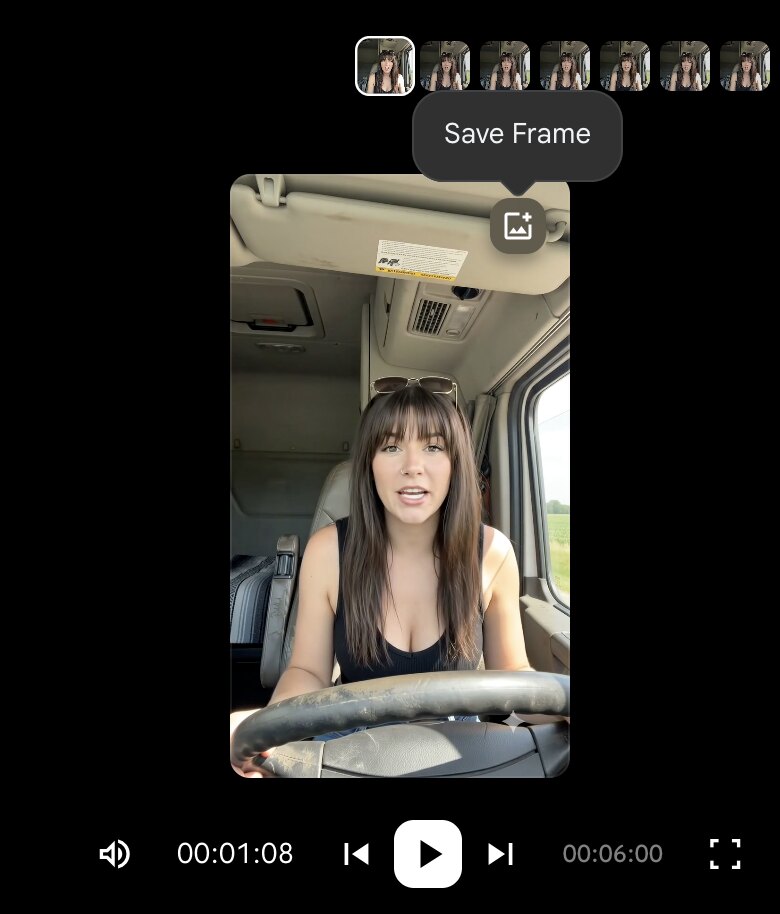
I don't personally use this, but if you want the option, here's how it works. For videos longer than about 30 seconds, Google Flow (Omni) has one genuinely useful feature: you can save the last frame of a clip and use it as the start frame of the next clip, so you're chaining scenes together instead of always starting from the same frame. You build the whole thing up scene by scene inside Flow, which has a basic built-in editor, then render it out and finish it properly in CapCut or Premiere. For UGC you can usually just cut between clips and it won't look abnormal.
Two honest caveats, which are why I don't rely on it:
- Omni mangles the words a lot. It skips or garbles dialogue more than Seedance, so expect more takes to get clean lines. (Prompting one line at a time helps.)
- Watch the gaps. There can be a gap between the end of one clip's sentence and the first frame of the next. If you're cutting tight for social anyway, and you should be, that chaining advantage mostly disappears, because you're trimming those transitions out regardless.
So: a real option for longer, scene-based pieces, but for tight, punchy social UGC I'd still generate clips individually and cut them together myself.
A few Omni gotchas worth knowing (learned the hard way, so you don't have to):
- Force the UGC pronunciation. It sometimes struggles to say "U.G.C" correctly. Typing it out as "U G C" or "U.G.C" fixes it.
- You may need a personal Gmail. Google Flow wouldn't work on a business/workspace Google account for me, I had to set it up with a personal Gmail.
- Keep hands away from the steering wheel. In a car scene, hands on the wheel made the model think she wanted to drive, and it animated her driving off. Hands in the lap or gesturing, not on the wheel. The wider lesson: the model reacts to the context of the shot, so if there's something in a person's hands there's a good chance it'll start using it. Set the scene so the props match what you actually want them doing.
- Mind your seating angle for noise. Sitting at certain angles in a car picked up annoying ambient/background noise in the generation. Small positioning changes reduce it, and you can clean audio up in post (Part 4).
Consistency
This is where most people fall apart, and where you're about to pull ahead.
Making one good clip is easy. Making three clips of the same person, with the same voice, in different shots, that's what an actual ad needs, and it's where it usually goes wrong. You make a great talking-head clip, then the next clip of "the same" person comes out with a different face and a different voice, and the illusion is dead.
So this section solves two problems: keeping the voice consistent, and keeping the character consistent across different locations.
Problem 1: Consistent voices.
Quick reality check first. For most AI UGC, we're not making complicated, cinematic pieces, we're testing at volume. So honestly, a lot of the time I focus on getting the expression right and let the voice be whatever the model gives me. A consistent voice is genuinely the biggest bottleneck in AI video as I write this. There are solutions in progress and it's getting better fast, but I'd rather be straight with you: if you're pumping out volume to test, don't let voice-matching paralyse you. Nail the expression, ship the content, and use the methods below when consistency actually matters.
"For volume, nail the expression and let the voice be what it is. Perfect voice-matching is the bottleneck, don't let it paralyse you."
Here's the thing to understand about how these models work right now: when you generate a video, the model assigns your character a voice, seemingly at random. The good news is there's a logic you can control. Here are three ways to keep a voice consistent, from easiest to most reliable.
Method 1, reuse the same start frame. The simplest one. When you generate from the same starting image, the model tends to assign the same voice each time, even without you prompting for it. So if you keep using the same start frame for your character's clips, the voice usually stays consistent on its own.
Method 2, the audio reference (the reliable one). This is the proper fix, and it's newer, you couldn't always do this. One thing that'll make sense of these prompts: in Higgsfield you reference things with the @ symbol. Upload an image and you point to it as @image1, a video as @video1, audio as @audio1. That @ is how you tell the model which asset you mean, and it references anything you've uploaded. One caveat worth knowing: audio references only work with Seedance right now, so make sure Seedance is your selected model before you try this.
Upload a voice sample (from ElevenLabs, or any clean audio), then prompt:
use @audio as a reference for the voice, have @image say: "your script"
Now your character speaks in that exact voice, every time, across every clip. This is how you lock a voice properly. (Before this existed, you had to generate a black-screen video with just the audio and upload it as a video reference. Now it's direct.)
Method 3, the video reference. Same idea, but with a video. Upload a clip of a real person talking, and the model lifts their voice and accent onto your character.
use @video for the voice and accent, have @image say: "your script"
One important note: famous people get blocked. If you upload a clip of a celebrity, moderation will stop you, because using a real, identifiable person's likeness or voice without permission is exactly the line we don't cross. Use voices you have the right to use. Inspiration, not faking, all the way through.
A quick tip if a voice drifts. If your accent comes out slightly different between clips, export the audio and run it through ElevenLabs' voice changer with a similar target voice, it'll unify them. Works best when the voices are already close. American to American, fine. American to British, it gets weird.
Problem 2: Same character, different location.
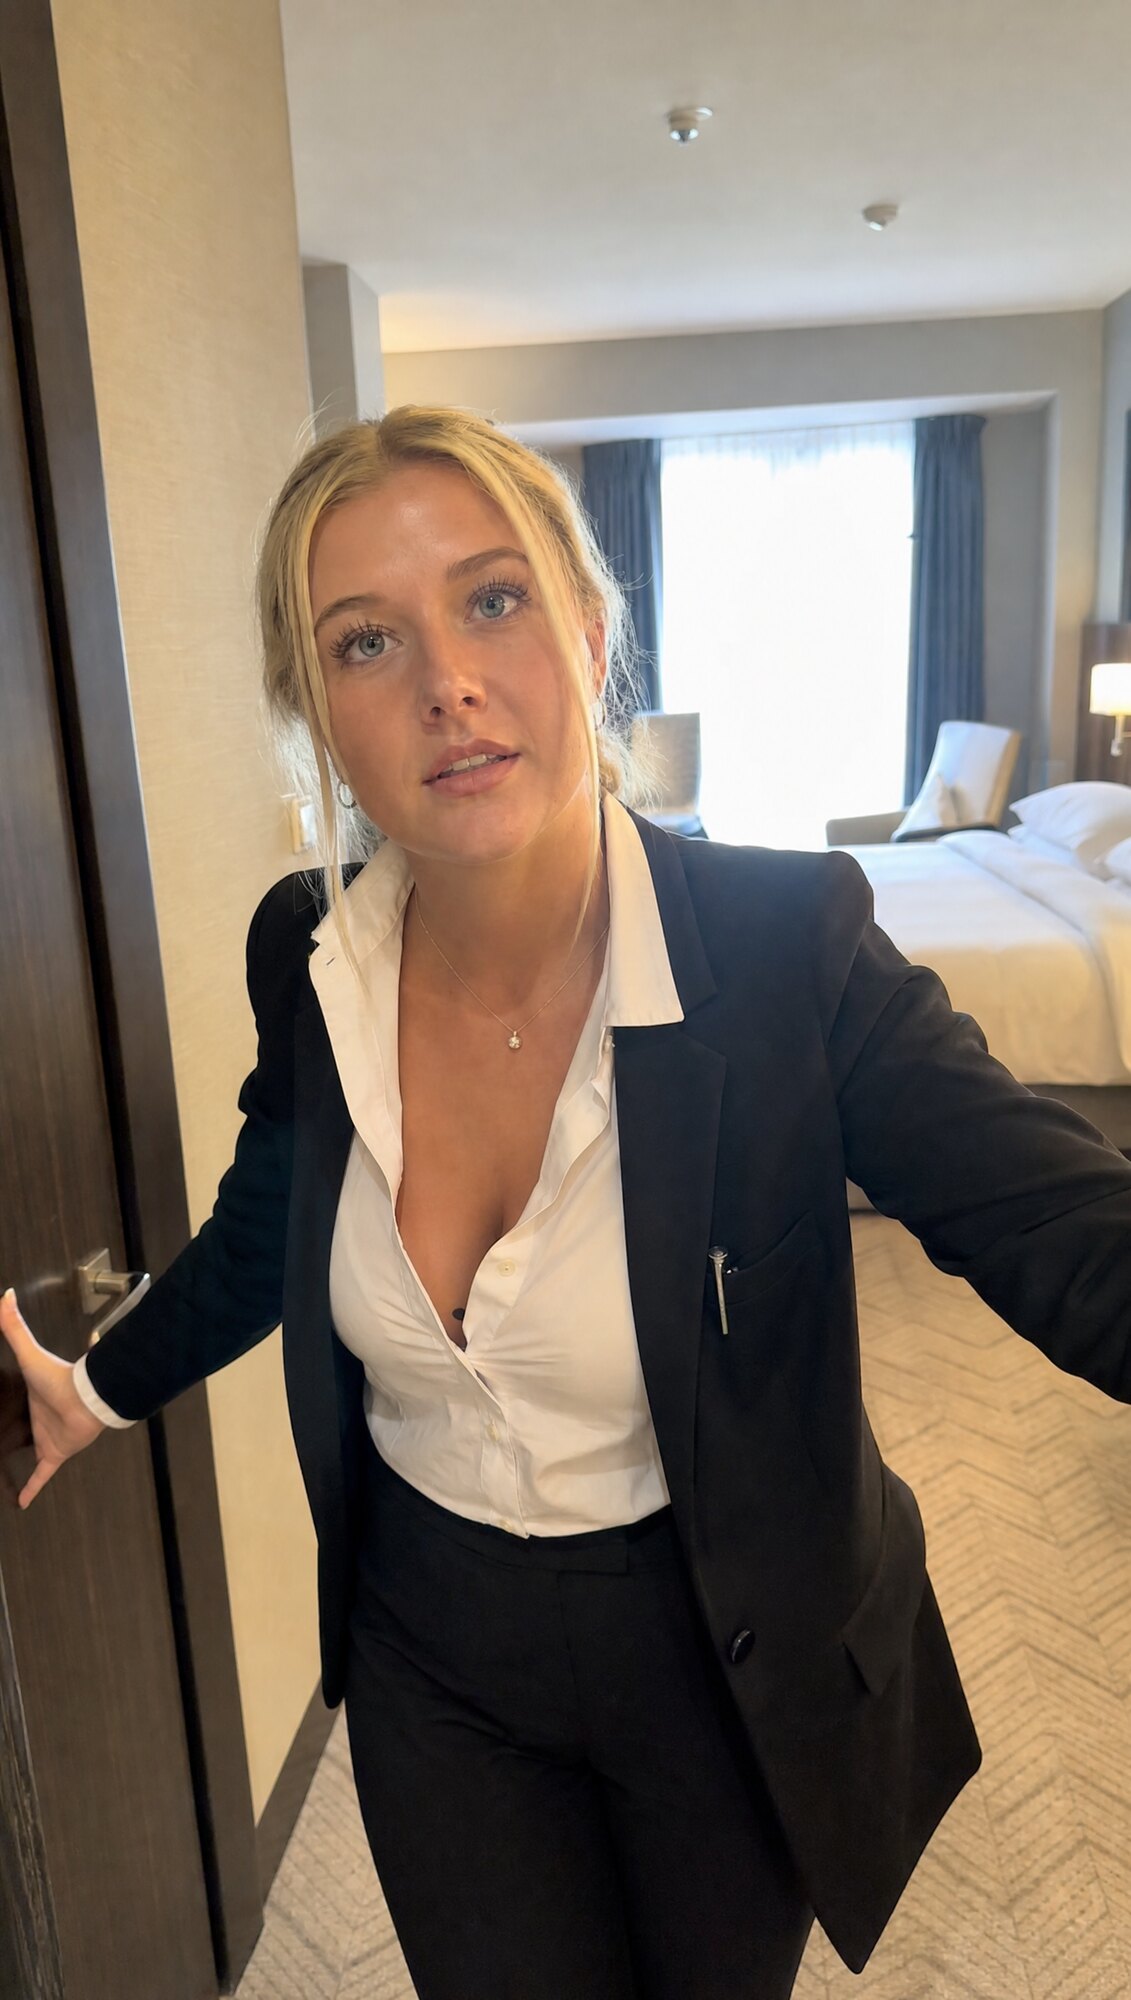
You've got your person nailed, now you need them in a second setting without them turning into a different human. Don't generate from scratch. Feed the model your existing frame and use this formula. It's the same shape every time: take this, put them here, always include this.
I want you to take this image. This woman, her outfit, the lighting and camera aesthetic. Keep the camera, lighting, composition and character exactly the same, but have her in (new environment), (pose / where she's looking). Make sure to include these details for consistency: (paste your UGC Aesthetic prompt from Part 1)
Same person, new scene. Save that prompt, you'll use it constantly.
Now here's the idea that ties everything together.
Look at all three consistency prompts. Audio reference, video reference, location swap, they're the same shape. In my videos you'll hear me say it like this, and it's the most useful sentence in this whole guide:
Using (input) have (subject) produce (output).
use this · have this · output this
"Use this, have this, output this. That's the blanket statement you can take to everything in AI."
Use this input (an image, a video, an audio), to have this subject do the thing, and output this result. Use @audio1 to have @image1 say this line. Use @video1 to have @image1 speak in that accent. Take one thing, use another, make a third.
That's the blanket statement. Once you see it, you can take that logic to pretty much everything with AI, including tools I haven't shown you. You stop memorising prompts and start understanding the machine. It's also how you work out which model to use: need a video reference? Ask "which model accepts a video reference?", that's Seedance, so that's your answer. The question tells you the tool.
Your task — make the same character speak in two different clips with a locked voice, using the audio reference method. Then put them in a new location. That's a real ad's worth of consistency.
Editing, Captions & Upscaling
You've got your clips. Now we finish them so they look real. This is the stage most people skip, which is exactly why their content screams AI.
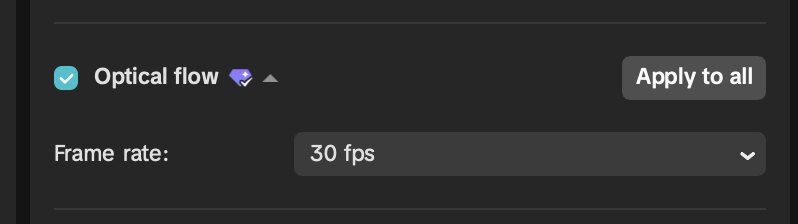
Get to 30fps, and don't over-polish. AI models output at 24fps; real phones shoot 30fps. That gap is part of what makes AI footage feel subtly "off." Import your clip into CapCut and use optical flow to reach 30fps. And resist the urge to over-sharpen. Real UGC doesn't look crisp and clean, it's a bit soft and imperfect, so leave it rough. Over-polish a candid clip and you've made it more fake, not less.
"Real UGC doesn't look crisp and clean. Over-polish it and you've made it more fake, not less."
Bonus — Upscaling close-ups with Topaz Astra. There are times you want crispness, and this is the exception, not the rule. If you've got a close-up, detail-heavy shot, tears running down a face, skin texture, a product macro, a hero beauty moment, upscaling can genuinely lift it. This does not apply to candid, everyday UGC, only to those tight, detailed shots.
A real example: I made a crying reel where the camera pushes in super close on tears running down her face. That's the perfect case for upscaling, at that distance you want the detail to hold up, because the whole shot lives or dies on it looking real up close.
My tool for this is Topaz Astra (the cloud version). → topazlabs.com/astra. Settings I use:
- Starlight 2.5 Precise (the "Fastest" option is lower quality, avoid it)
- Output resolution: 1080p (4K is available but pointless for social)
- Output frame rate: 30fps
Cost is around 5 credits a clip. Processing varies from a couple of minutes to an hour, so don't panic if it's slow.
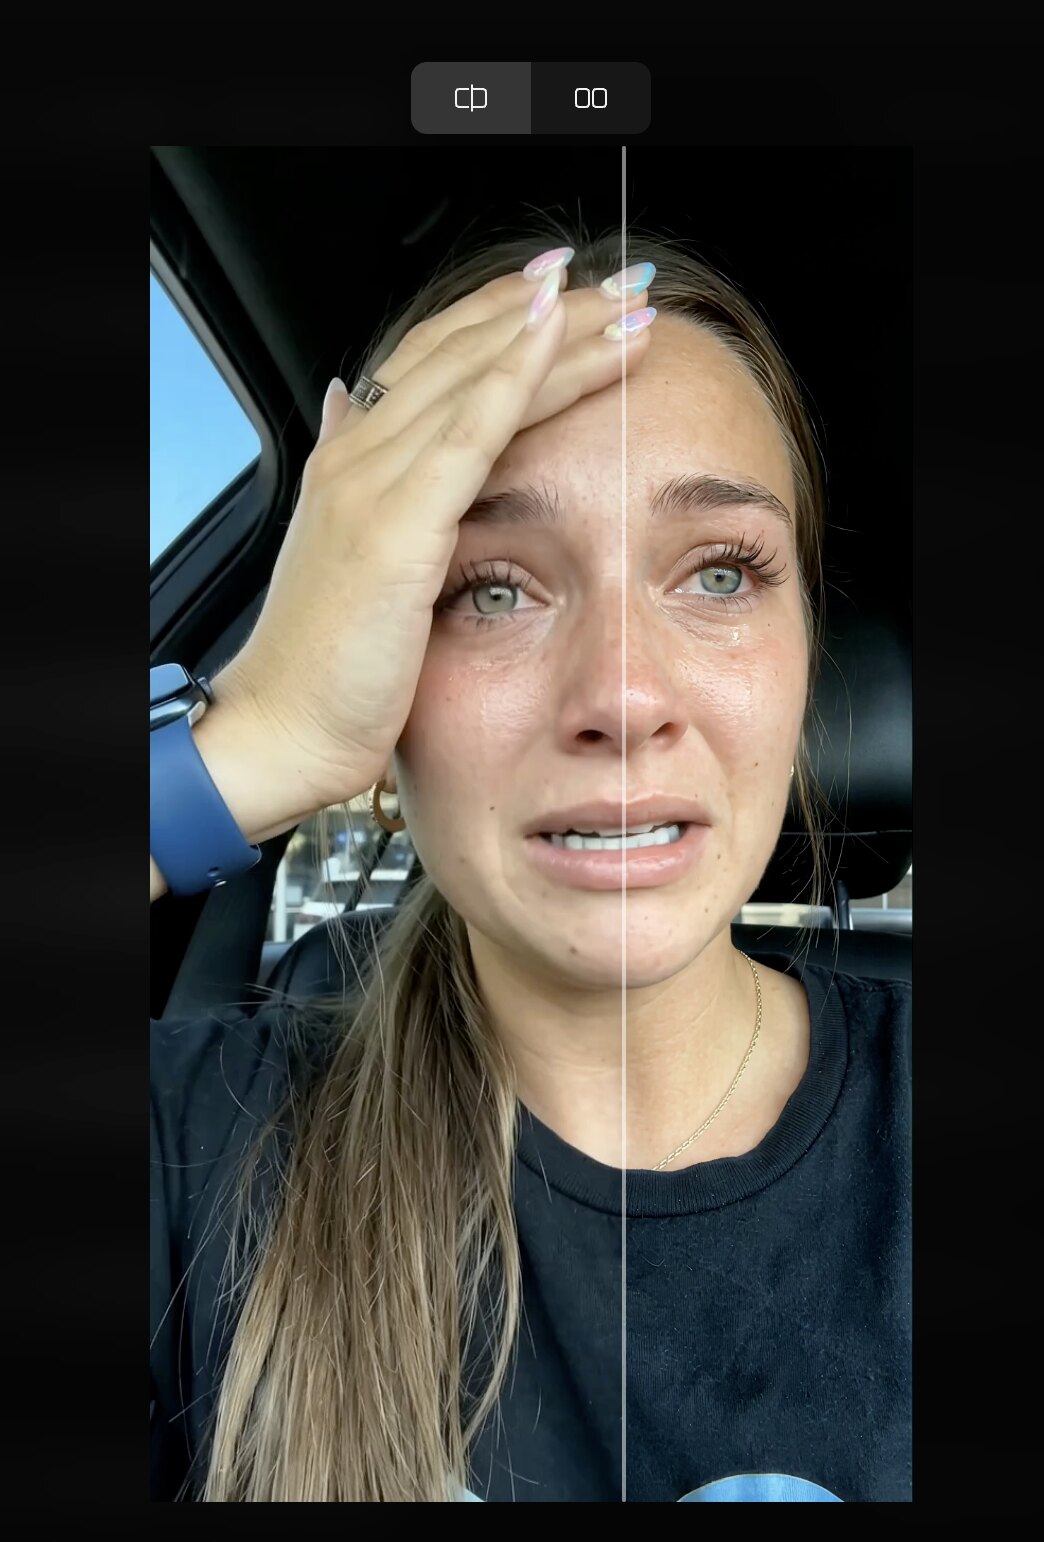
The rule of thumb: authentic, raw UGC → CapCut optical flow to 30fps, keep it rough. Close-ups and detailed shots on viral reels → Topaz. Match the tool to the shot.
Editing software. Use whatever you like. CapCut is simple and has a free version. I use Premiere Pro for tighter controls. Whatever you use, cut your audio gaps tight, especially for social, dead air kills a short.
Fix inconsistent audio. If your room noise or volume jumps between clips, run it through dialogue cleanup, Premiere Pro's, CapCut's AI, or Adobe Podcast Enhance, to keep the sound consistent across the whole edit. Inconsistent room tone between stitched clips is a dead giveaway.
Colour: cool it down and flatten it. AI images often come out too warm or too high-contrast. Use the colour slider to drop the contrast slightly, and play with highlights and shadows to get a cooler, flatter, more natural look. Real phone footage is flatter than AI thinks it is. Do this on one adjustment layer and spread it across all your clips, so the whole ad matches instead of grading each clip separately.
"AI renders warm and glossy. Real footage is cooler and flatter. That one adjustment sells realism more than anything else."
Captions. CapCut has one-click caption templates, generate them and adjust to taste. Most people watch on mute, so captions aren't optional.
Bonus, the fake Snapchat overlay. A semi-transparent black bar near the top of frame plus text in Helvetica Neue with an emoji reads as a real screen-recorded Snapchat story.
Platform safe zones: the actual margins
Every platform covers parts of your frame with its own UI, captions, buttons, profile info, and it's different on each one. The trick is to design for all three at once so the same video works everywhere. As a rule of thumb, keep anything important, text, faces, your hero moment, out of these zones:
- Bottom ~15-20%: captions, usernames, and the "..." menus all live down here. The worst offender, keep it clear.
- Right ~10-15%: the like / comment / share / follow buttons stack up the right side on TikTok and Reels.
- Top ~10%: occasional status bars, tabs, and search icons.
Keep your key content in the middle of the frame, and treat the bottom strip and right column as no-go zones. If you design to survive TikTok, Reels and Shorts overlays, one export works across all of them, and you're not re-cropping the same video three times.
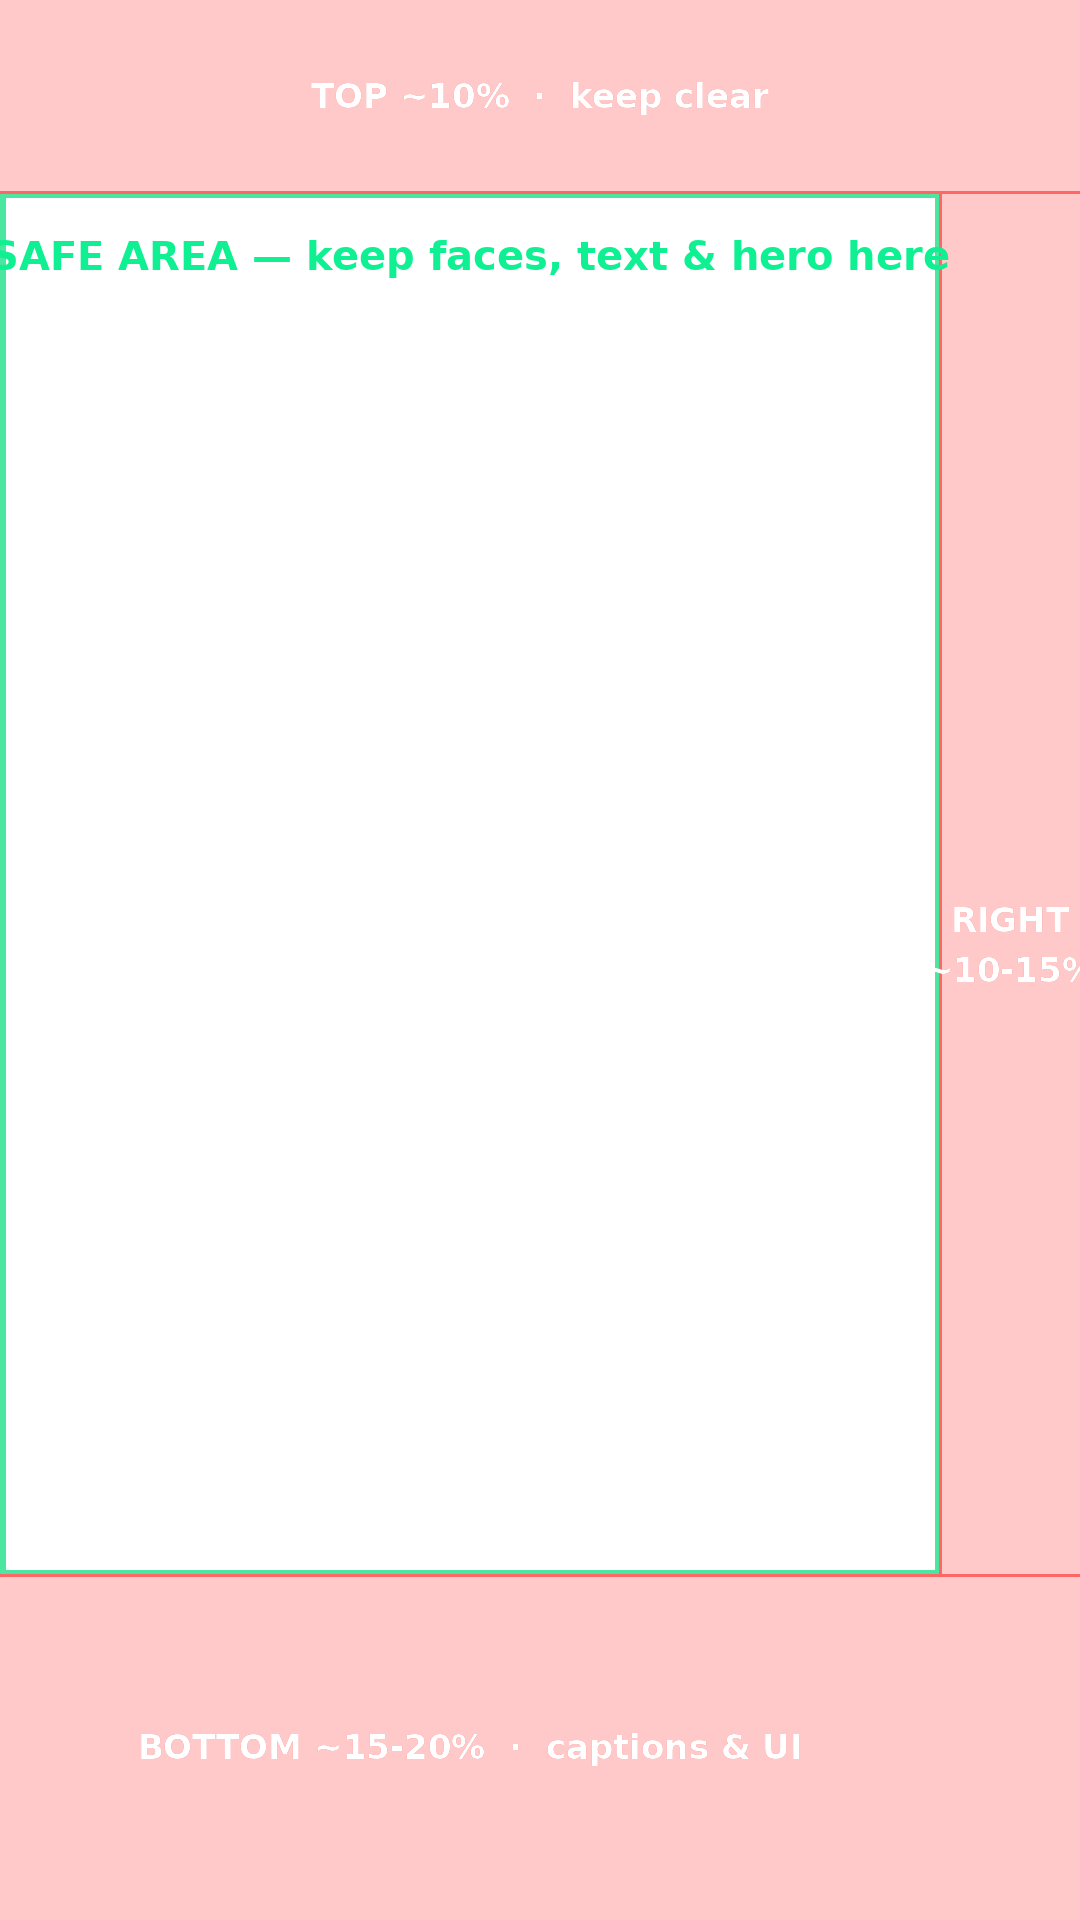
"Design for the middle. The bottom strip and right column belong to the platform, not to you."
Your task — take your clips, upscale to 30fps, cool the grade, add captions, and export. That's a finished, believable piece of content.
Putting a Full Ad Together
Everything up to now has been the pieces. This is where they become an ad. Let's walk the whole thing end to end, so you can see how the parts connect. This is the exact order I work in:
- Start with the idea. One clear message, one hook. Keep it simple, UGC lives and dies on feeling real and getting to the point.
- Make your start frame (Part 1). Pick your method and get one strong, realistic frame. Rubbish in, rubbish out.
- Plan your shots. One continuous talking-head, or a few angles: a hook, a middle, a CTA. Use the consistency methods from Part 3 to hold the person and voice across shots.
- Animate each clip (Part 2). Simple prompts. Dialogue, expression, a bit of direction. Count your timing on your fingers.
- Keep it consistent (Part 3). Same start frame or audio reference to hold the voice. Location-swap formula to move between scenes. Use this, have this, output this.
- Finish it (Part 4). 30fps, cool the grade, captions, mind your safe margins. Keep candid stuff rough; only upscale tight close-ups.
- Post it. That's the step people skip. Don't.
That's a full ad. Every piece you've already learned, in order.
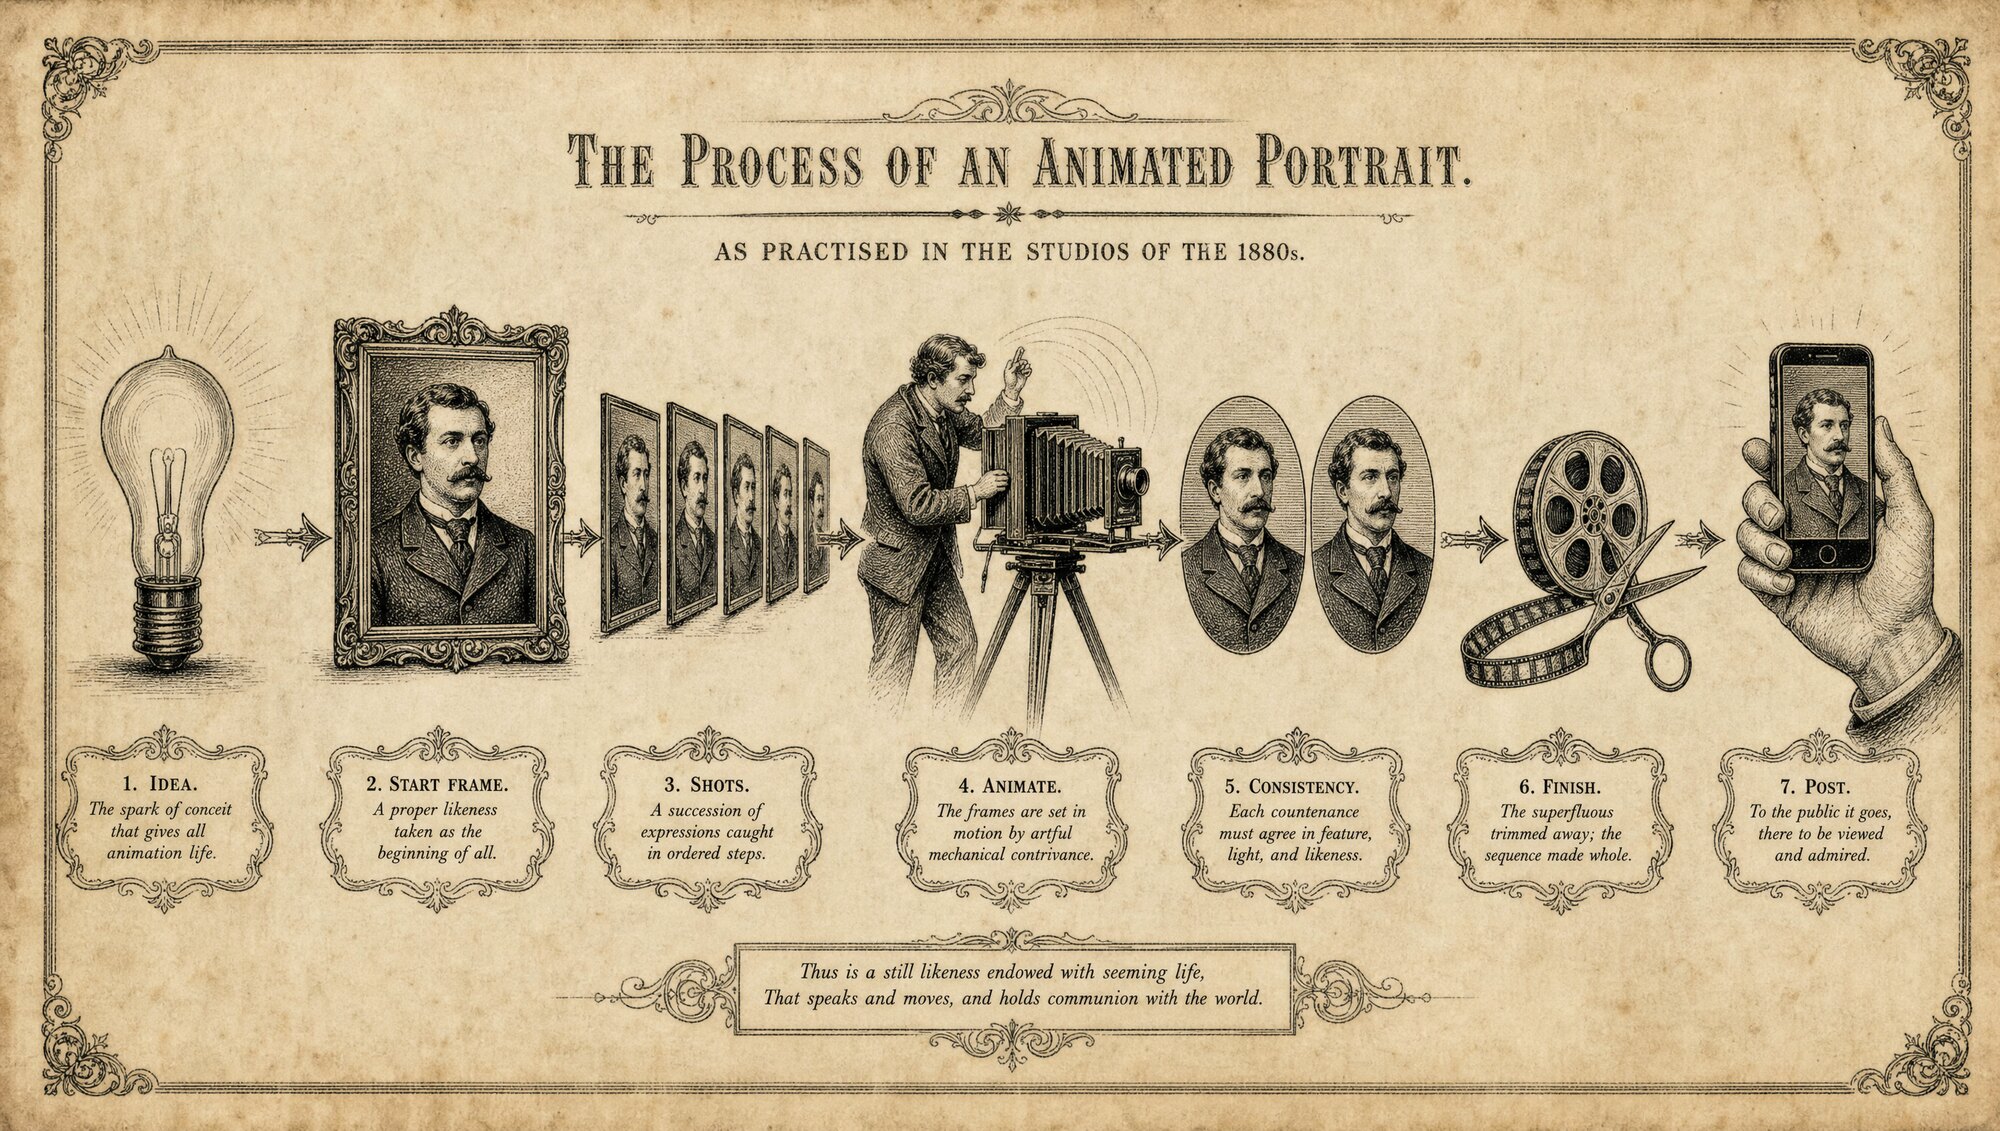
Your task — make one complete ad. Start frame, a clip or two, finished and graded, posted. However rough. You'll learn more from finishing one than from reading this ten times.
The Realism Checklist
Before you post, run through this. If you can tick all of it, you've got something that looks real.
If the last two are yes, post it.
Legal & Disclaimer
Right, the serious bit. Read it properly, it protects you.
This isn't legal advice. I'm a video producer, not a lawyer. Everything in this guide is practical guidance from my own experience. The laws around AI content vary by country and state, and they're changing fast. Do your own due diligence, and if you're doing anything high-stakes, get proper legal advice.
AI disclosure is real and growing. Platforms like Meta and TikTok increasingly require you to label AI-generated content, and a growing list of jurisdictions have their own disclosure laws. If you're running ads, that responsibility is yours. If you're making content for a client, put it in writing that disclosure decisions are theirs once you hand the work over. Don't absorb a liability that isn't yours to carry.
The two hard lines, and I mean these.
No fake testimonials. Do not create content where someone claims a result, experience or endorsement that never happened. A made-up "this product changed my life" from a person who never used it isn't marketing, it's deception, and depending on where you are it can be illegal.
No unauthorised likenesses or voices. Do not use a real, identifiable person's face or voice without their explicit written permission. Not a celebrity, not a stranger from a photo, not anyone. The models block a lot of this for a reason, and the ones that don't block it don't make it legal.
The honest principle underneath all of it: we take inspiration, we don't copy or fake. Recreating a style or a vibe you admire is fine, that's how all creative work happens. Cloning a specific real person, or inventing testimonials, is not. If you'd feel uncomfortable explaining what you did to the person it affects, don't do it.
So, to stay clean: get consent in writing when real people are involved, get proper contracts in place with clients, disclose AI where it's required, and use this skill to make genuinely good content rather than to trick anyone. Used properly, this is a legitimate, powerful way to make ads. Keep it that way, and it'll keep paying you.
Where to Go Next
Thanks for reading this far. The median online course completion rate is just 12.6%, most people buy something like this and never reach the end. You did, so genuinely, well done. I hope you're taking action and getting amazing results.
To summarise the whole thing: it's start frame plus animation. Rubbish inputs, rubbish outputs. And now that we can all generate a shot, it's the idea that wins in 2026.
"Now that we can all generate a shot, it's the idea that wins."
This guide stays current. AI moves fast, and when the tools change, I update this guide, and because you bought it, every update lands in your inbox free. You're not chasing the latest model across a hundred videos. It comes to you.
And when you're ready to go further: once you've made a few of these by hand and you understand what's happening under the hood, the natural next step is automating it, turning this whole manual process into workflows that do the heavy lifting for you, and going deeper with the full video course and community where I break it all down and give feedback on your work. You've earned the shortcut by learning the long way first. That's the right order.
On communities, one worth your money. The best AI community I've been part of is GENHQ. I'll be straight with you, it's not cheap, but it's genuinely top tier, the people and the pace of what gets shared in there is unmatched, and it's where I keep sharp. If you join through my link it supports me, but I'd only ever point you at something I actually use.
And come say hello. If you'd like to follow my work as I test AI, this is where I share it. I read my comments and reply.
For enquiries or done-for-you services, reach me at ryan@ryancollinsvideo.com.
One favour to ask. If you ever see me anywhere, a post, an ad, and you got value from this, give me a shout out. I see all my comments and I'll reply. I'm truly grateful, and I hope you enjoyed my e-book.
Life is short. Create something, send it, never look back.
Good luck, Ryan
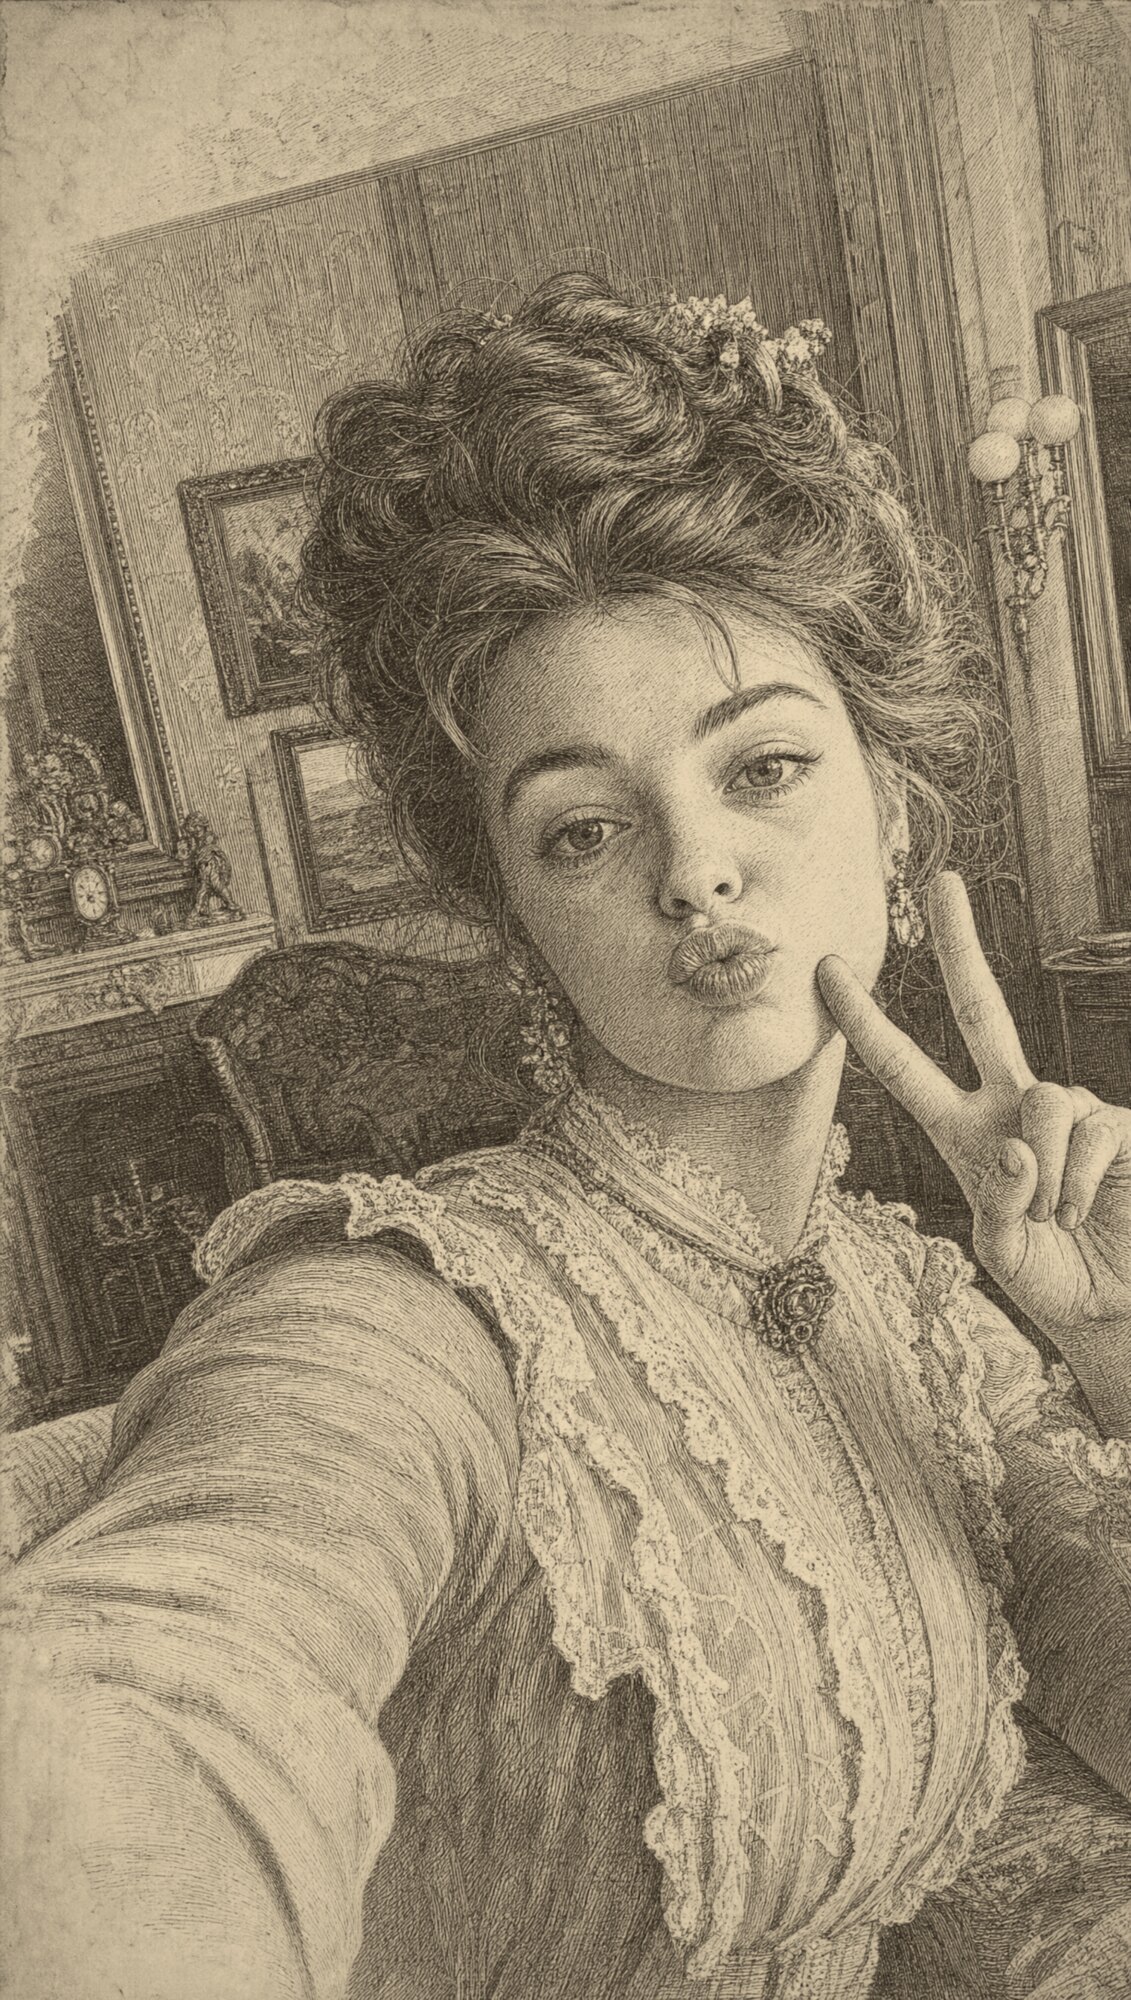
The Prompt Library
Every prompt in the guide, in one place, so you never have to scroll for one mid-build. Tap any box to copy it.
Fill the (brackets) with your own details before you run them.
Part 1 · Start frame
POV Shot front / selfie facing camera of a (demographic / clothing description) in (environment) shot on iphone, no text or overlays. He / She is looking (direction / expression) as if (talking to camera / looking out of a window etc.)
Shot on a mediocre phone camera, not a polished AI render: visible pores and realistic skin texture, real iPhone color science, natural smartphone HDR, slight overexposure with blown highlights near the window, faint lens flare at edge of frame, minor compression artifacts, faint noise, slight autofocus imperfection, framing slightly off-center, one-handed grab-shot feel, no beauty filter, no skin smoothing. Everything should feel accidental and mundane, believable as a real phone photo, avoid anything that reads as rendered or AI-generated.
I want you to reverse engineer a prompt that will get me an image like this. Ignore the overlays or text. Just analyze the camera angle, the quality, lighting, subject and context and give me a nano banana / GPT image prompt that will get me as close to this image as possible.
Take this image and replace the person with (description). Keep the camera quality, camera angle, lighting, background, composition, the person's pose exactly the same.
Take this image and keep the person, the camera angle, the lighting and camera quality exactly the same. But change the background enough so that it's not recognized - change colors, accessories, objects around the room, but keep the context of the environment exactly the same. Do not change the character at all.
Perform a strictly local edit only. Replace only the object inside the person’s hands with the supplied product. Preserve the original image outside that area exactly: no changes to the face, skin, hair, clothing, background, lighting, colour grade, sharpness, noise, texture or resolution. Do not beautify, restyle, relight, denoise or regenerate the full frame. Preserve the supplied product’s exact proportions, logo, label text and colours.

Do not have the person using the product, just holding it as if delivering a message to the audience on camera.
Part 2 · Video
She says "your line here" in a (accent) accent, (expression, e.g. smiling, a bit frustrated).
She is (what they're doing / where they're looking).
(Camera, e.g. no camera movement, do not push in on her face.)
(Negatives, e.g. no background music, no sound effects.)
Part 3 · Consistency
use @audio as a reference for the voice, have @image say: "your script"
use @video for the voice and accent, have @image say: "your script"
I want you to take this image. This woman, her outfit, the lighting and camera aesthetic. Keep the camera, lighting, composition and character exactly the same, but have her in (new environment), (pose / where she's looking). Make sure to include these details for consistency: (paste your UGC Aesthetic prompt from Part 1)
The Workflow Library
Once you've built a few of these by hand, the next step is automating the boring parts. These are the actual workflows I use, the ones that chain the prompts in this guide together so you're not copy-pasting between tabs all day. Copy any of them into your own account and tweak from there.
Quick honesty, same as always: these run on Pletor and the links below are affiliate links. If you copy one of my workflows the discount applies automatically. You don't need any of them to follow this guide, they just save you time once you know what you're doing. Two to start:
1. The UGC Generator
The full start-frame factory. Feed it your idea and it assembles the manual template and the UGC aesthetic block, then generates realistic start frames ready to animate. This is Part 1, automated.
Copy the UGC Generator →2. The Social Swap
Drop in a reference you like and a new person, and it recreates the look as your own shot. The fast way to test new avatars against an ad that's already working.
Copy the Social Swap →Links go live as I publish each workflow. Bookmark this page, it updates.