Checking workshop access…
Style Stealer Static Ads
Turn one product into twenty static-ad candidates.
Use a product page, a clean product image and a visual reference to generate ten original concepts—then run every concept through two image models and compare the results properly.
Copy the shared flow into your workspace, replace the three inputs and test one matched pair before running the full batch. You'll get 20% off Pletor if you do sign up.
Jump to the part you need.
The recording follows the workflow from inputs to matched model comparisons. Use these timestamps if you already know where you are stuck.
- 00:00 Why build this workflow?
- 00:59 The three inputs
- 02:02 Switching the reference style
- 02:44 The prompt generator
- 03:43 Splitting and routing the briefs
- 04:24 Running the batch
- 06:10 Another input: Meta ad scraper
- 07:27 Comparing both models
- 09:43 Reuse and clearer instructions
Build it step by step.
Keep the shared workflow open beside this guide. You do not need to watch the recording first. The example combines a Glossier product with Liquid Death’s visual attitude; replace both with your own inputs.
1. Replace the three inputs
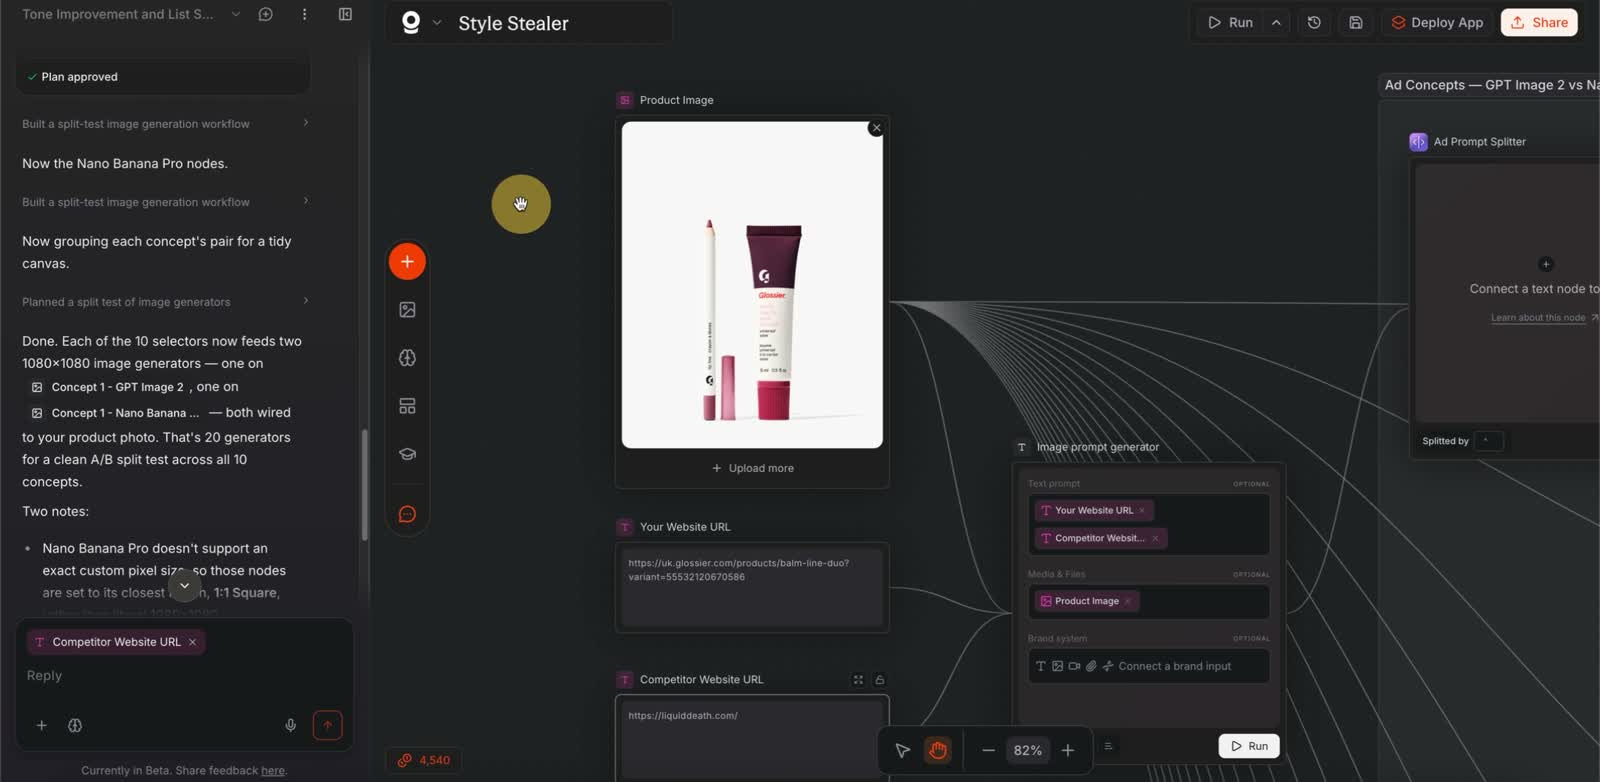
Open the shared Style Stealer workflow and make a copy in your workspace. Find these three input nodes:
- Your Website URL: paste the page for the product you want to advertise. Use the actual product page so the model can find the right features and selling points.
- Product Image: replace the example with a clear image of your product. The packaging, colour and label should be easy to see.
- Competitor Website URL: paste the website you want to use as a visual reference. Despite the node name, this can be a brand in a completely different category.
Check before moving on: your product page and product image should describe the same item or bundle. The reference URL supplies the style, not the product facts.
2. Give the prompt generator two separate jobs
Open Image prompt generator. It needs both website URLs as text inputs and the product image as an image input.
First, ask it to read your product page and extract the product name, features and selling points. Second, ask it to describe the reference brand’s typography, colours, layout, contrast and mood.
That distinction is the whole idea. We are taking descriptions of visual choices and applying them to our product—not feeding the reference brand’s finished ad into the image generator. Keep its name, logos and slogans out of the generated creative.
If a page cannot be read: supply the product facts or reference screenshots yourself. Do not treat a confident-sounding guess as product research.
3. Ask for ten complete, separate ad briefs
Each brief should describe one original ad for your product: the composition, product placement, typography, background, lighting and exact text to include. Ask for a square 1:1 composition if you are following this demonstration.
Make the ideas meaningfully different. Ten colour variations of the same layout are not ten distinct concepts. Each brief must also work on its own, because it will be sent to a separate image node.
Copyable prompt-generator instructions
This is a cleaned-up template based on the lesson, not a verbatim export of the recorded prompt. If you use it, set your splitter to the same [AD_BREAK] separator.
You will receive:
1. Our product-page URL.
2. Our original product image.
3. A reference website URL for visual style.

Read our product page. Extract the product name, features and selling points using only information explicitly supported by the supplied material. Do not invent claims, prices, offers or testimonials. If essential product information is inaccessible, ask for it before producing the briefs.

Study the reference website. Describe its typography, colour palette, contrast, composition, texture and mood. Use those design principles to develop original ideas for OUR product. Do not reproduce the reference brand's name, logo, slogans, characters or finished artwork.

Write exactly ten distinct image-generation briefs for square 1:1 social-media ads. Each brief must be self-contained and tell the image model that it will receive our original product image. Preserve the identity, packaging and proportions of that product.

For each brief, specify the composition, product placement, background, lighting, typography and exact ad text. Use supported product facts only. Vary the concept and layout, not just the colours. Make the product and main message easy to understand.

Separate the ten briefs with [AD_BREAK] on its own line. Use exactly nine separators. Do not add numbering, headings, introductory commentary or a separator after the last brief.
4. Split the list into one brief per branch
Connect the prompt generator’s text output to Ad Prompt Splitter. A separator is simply a piece of text that tells the splitter where one brief ends and the next begins.
If you are using the supplied workflow unchanged, keep its existing separator. If you paste the template above, change the splitter to [AD_BREAK] as well. The text in both places must match exactly.
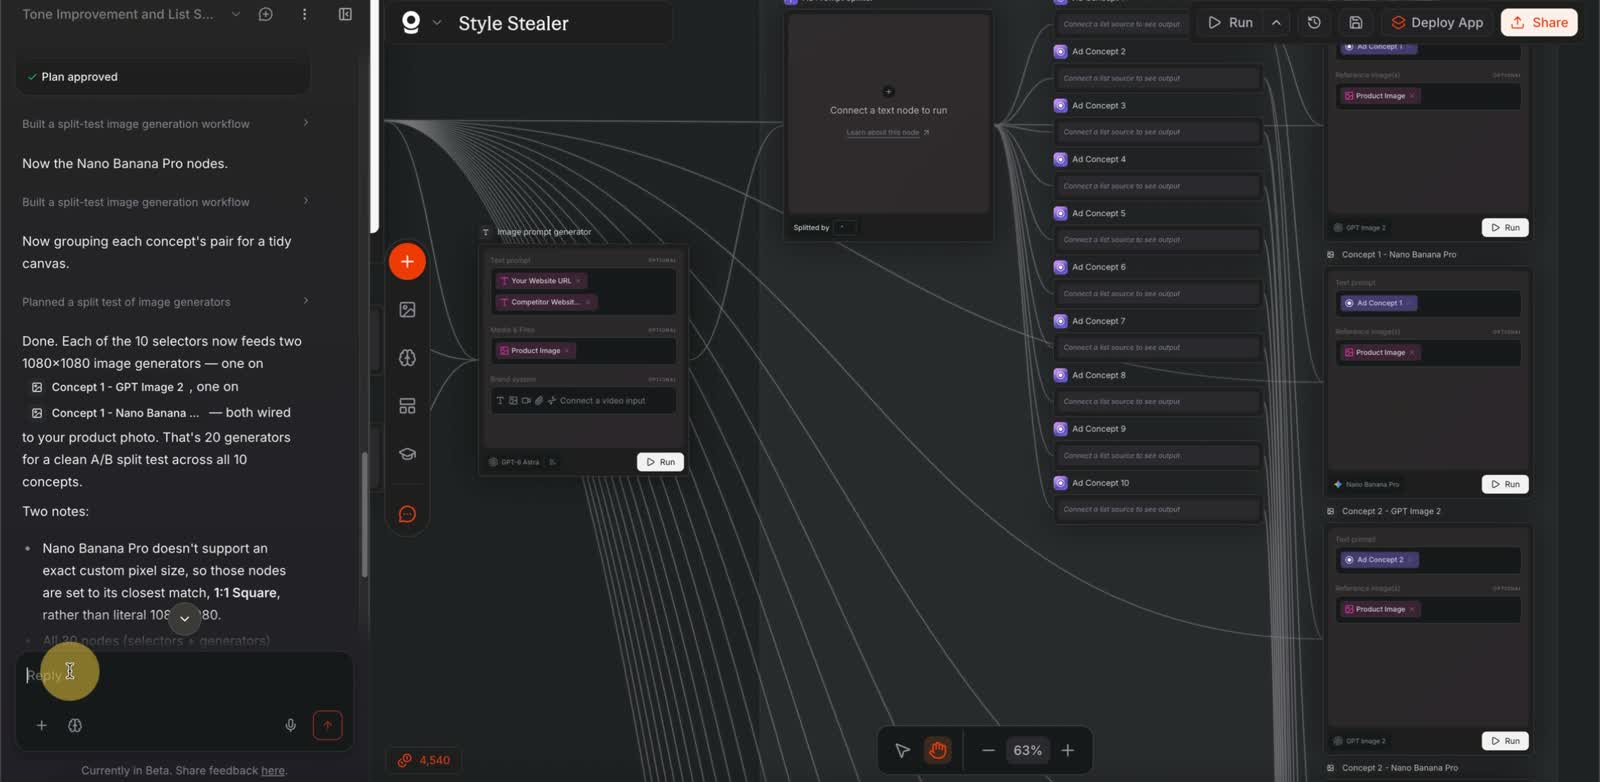
The split list feeds Ad Concept 1 through Ad Concept 10. Select a different list item in each concept node. Open a few outputs and check that each contains one complete brief—not all ten briefs, and not the same brief repeated.
5. Send the same brief to both image models
For each concept, connect its selected brief to two image nodes: one using GPT Image 2 and one using Nano Banana Pro. Connect the same original Product Image to both nodes too.
Ad Concept 1 + original Product Image
→ GPT Image 2
→ Nano Banana Pro
Repeat that pairing for Concepts 2–10.
Set both to a square aspect ratio. Available resolution controls can differ between models; the recording shows that their exact pixel dimensions need not match. Check the downloaded dimensions before using an output.
Check the wires: neither model should receive the other model’s generated image. Both start with the same brief and original product image so you can compare their interpretations.
6. Run one pair before running the whole batch
Run the prompt generator and inspect the briefs first. Then run the two image nodes for one concept. This gives you two images to check before paying for twenty.
Look for the correct product, plausible packaging, readable copy and a composition that follows the brief. If a product claim is wrong in the brief, fix the prompt generator before running the remaining branches. If the brief is correct but one image has a mistake, refine or rerun that image node.
Once that pair works, run the remaining concept pairs. Ten concepts across two models gives you twenty candidate images. Check the credit estimate first; the cost shown in the recording is not a fixed price for your run.
7. Compare matched pairs, not unrelated images
Put both results for Concept 1 beside each other, then repeat for the other concepts. Ask:
- Product: does it still look like the supplied item, with the correct packaging and proportions?
- Text: is the wording accurate and readable? Has it invented extra words or repeated the brand name?
- Layout: can you quickly identify the product and main message?
- Instructions: did it produce the concept you asked for?
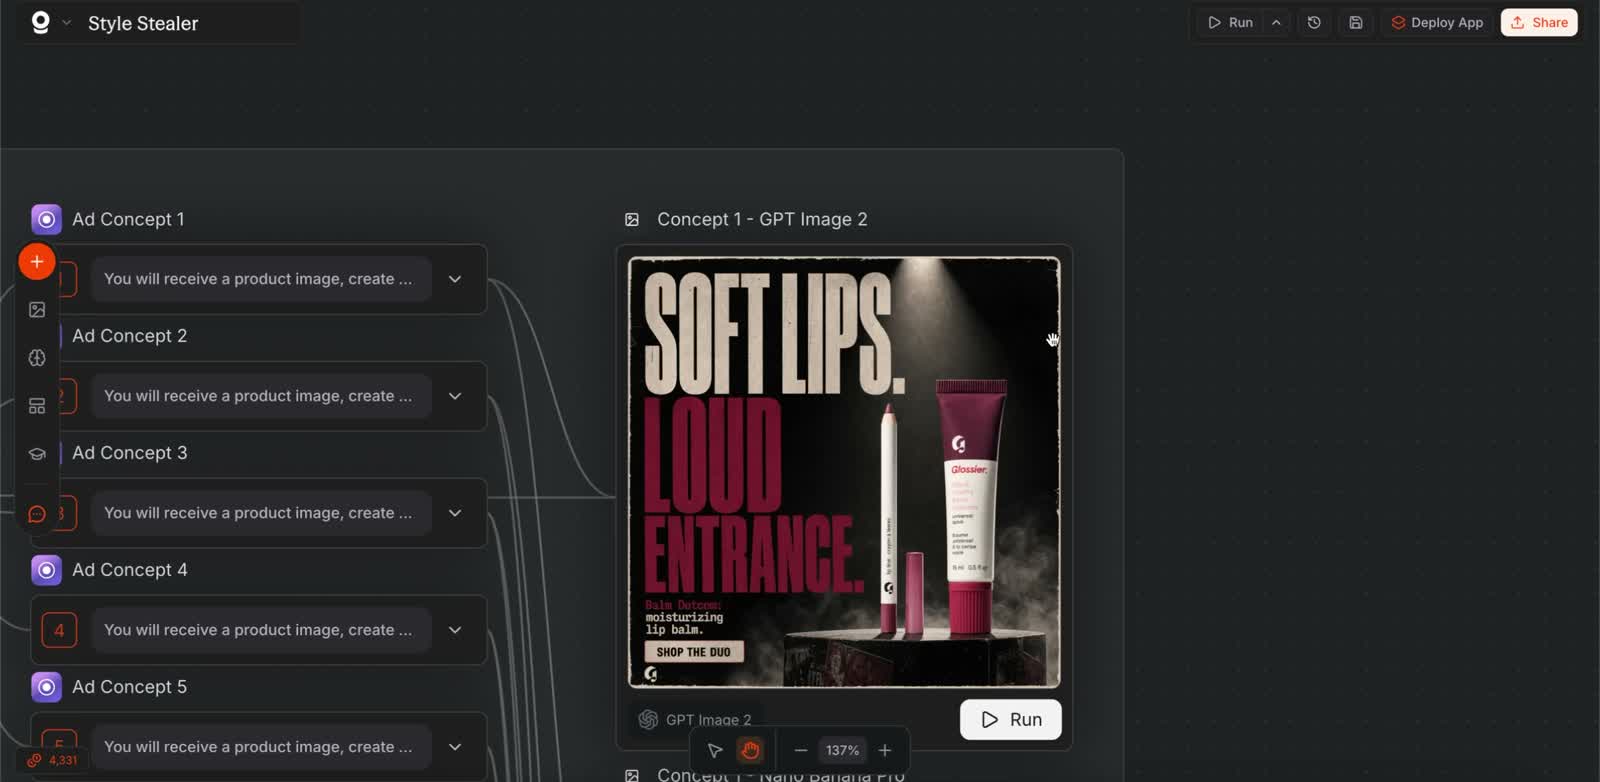
In this recording I generally preferred GPT Image 2, but there were useful results from both. Pick the stronger image for each concept; you do not have to declare one model the permanent winner.
This is a model comparison, not proof of advertising performance. Save the strongest candidates for a separate ad test.
8. Change the inputs and use it again
To try a new product, replace the product page and product image together. To explore a different visual direction, change the reference URL. Regenerate the briefs so the old product or style does not carry into the new batch.
Start with one pair again whenever you make a substantial change. Keep the parts that work and adjust the specific step that produces the first wrong output.
Optional variation from the recording: a Meta ad scraper can supply reference material instead of a website. That is an extension, not a requirement for this build. Describe what you want to learn from those ads—such as layout or copy structure—and keep your own product facts and claims separate.
When something goes wrong
- Every image looks like the same concept: check that each concept selector uses a different item from the split list.
- A node receives all ten briefs: check the separator and the splitter output before changing the image prompt.
- The product changes shape or branding: check that the original product image reaches both models, then make the preservation instruction more specific.
- The copy invents a benefit: correct the product facts and generated brief before rerunning the image.
- The reference brand appears in the ad: remove it from the brief and restate the visual characteristics you actually want.
Your first exercise: one product, one reference style, one brief, two models. If you can explain why one result is better, you have learned the useful part of this workflow.
One brief. Two models.
Start with one product, one reference style and one brief. Compare both outputs and explain why one is stronger before spending credits on the remaining concepts.
Final checks before you use an image
- Check every claim against your own approved product information.
- Remove invented copy, extra branding, malformed packaging and misleading visual implications.
- Use your own or appropriately licensed material. An instruction not to copy does not replace reviewing the result.
- If a URL cannot be read, supply the missing facts yourself rather than letting the model guess.
- The credit total in the recording belongs to that run. Check the current estimate before running your version.
Read the recording transcript
Automatically transcribed from the recording. Spoken repetitions are retained; recognition errors may remain.
Loading transcript…